The most important part of animation is creating lifelike movement, followed by telling a good story and the creation of memorable characters. However, when all that is done, it is nice to add a little icing on the cake. Enhance your animation by giving it some subtle atmosphere or by turning up the wow factor. Toon Boom Studio offers eleven different pre-installed effects to choose from.
This chapter is divded as follows:
| • | Previewing Effects |
| • | Blur Effect |
| • | Adding Forces of Nature Effects |
| • | Adding Blockbuster Effects |
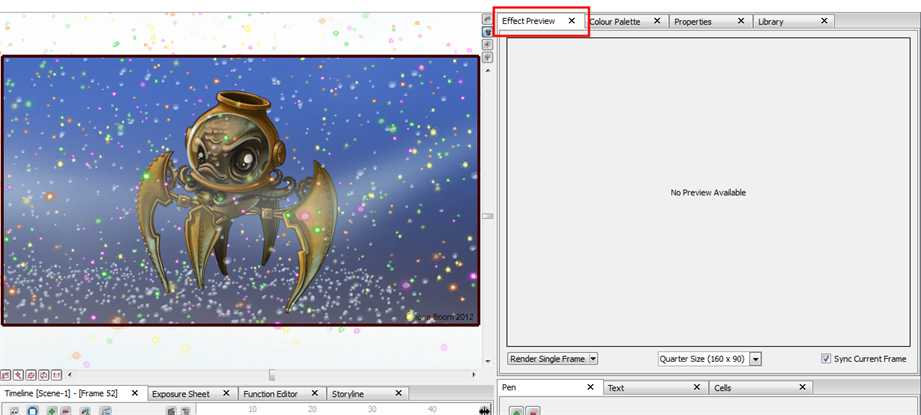
To see the final look of some of your effects such as the blur, the system needs to calculate and render them. The Camera view shows a simple version of your effects so you can play back your animation quickly. Therefore, to see your final effects as you adjust them, you need the Effect Preview view which gives you the ability to render the current frame and display it in a window.
To open the Effect Preview view:
| 1. | Select Window > Effect Preview. |
| 2. | Grab the floating view and dock it beside your Camera view. |
The Effect Preview view allows you to render a single frame, a frame range or your whole scene to see your effects. You can render the images to a quarter, half or full size of your project depending on how much memory you want to use.
To preview a blur effect:
| 1. | In the Special Effects toolbar, click the Blur Effect  button. button. |
| 2. | In the Timeline view, parent the drawing layers that you want to blur to the Blur effect. |
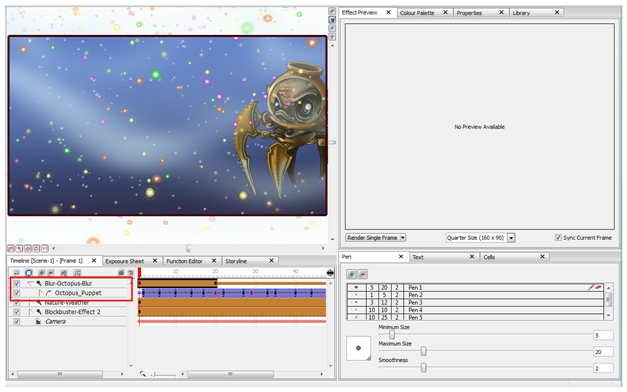
| 3. | In the Effect Preview view, click Render Single Frame. |
The current frame preview appears at a quarter of the project's size.
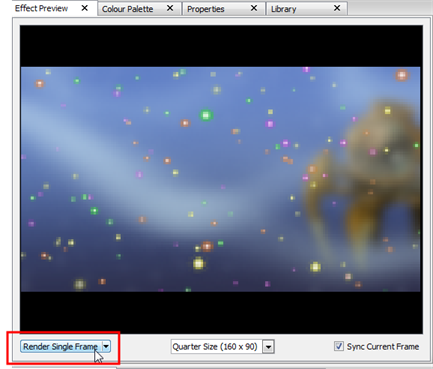
If you are animating an image that is visible from a great distance, or through adverse weather conditions such as fog, you can use the Blur effect to give a soft-focus look to your image. With the Blur effect, you can alter the overall blurriness of an element and then set keyframes to animate the blurriness over time. In this way, you can both increase and decrease the level of blurriness throughout the animation.
To create a Blur effect:
| 1. | In the Special Effects toolbar, click the Blur Effect button. |
You can also add the Blur effect from the Timeline toolbar.
| ‣ | In the Timeline view, click the Add New Element  button. button. |
The New Elements dialog box opens.
| ‣ | From the Type list, select Blur Effect. |
| ‣ | In the Name field, rename the effect appropriately. |
| ‣ | Click OK. |
A new Blur layer appears in the Timeline view.
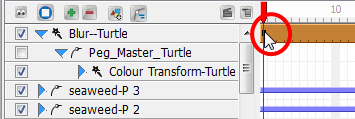
| 2. | In the Timeline view, select the drawing layer that you would like to attach to the Blur effect and drag it onto the Blur effect layer. |
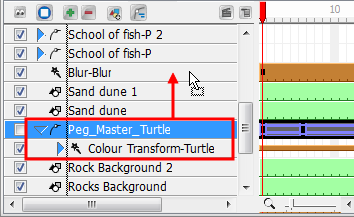
| 3. | Double-click the Blur effect layer to rename it in accordance with the Drawing layer that is attached to it. This is good practice, as you may want to add more than one Blur effect to the Timeline view. You may want to add more than one Blur effect because as the camera approaches different elements, those elements in front will come into focus before those farther back. In order to create different timing sequences, you need multiple versions of the same effect. |
| 4. | If you do not want the Blur effect to start at the first frame, you can select the effect's cells and drag them to the starting frame that you prefer. |

You can also right-click anywhere on the effect's cells and select Change Start Frame.
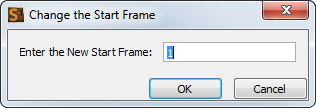
Enter the start frame that you would like into the Enter the New Start Frame field and click OK. The entire row of effect cells will be shifted down the Timeline view.
| 5. | If you want the transition to be shorter or longer, select the end of the group of frames, wait until you get the double arrow cursor and then pull towards the left or right. |

You can also right-click anywhere on the effect's cells and select Change Duration.

Enter the duration that you would like the effect to last for in the Enter the New Duration field and click OK. The exposure of the effect will be extended or shortened depending on the value entered.
| 6. | In the Timeline view, drag the red playhead to the frame on your effect layer where you would like to add a keyframe. |

In the Tool Properties panel for the Blur effect, click the Add Blur Effect Keyframe button.

A new keyframe is added to the chosen location.
| 7. | In the Timeline view, drag the red playhead to a frame on your effect layer where you would like to delete a keyframe. |

In the Tool Properties panel for the Blur effect, click the Delete Keyframe button.

The keyframe is deleted from the chosen location.
| 8. | In the Timeline view, go to the frame containing your first keyframe and select the Blur effect layer. |
| 9. | In the Properties view, move the Radius slider to increase or decrease the Blur Radius, or simply enter a value directly into the field. You can enter decimal increments for more precision. |
To add a Forces of Nature effect:
| 1. | In the Special Effect toolbar, click the Forces of Nature Effect  button. button. |
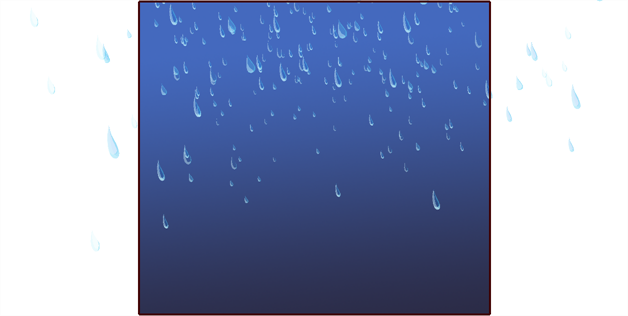
A Forces of Nature effect layer, as well as its child, a Sprite-Drawing layer, is added to the Timeline view. A Sprite is the particle multiplied and generated by the Forces of Nature effect. In the example below, a drawing of a raindrop is used as the Sprite.

By default, the Rain effect is selected and visible in the Camera view.
To customize and animate your Forces of Nature and Blockbuster effects, you must adjust the parameters in the Properties panel. Use the Static Parameters to customize the general settings for the effect. Any frame of the effect layer can be selected in the Timeline view when modifying values in this tab. If you want to animate the properties of the effect, add keyframes accordingly, then change the keyframe values in the Dynamic Parameters tab.

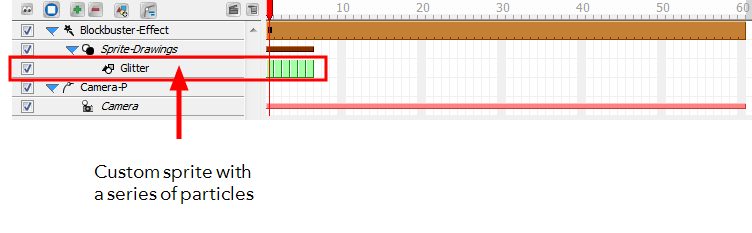
To add a Blockbuster effect:
| 1. | In the Special Effect toolbar, click the Blockbuster Effect |
A Blockbuster effect layer, as well as its child, a Sprite-Drawings layer, is added to the Timeline view. A sprite is the particle multiplied and generated by the Blockbuster effect. In the example below, a drawing of a brick is used as the sprite.

By default, the brick wall shatter effect is selected and visible in the Camera view.

| 2. | You have the possibility to create your own effect and customize it as you want. Create your own particle on a drawing layer, or import an image to use as a sprite (particle to multiply in the effect). Then you can attach that drawing to the existing Blockbuster effect and it will override the default content. |
In the case of the Blockbuster Shatter effects, the first image will be used as the image to break to pieces and the second drawing will be used as the pieces and area to break in the first drawing—
For the Magic and other Blockbuster effects, traditionally animated drawings will be treated as multiple versions of the same particle type. For example, a traditionally drawn walk cycle appears as a series of frames on the same layer. Each frame contains a slightly modified version of a character's legs and arms moving. If this layer were to be used as a sprite, all those different drawings would be randomized and appear as non-sequential, static, singular particles in the effect. Therefore, if you draw a glitter particle in the first cell, a different colour glitter particle in the second cell and a different one of another colour in the third frame, you will obtain a multicolour glitter effect.
You can use this behaviour to your advantage; for example, in the event that you want to create five types of stars to be multiplied and generated. Simply create five different drawings on the same layer, but drawing each on their own frame.
| 3. | Drag your newly created Sprite layer onto the Sprite-Drawings layer to parent it. The Blockbuster effect Sprite (unseen in the Timeline view) is automatically overridden by your custom Sprite. |
If no sprite is created for a Blockbuster effect, the default sprite will be visible.