Blur Effect
If you are animating an image that is visible from a great distance, or through adverse weather conditions such as fog, you can use the Blur effect to give a soft-focus look to your image. With the Blur effect, you can alter the overall blurriness of an element and then set keyframes to animate the blurriness over time. In this way, you can both increase and decrease the level of blurriness throughout the animation.
To create a Blur effect:
| 1. | In the Special Effects toolbar, click the Blur Effect  button. button. |
You can also add the Blur effect from the Timeline toolbar.
| ‣ | In the Timeline view, click the Add New Element  button. button. |
The New Elements dialog box opens.
| ‣ | From the Type list, select Blur Effect. |
| ‣ | In the Name field, rename the effect appropriately. |
| ‣ | Click OK. |
A new Blur layer appears in the Timeline view.
| 2. | In the Timeline view, select the drawing layer that you would like to attach to the Blur effect and drag it onto the Blur effect layer. |
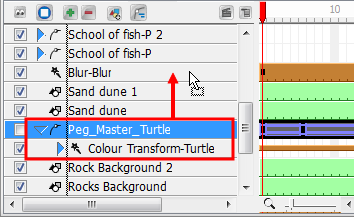
| 3. | Double-click the Blur effect layer to rename it in accordance with the Drawing layer that is attached to it. This is good practice, as you may want to add more than one Blur effect to the Timeline view. You may want to add more than one Blur effect because as the camera approaches different elements, those elements in front will come into focus before those farther back. In order to create different timing sequences, you need multiple versions of the same effect. |
| 4. | If you do not want the Blur effect to start at the first frame, you can select the effect's cells and drag them to the starting frame that you prefer. |

You can also right-click anywhere on the effect's cells and select Change Start Frame.
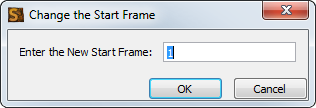
Enter the start frame that you would like into the Enter the New Start Frame field and click OK. The entire row of effect cells will be shifted down the Timeline view.
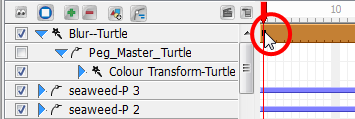
| 5. | If you want the transition to be shorter or longer, select the end of the group of frames, wait until you get the double arrow cursor and then pull towards the left or right. |

You can also right-click anywhere on the effect's cells and select Change Duration.

Enter the duration that you would like the effect to last for in the Enter the New Duration field and click OK. The exposure of the effect will be extended or shortened depending on the value entered.
| 6. | In the Timeline view, drag the red playhead to the frame on your effect layer where you would like to add a keyframe. |

In the Tool Properties panel for the Blur effect, click the Add Blur Effect Keyframe button.

A new keyframe is added to the chosen location.
| 7. | In the Timeline view, drag the red playhead to a frame on your effect layer where you would like to delete a keyframe. |

In the Tool Properties panel for the Blur effect, click the Delete Keyframe button.

The keyframe is deleted from the chosen location.
| 8. | In the Timeline view, go to the frame containing your first keyframe and select the Blur effect layer. |
| 9. | In the Properties view, move the Radius slider to increase or decrease the Blur Radius, or simply enter a value directly into the field. You can enter decimal increments for more precision. |
| 10. | Deselect the Radial option if you want to create a Motion Blur. The Angle slider will automatically become active. You can still modify the blur intensity with the Radius slider and the angle of the blur with the Angle slider. |
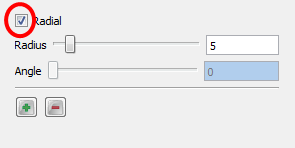
Choose a large Radius value, such as 200. You can enter different radius values for the start and end keyframes of your effect to see the blur trail either increase or decrease in length. You can also enter a different Angle value for the start and end keyframes to have the direction of the Motion Blur rotate around the object. Obviously, the Motion Blur will look more natural if you apply this effect to a moving object.
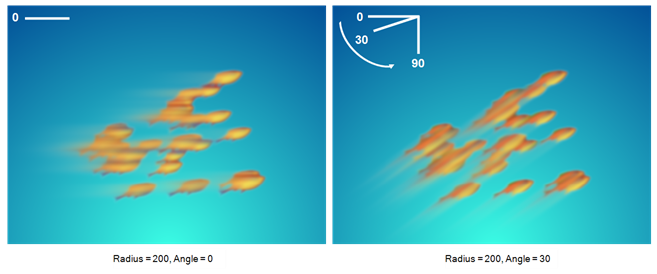
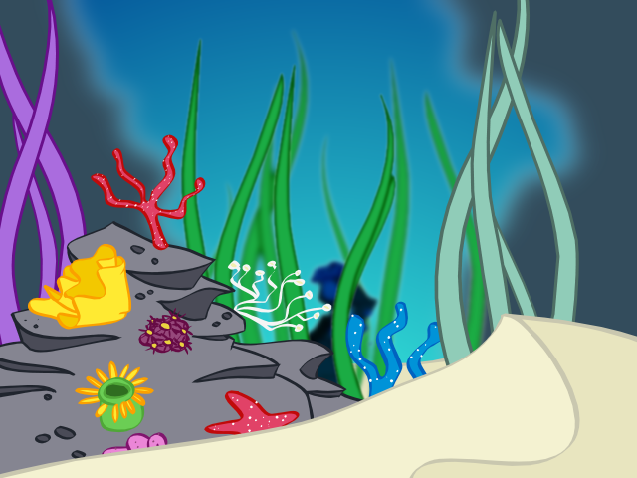
It is important to play with and animate the effect to ensure a convincing result. For example, in this example, the school of fish flip abruptly and start swimming upwards in the opposite direction. Now the 30 degree angle no longer looks good. It would be better to key a new angle at the point of the flip in the Timeline. Also, as the fish slow down before the flip, their motion blur would inevitably shorten, then lengthen again when they speed up.

A trick that you could do is to create a solid version of your object over a blurred version. You can achieve this effect by duplicating the original object. If the object contains multiple drawings and keyframes, then you could create a template of it in the Library first. Be sure that the timing is aligned in the Timeline, as templates often start at frame 0. Add a Motion Blur to the version lower in the Timeline layer stack.