About the Skeleton Effect
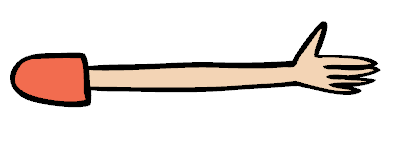
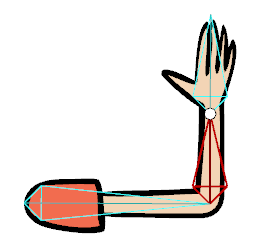
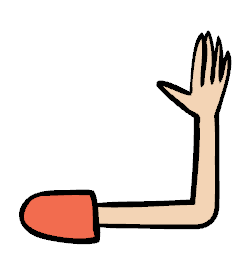
The Toon Boom Studio Skeleton effect is used to create an animatable bone structure in a character or design. The structure will let you bend a limb, automatically creating a joint with a distortion of the artwork such as the arm example above. The arm is drawn straight on a single flattened drawing; the skeleton effect automatically creates the elbow joint.
When you animate the arm bending, a keyframe is created in the Timeline view and the motion is automatically interpolated (all the drawings between the two keyframes will be created for you) if your keyframes are set to non-constant.
Once you gain confidence, you can also use your creativity and try the Skeleton effect on other animatable designs other than limbs to create some interesting distortion effects, like this animated smiling fish!


Related Topics
| • | Understanding Keyframes and Drawings |
| • | Constant and Non-Constant Segments |
| • | Adjusting the Velocity |
| • | Using the Onion Skin in Cut-out Animation |
Bone Tools Toolbar
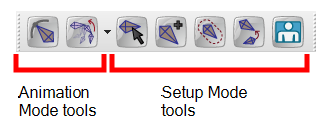
By default, the Bone Tools toolbar is located just below the Animation Tools toolbar on the left side of the application. Use these tools to create, set up and animate your bone structure.
There are two types of tools:
| • | Setup mode |
| • | Animation mode |
It is very important to understand that when selecting a Bone tool, the camera display and Skeleton effect will automatically switch to either Setup mode or Animation mode.
Setup Mode
The Setup mode is active when you are using tools to set up the initial bone structure of the skeleton. Moving bones around with these tools will not create keyframes or animation in the Timeline view.
When in Setup mode, a large circle appears at the base of your bones.
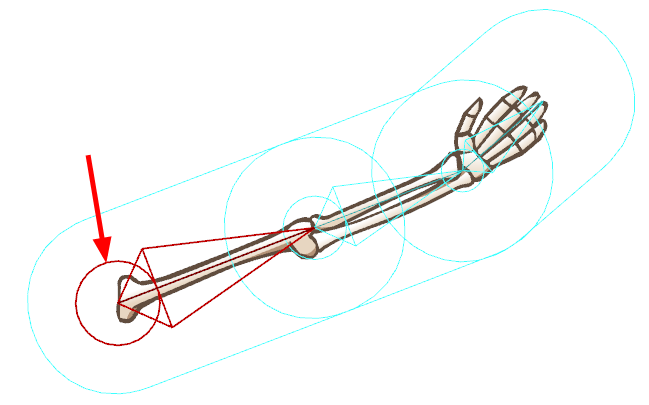
These are the bone setup tools. Selecting any of these will switch the Skeleton Effect to Setup mode:
| • |
 Bone Setup Tool Bone Setup Tool
This tool is used to position the selected bones on your drawing. Use this tool to drag, rotate and scale a bone or a hierarchy of bones. You can also select Tools > Bone Tools > Bone Setup or press [J]. |
| • |
 Bone Creator Tool Bone Creator Tool
This tool is used to create individual bones. Once a bone is created, it is automatically selected. When a bone is selected, the next bone created will automatically be parented to it, creating a chain. If you want to break the chain to create a freestanding bone or to start a new chain, hold down the [Shift] key as you create. |
You can also select Tools > Bone Tools > Bone Creator or press [U].
| • |
 Bone Influence Tool Bone Influence Tool
|
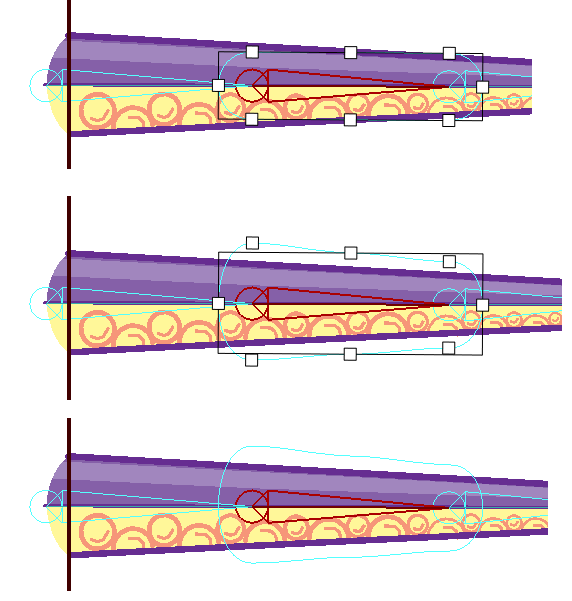
The zone of influence is the area around the selected bone that determines what part of the underlying drawing will be influenced by it. This tool is used to modify the size and shape of that area. By default, the zone of influence remains invisible, as the Influence type is set to Infinite in the Tool Properties panel. If the Influence type is changed to Elliptical, the zone of influence will appear as a large ellipse, surrounded by a bounding box, around the selected bone. You can use the Bone Influence tool to move the square points on the bounding box to reshape the elliptical zone of influence.
You can also select Tools > Bone Tools > Bone Influence.
| • |
 Bone Parent Tool Bone Parent Tool
This tool is used to parent different bone chains to one another. You can also select Tools > Bone Tools > Bone Parent. |
| • |
 Connect Character Setup Mode Tool Connect Character Setup Mode Tool
|
This tool is primarily used with the Robo-Skeleton templates. Each template has a layer named Envelope in its Skin Group. Click the Connect character set-up mode button to see the envelope zones appear and to see the character revert to Setup mode, where its body parts are typically separated and spread apart—see Adding Your Own Character to the Robo-Skeleton Template.
To have this command work with your own creations, create your own templates and set the layer type of your envelope drawing to Envelope in the Layer Properties panel.

You can also select Tools > Bone Tools > Show-Hide.
Animation Mode
The Animation mode is automatically active when you select the Bone Manipulator  tool or the Natural Movement
 ![]() tools. This means that the Camera view displays the current pose of the bone structure at the selected frame and any manipulation you make creates a keyframe in the Timeline and is animated.
tools. This means that the Camera view displays the current pose of the bone structure at the selected frame and any manipulation you make creates a keyframe in the Timeline and is animated.
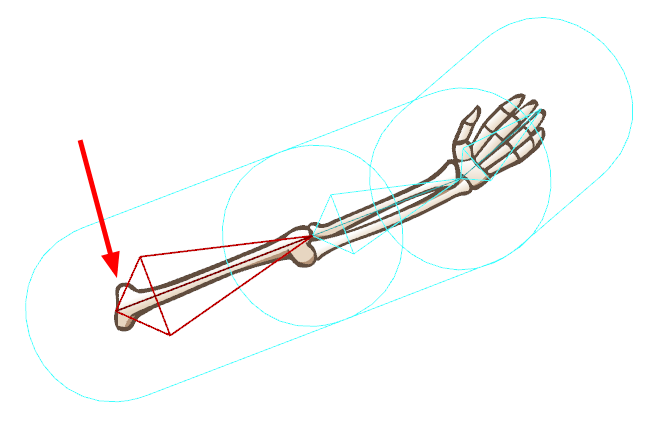
When in Animation mode, notice that the large circle at the base of the bones in Setup mode disappears.
| • |
 Bone Manipulator Tool Bone Manipulator Tool
This tool is used to animate the bone structure. You can drag, squash, stretch, rotate or scale a selected bone chain, creating an animation keyframe in your Timeline view. |
You can also access this tool by selecting Tools > Bone Tools > Bone Manipulator or pressing [H]—see Animating Bones .
| • | These tools are used to animate the bone structure. The squash and stretch must be the same way as the Bone Manipulator tool, but when rotating a bone, all children bones in the chain must also slightly rotate along to create a smoother and more natural movement. |
The Natural Movement Inverse rotates the children bone in the opposite direction of the parent, creating resistance. The Natural Movement Forward rotates the children bone in the same direction as the parent, creating graceful movement such as a ballerina lifting her arm.
You can also access this tool by selecting Tools > Bone Tools > Natural Movement Inverse and Natural Movement Forward—see Natural Movement.