Other Options
Many features, options and tools are available to help you learn, create, and optimize your projects. Here are some which are useful when setting up your scene and creating motion paths:
| • | Attach to Next Object |
| • | Detach from Parent |
| • | Changing the Start Frame |
| • | Changing the Duration |
| • | Change Loops |
| • | Element Notes |
| • | Show Timeline Selection |
| • | Paste Special |
Attach to Next Object
You can easily connect elements to one another using drag and drops in the Timeline view. If you prefer, you can also use the Attach to Next Object when it is time to create a hierarchy.
The Attach to Next Object command connects the selected element to the one situated one level lower in the Timeline view order making it its child.

To attach elements using the Attach to Next Object command:
| 1. | In the Timeline view, select the element you want to attach to the element situated immediately below it. |
| ‣ | You can also use a sceneplanning tool and select the element directly in the Camera, Top or Side view. |
| 2. | Select Element > Arrange > Attach to Next Object. |
The selected element becomes the child of the element that was below it.
Detach from Parent
You can easily manipulate hierarchy connections using drag and drops in the Timeline view. If you prefer, you can also use the Detach from Parent command to disconnect a child element from its parent from the Camera, Top or Side view.
To detach a child element from its parent:
| 1. | In the Animation Tools toolbar, click the Select  tool, select Tools > Animation Tools > Select or press [6] tool, select Tools > Animation Tools > Select or press [6] |
| 2. | In the Camera, Top or Side view, select the element you want to detach from its parent. You can also select the element directly in the Timeline view. |

| 3. | Select Element > Arrange > Detach from Parent. |
The selected element is detached from its parent.

Changing the Start Frame
You can quickly offset the timing of elements in your scene. This can be useful if for instance, you realize that the planned action would be better occurring at a later moment or if you inserted new elements or action at the beginning of your Timeline.
To change the starting frame of an element or peg's motion:
| 1. | In the Timeline view, select the element you want to offset. |

| 2. | Select Element > Change Start Frame. |
The Change Start Frame dialog box opens.
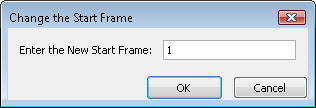
| 3. | In the Change Start Frame dialog box, type in the frame number where you want your element to start. |

The starting frame of the selected element will be changed to the one you typed in the Change Start Frame dialog box.

Changing the Duration
You may need to extend the duration of a peg, for example if you add content or change the exposure of the element that is attached to it.
To change the duration of a motion:
| 1. | In the Timeline view, select the peg element of which you want to change the duration. |

| 2. | Select Element > Change Duration. |
The Change Duration dialog box opens.
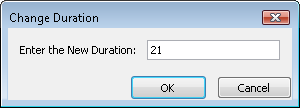
The Enter the New Duration field displays the current duration of your element.
| 3. | In the Change Duration dialog box, type in the desired duration. |

The duration of the selected element will be updated.

The duration of a peg element can also be changed by stretching the peg's motion block in the Timeline view.
To stretch a Peg element:
| 1. | In the Timeline view, move the pointer to the edge of the peg element's motion block and drag it right or left to increase or decrease the length of the motion. |

Change Loops
If you want a Peg element to repeat a motion, you can loop it.
Note that each time the loop restarts, it skips the first frame of the peg. This is similar to a walk-cycle where the last step leads naturally to the first step in the cycle; this ensures the logical continuation of the looped action. Therefore, if you loop a 10-frame peg action three times, the entire length of the peg will be 28 frames.
To loop a peg motion using the Change Loops command:
| 1. | In the Timeline view, click on the Peg element's motion segment you want to loop.  |
| 2. | Select Element > Change Loops or right-click (Windows) or [Ctrl] + click (Mac OS X) directly on the Peg element's motion segment you want to loop and select Change Loops. |
The Change Loops dialog box opens.
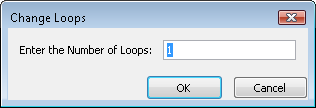
| 3. | In the Change Loops dialog box, type the number of times you want to repeat the selected motion segment and click OK. |
The peg repeats itself for the number of loops you entered. After the first segment, the peg motion bar representing the looped segment is displayed in light grey.

To loop a peg motion by dragging the motion segment:
| 1. | In the Timeline view, hold [Ctrl]Windows or [z] (Mac OS X) and drag the end of the peg's motion segment to the desired position. |

| 2. | Release to create a loop that will repeat until the destination frame. |

Element Notes
The Element Notes option lets you write notes or comments in a layer for future reference.
To create an element note:
| 1. | In the Timeline view, select the layer in which you want to include a note or a comment. |

| 2. | In the Timeline menu, select Add Element Note or right-click (Windows) or [Ctrl] + click (Mac OS X) on the layer and select Add Element Note. |
The Note dialog box opens.
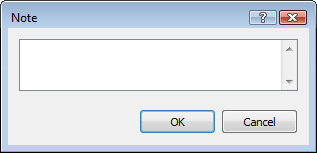
| 3. | In the empty text field, type in your note or comment and click OK. |

The Note icon appears on the selected layer.

To open and edit an element note:
| 1. | In the Timeline view, select the layer containing the element note.  |
| 2. | In the Timeline menu, select Update Element Note or right-click (Windows) or [Ctrl] + click (Mac OS X) on the layer and select Update Element Note. You can also double-click the Note icon of the layer. |
The Note dialog opens, displaying the element's note previously entered.
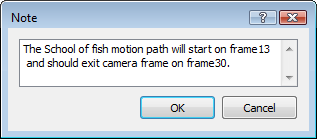
| 3. | You can edit the note if needed, and click OK. |
Show Timeline Selection
Use this option if your scene becomes crowded and you want to quickly find the layer in the Timeline view that corresponds to the selected element in the Camera view.
To show the timeline selection:
| 1. | In the Camera view, select the element you want to find in the Timeline view. |
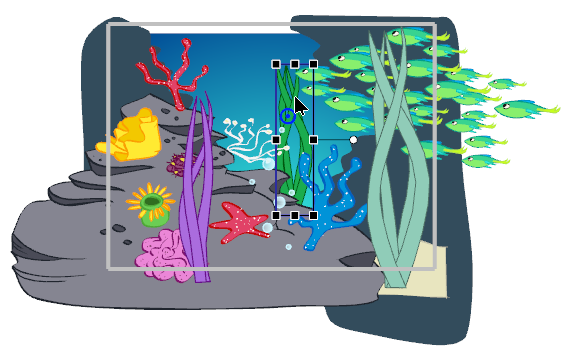
| 2. | Select View > Show Timeline Selection or press [O]. |
The Timeline view automatically sets its focus so that the selected layer appears on top of the view.

Paste Special
Use the Paste Special command to paste a copied selection of frames in the Timeline view and to define which properties you want to paste.
To use the Paste Special command:
| 1. | In the Timeline view, select the frames to copy. This selection can include single or multiple frames, drawings and keyframes. |

| 2. | Select Edit > Copy Cell or press [Ctrl] + [C] (Windows) or [⌘] + [C] (Mac OS X) |
| 3. | In the Timeline view, select the cell in which you want to paste the copied values. |
| 4. | Select Edit > Paste Special or press [Ctrl] + [B] (Windows) or [⌘] + [B] (Mac OS X). |
The Timeline Paste Special Preferences dialog box opens.
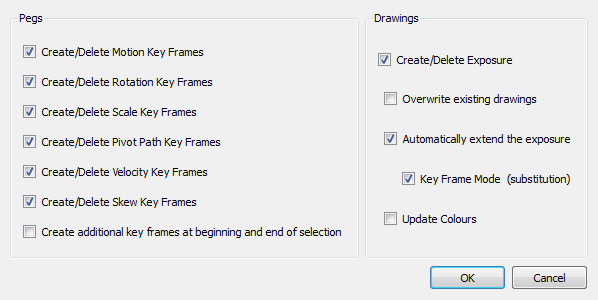
| 5. | In the Pegs section select/deselect the options to choose the values of the keyframe you want to paste: |
| ‣ | Create/Delete Motion Key Frames: Pastes the translation value of the copied keyframe. |
| ‣ | Create/Delete Rotation Key Frames: Pastes the rotation value of the copied keyframe. |
| ‣ | Create/Delete Scale Key Frames: Pastes the scale value of the copied keyframe. |
| ‣ | Create/Delete Pivot Key Frames: Pastes the pivot position value of the copied keyframe. |
| ‣ | Create/Delete Velocity Key Frames: Pastes the velocity value of the copied keyframe. |
| ‣ | Create/Delete Skew Key Frames: Pastes the skew value of the copied keyframe. |
| ‣ | Create additional key frames at beginning and end of selection: Create an additional keyframe at the beginning and at the end of your pasted selection to block the copied values between them. |
| 6. | In the Drawings section select/deselect the desired options: |
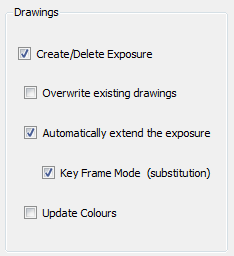
| ‣ | Create/Delete Exposure: Pastes the drawing exposure. Disabling this option will grey out the rest of the Drawings options, as it will mean that you only wish to paste position and peg values. |
| ‣ | Overwrite existing drawings:Overwrites existing drawings in the destination layer if they have the same name as the copied ones. When this option is disabled, new drawings will be created instead. |
| ‣ | Automatically extend the exposure:Automatically extends the exposure of the last copied frame to the last frame of the destination layer, overwriting the existing exposure. Disabling this option will grey out the Keyframe Mode (substitution) option. |
| ‣ | Keyframe Mode (substitution):This option is used with the Automatically extend the exposure option. It will paste and extend the keyframe information of the copied element in the destination layer following the same rules as the Automatically extend the exposure option. |
| ‣ | Update Colours:When pasting templates, this option updates the current animation colours to those used in the templates. |
Paste Special Again
Once you set up the proper option in the Paste Special dialog box, you can use the Paste Special Again command to quickly paste the parameters using the same options without going through the Paste Special dialog box.
To use Paste Special Again:
| 1. | In the Timeline view, select the frames you wish to copy. This selection can include single or multiple frames, drawings and keyframes. |
| 2. | Select Edit > Copy Cell or press [Ctrl] + [C] (Windows) or [⌘] + [C] (Mac OS X). |
| 3. | In the Timeline view, select the cell in which you want to paste the copied values. |
| 4. | Select Edit > Paste Special Again or press [Ctrl] + [Shift] + [B] (Windows) or [⌘] + [Shift] + [B] (Mac OS X). |
Your copied selection is pasted using the same options as the last time you used the Paste Special command.