Importing Bitmap Images
Images can come in many different file formats. Some formats are able to preserve transparency or transparent layers. Toon Boom Studio supports the following formats: GIF, JPEG, JPEG 2000, PICT, SGI, BMP, PNG, PSD, TIFF, TGA, MacPaint, QuickTime, and FlashPix.
In this section, you will cover the following topics:
| • | Importing Bitmaps Without Vectorizing |
| • | Vectorization of an Image Element or Image Cell |
| • | Importing and Vectorizing Images |
Importing Bitmaps Without Vectorizing
To import bitmaps:
| 1. | Select File > Import File. |
The Open browser opens.
| 2. | Browse for your bitmap image file and click Open. |
The Import Options dialog box opens.
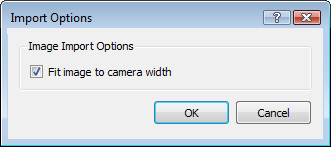
| 3. | In the Import Options dialog box, set the Image Import Option: |
| ‣ | Fit Image to Camera Width
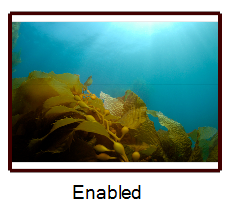
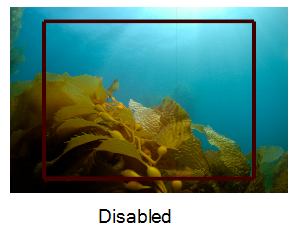
By default this option is enabled, meaning that your image is resized to fit the width of the camera frame. You can disable this option to import the image at its original size. |
| 4. | Click OK. |
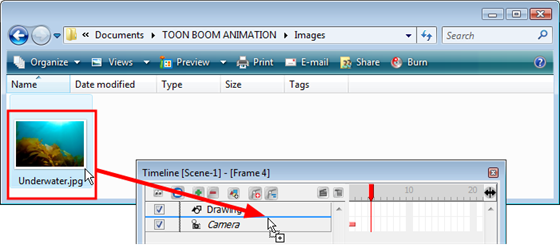
You can also select a bitmap file directly from your operating system browser and drag it in the Camera, Drawing, Top, Side, Timeline or Exposure Sheet view.
Adding Images to a Bitmap Layer
Once you created a bitmap layer, it is possible to add more images inside it.
To add an image element from the top menu:
| 1. | Select Element > Add > Image. |
The new image column is added to your scene.
To add an image layer from the Timeline view:
| 1. | In the Timeline View toolbar, click the Add Layer  button. button. |
The New Elements dialog box opens.
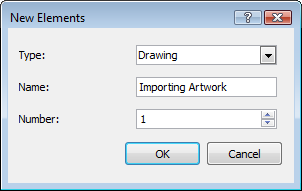
| 2. | Choose Image from the Type list. |

| 3. | Enter a name for your new image layer in the Name field. |

| 4. | Choose how many image layers you want to add to your scene using the Number field. |

| 5. | Click OK. |
To add an image element from the Exposure Sheet view:
| 1. | In the Exposure Sheet View toolbar, click the New Image button. button. |
The new image element is added to your scene.

To add images to a bitmap layer:
| 1. | In the Timeline or Exposure Sheet view, select the cell into which you want to import the image. |
| 2. | Right-click in the selected cell and select: |
| ‣ | Timeline View: Import Images > Import Images. |
| ‣ | Exposure Sheet View: Import Images > From File. |
The Open browser opens.
| 3. | Select the desired bitmap image file. You can select multiple image files if needed. |
| 4. | Click OK. |
The image is imported in the selected cell.
Vectorization of an Image Element or Image Cell
You can vectorize a bitmap after it has been imported to your project. You can do this by using the Convert Element to Vector option or a regular Copy/Paste command.
To vectorize bitmaps using the Convert Element to Vector option:
| 1. | In the Timeline view, select the cells containing the images you want to convert into vectors: |
| ‣ | Select specific cells in the right side of the Timeline view. |
OR
| ‣ | Select the full Image element by clicking on it in the left side of the Timeline view. |
| 2. | Right-click on a selected cell and select Convert Element to Vector. |
The files are converted and a new Drawing element containing the vectorized files is created.
To vectorize bitmaps using copy/paste command:
| 1. | In the Timeline view, select the cells containing the images you wish to convert into vectors: |
| ‣ | Select specific cells in the right side of the Timeline view. |
OR
| ‣ | Select the full Image element by clicking on it in the left side of the Timeline view. |
| 2. | Select Edit > Copy or press [Ctrl] + [C] (Windows) or [⌘] + [C] (Mac OS X) to copy the cells. |
| 3. | In the Timeline view, select the destination of your copied image element or cells: |
| ‣ | Select a cell in the Drawing element in which you want to paste your copied cels into. |
OR
| ‣ | Select the entire Drawing element in which you want to paste your Image element into. |
| 4. | Select Edit > Paste or press [Ctrl] + [V] (Windows) or [⌘] + [V] (Mac OS X). |
Your cells are copied and simultaneously converted into vectors.
Importing and Vectorizing Images
In Toon Boom Studio, you can import bitmap images and vectorize them.
To import and vectorize bitmap images:
| 1. | In the Timeline or Exposure Sheet view, click the Add Drawing Element  button if you do not already have an empty drawing element in your scene. button if you do not already have an empty drawing element in your scene. |
The new drawing element is added to your scene.
| 2. | In the Timeline or Exposure Sheet view, select an empty cell. |

| 3. | Right-click in the empty cell and select Import and Vectorize > From File or select File > Import and Vectorize > From File. |
The Open browser opens.
| 4. | Locate the bitmap image file(s) you want to import and vectorize, and click Open. You can select multiple files if necessary. |
The Import and Vectorize Options dialog box opens.
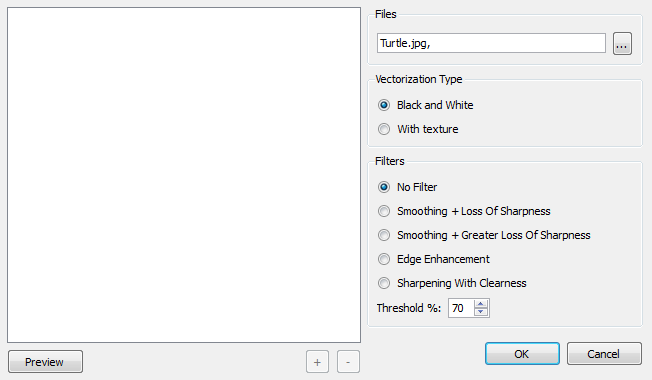
| 5. | Click Preview to display your image in the preview space. Click Preview every time you change the settings to update the result. |

| 6. | Click the plus (+)and minus (-) buttons to zoom in and out in the preview space. |

| 7. | Set up the desired parameters: |
| ‣ | Files: This field displays the image you selected to browse. You can click on the browse button to change your selection. |

| ‣ | Vectorization Types: |

Black and White: Vectorizes the images in black and white. This is used when vectorizing line art that can be coloured in Toon Boom Studio later. This makes use of the Filters options described later in this section.
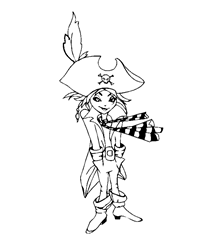
With Texture: When the Vectorization type is set to With Texture, Toon Boom Studio imports the bitmap and applies it as a texture on a vector shape. This allows for direct manipulation of bitmap images within Studio.
| ‣ | Filters |
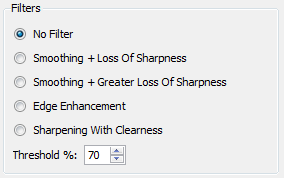
No Filter: Vectorizes without applying a filter.
Smoothing + Loss Of Sharpness: Smooths the image. This process causes a loss of sharpness of the original image.
Smoothing + Greater Loss Of Sharpness: Smooths the image. This process causes a greater loss of sharpness of the original image than the option above.
Edge Enhancement: Enhances the edge of the image, resulting in a more precise result.
Sharpening With Clearness: Sharpens the images, resulting in a more precise and clear result.
Threshold%: Lets you adjust the threshold value. The greater the percentage, the more grey pixels are allowed into the final vectorization of the line.