Project Properties
When you created your new project, you chose the name and resolution. However, if you want to change these initial settings later on, you can.
To access project properties:
|
‣
|
Select Storyboard > Properties. |
The Project Properties dialog box opens.
Defining the Project Naming and Start Time
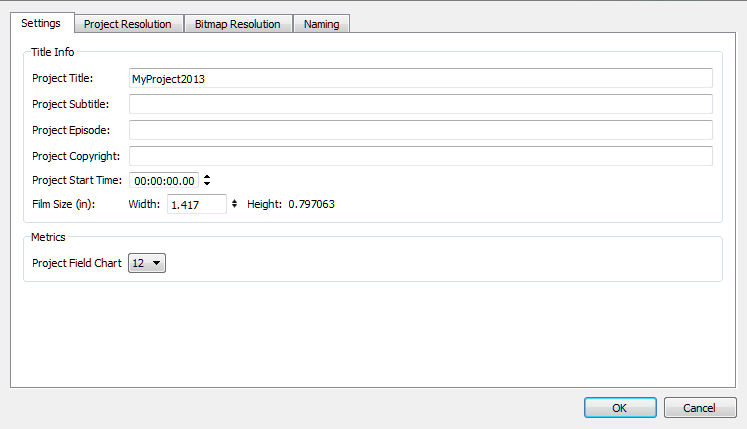
In the Settings tab, you can define the project naming scheme and start time for the current project:
NOTE: Special characters (!"/$) cannot be used for project names because they interfere with the operating system. However, they can be used in the project title.
|
•
|
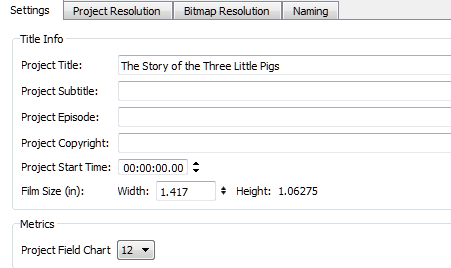
Project Title: By default, the Project Name already appears is this field if no project title was entered during the creation of this project. The Project Name is the name of the Storyboard Pro project file. The Project Title is the title that will appear in all PDF renders. They can, and often should, be the same. |
|
•
|
Project Subtitle: In this field, type the name of the project subtitle, which will appear in the proper places in all PDF renders. |
|
•
|
Project Episode: Type the episode number in this field. If you want the word “Episode” to appear next to the number, you must include it in the field as well. The information entered into this field will appear after the Project Subtitle in all PDF renders. |
|
•
|
Project Copyright: In this field, enter in the copyright date. This can be the month and year or just the year. This information will appear at the bottom of the page in all PDF renders. |
|
•
|
Project Start Time: This time is important when generating an EDL (Editing Decision List) of your project. EDLs are generally used by 3rd party, editing software, such as Final Cut Pro. The EDL determines how the panels of your project are distributed in the timeline of the 3rd party software. The numerical value you enter in this field also appears as the start time in the Timeline view. |
|
•
|
Film Size: When working on a 3D scene, the film size determines the focal length of the camera. You should use the same value as that used in the 3D software used to create your 3D elements. A value of 1.417 is equivalent to 35mm film. |
|
•
|
Project Field Chart: Sets the field standard for your project. |
The following sample .pdf export indicates the project title, subtitle, episode, and copyright:
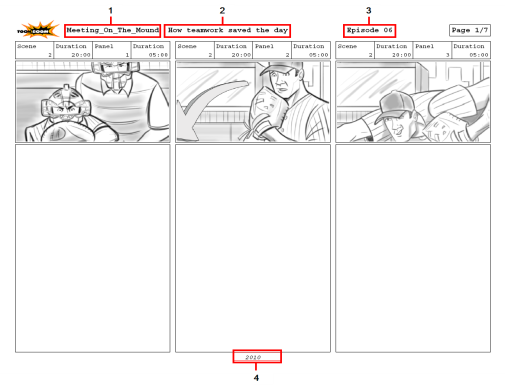
- Project Title
- Project Subtitle
- Project Episode
- Project Copyright
- Project Start Time (not shown)
Changing the Project Resolution Settings
In the Project Resolution tab, you can define the project resolution, aspect ratio, field of view and frame rate for the current project:
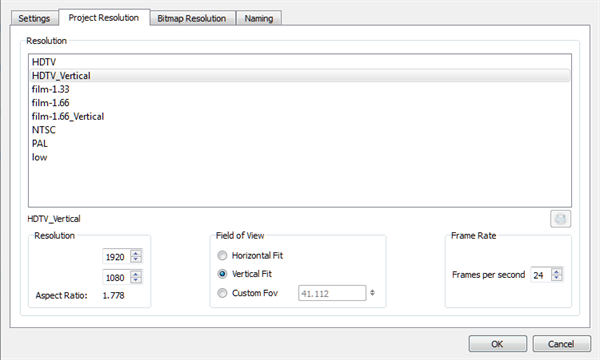
- Project Resolution Type: You can select your project’s resolution type from this area. Take into consideration the intended format of the production for which you are creating the storyboard. Your project’s resolution should match.
|
‣
|
HDTV: High Definition Television delivers a higher quality image than standard television because it has twice the standard number of scanning lines per frame. To take advantage of the superior quality, your output device must be compatible with HDTV technology to make this resolution setting useful. |
|
‣
|
HDTV_Vertical: The "vertical resolution" of HDTV_Vertical refers to how the drawing grid is fit into the camera frame. When working with 12 or 16 field drawing grids, the grid is a different aspect ratio from the camera frame. When you fit vertically, you fit the grid with the top and bottom of the camera frame. |
NOTE: The HDTV_Vertical format is ideal when importing images into an HD project.
|
‣
|
film-1.33: Applies to a wide screen film format that conforms to the standard 4:3 pixel aspect ratio. |
|
‣
|
film-1.66: Applies to a wide screen film format that conforms to the 16:9 pixel aspect ratio in which the pixel's width is greater than its height. |
|
‣
|
film-1.66_Vertical: This is essentially the same as film-1.66. Refers to how the drawing grid is fit into the camera frame. When working with 12 or 16 field drawing grids, the grid is a different aspect ratio from the camera frame. When you fit vertically, you fit the grid with the top and bottom of the camera frame. |
NOTE: The film-1.66_Vertical view is ideal for importing images into film projects.
|
‣
|
NTSC: The standard analog television broadcasting system that was used in most of the Americas, Japan, South Korea, Taiwan, Burma, and some Pacific island nations and territories. It conformed to the North American standards on how rectangular pixels were displayed for computer and television screens. This format has been replaced in most regions with HDTV. |
|
‣
|
PAL: An analog television encoding system that was used in broadcast television systems in large parts of the world, such as Western Europe, Asia, Australia, most of Africa and some North American countries. This resolution worked best with the European format for television and computer screens, as the rectangular pixels are displayed at a different orientation. This format has been replaced in most regions with HDTV. |
|
‣
|
Low: This format is ideal for videos destined for the web, where size and fast download of a video file might take precedence over quality. |
- Resolution: Displays the scene resolution setting selection.
- Aspect Ratio: The aspect ratio describes the number of pixels wide the project is divided by the height. Storyboard Pro always works with square pixels. An aspect ratio of 1:1 indicates that the camera frame is square, and has the same number of pixels defining the width as it does defining the height. The aspect ratio is defined automatically when you enter values for the width and height of the camera frame.
- Field of View: Defines how the camera frame fits with the drawing grid in your scene. A Horizontal fit will fit the drawing grid to the width of the camera frame. A Vertical fit will fit the drawing grid with the top and bottom of the camera frame. When working in 3D, a different custom FOV might be more common, so this can be set here as the default FOV for the scenes in your project. The FOV can be adjusted for individual 3D scenes, in order to switch out the camera lens.
- Pixel Dimensions: Displays the pixel dimensions for your resolution selection. If you decide to type in the pixel dimensions, or use the up and down arrows to change the pixel increments, you must save your custom selection to make it active. It will then appear in the resolution selection list.
- Project Frame Rate: Select the frame rate for your project. The higher the frame rate, for example 30 fps, the smoother your animation will look, but the heavier it will be. The lower the frame rate, for example 12 fps, the choppier your animation may look, but the lighter it will be.
- Save Custom Resolution: Click Save to save and create your custom resolution as a setting. This button becomes active when you create a custom resolution type.
NOTE: When changing the FOV value of a project, a dialog box will appear asking if you wish to adjust the cameras to preserve the framing in your project.
Setting the Bitmap Resolution
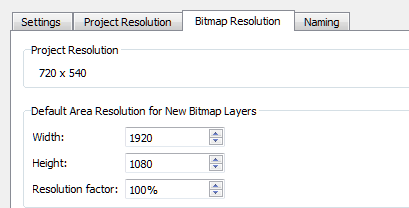
In the Bitmap Resolution tab, you can define the default resolution at which bitmap layers are created. The resolution is based on the number of pixels that fit in the camera frame when the camera is at the default position.
To define the bitmap resolution:
|
‣
|
Set the Width/Height or the Resolution Factor. |
NOTE: The dimensions of a bitmap drawing layer can be adjusted individually. If you have a camera zoom, for example, then you may want that drawing to be at a higher resolution, so you do not see pixellation when you zoom in. You can adjust this by right-clicking on the layer, and selecting Change Bitmap Layer Resolution.
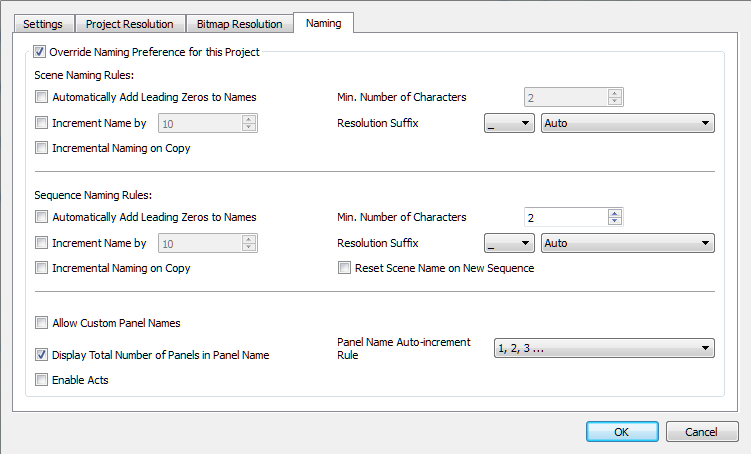
Defining the Naming Rules
All options in the Naming tab affect the Panel window. The changes you make in this window override your Storyboard Pro preferences and affect the current project only. Your default preferences remain in effect for any new projects you create. There are naming rules for scenes and sequences.
|
•
|
Override Naming Preference for this Project: When selected, current preferences for this project are overridden, and all the options on this tab become active. |
|
•
|
Automatically Add Leading Zeros to Names: Automatically adds a zero before the scene or sequence name. |
|
•
|
Min. Number of Characters: Determines the minimum number of characters the scene names will contain when using leading zeros. |
|
•
|
Reset Scene Name on New Sequence: By default, this option is enabled. Whenever you create a new sequence, the scene naming scheme is reset. For example, the naming will be as follows: Seq 1, Scene 1, Seq 1, Scene 2, Seq 2, Scene 1. When disabled, the scene number always increments. For example, Seq 1, Scene 1, Seq 1, Scene 2, Seq 2, Scene 3. |
|
•
|
Allow Custom Panel Names: Selecting this option will activate the Panel field so that you can enter in a custom name for all panels. |
|
•
|
Display Total Number of Panels in Panel Name: Selecting this option will display a counter at the end of the Panel field which will indicate the total number of panels in the selected panel’s scene. |
|
•
|
Enable Acts: Displays the Act field, along with the Act number. |
|
•
|
Panel Name Auto-increment Rule: By default, panel names are named numerically. Using this preference, you can select from three other alphabetical increment rules. The difference between each of them is the behaviour once you reach panel Z. |
