
Creating and Opening a Project
All projects created with Storyboard Pro are independent and local to the computer. There are a few different ways to create and open projects.
This section includes the following topics:
| • | Using the Welcome Screen |
| • | Creating and Opening a Project |
| • | Using a Final Draft Script to Create a New Project |
| • | Creating a Project from Harmony Scenes |
Using the Welcome Screen
To create a project from the Welcome Screen:
- Select a project folder by clicking the Browse
 button.
- In the Project Name field, type the name of the project. This name will appear as the file name.
- In the Project Title field, type the name of the project title. It is a good idea to use the Project Name for the Project Title. You can also type in the name of the Project Subtitle, but it is not mandatory. These titles will appear on the appropriate pages of PDF exports.
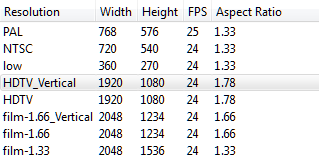
- In the Resolution section, choose the project’s resolution, or continue to step 5 to add a new resolution to the list.
- Click the Add
 button to add a new resolution to the list.
The New Resolution box opens.
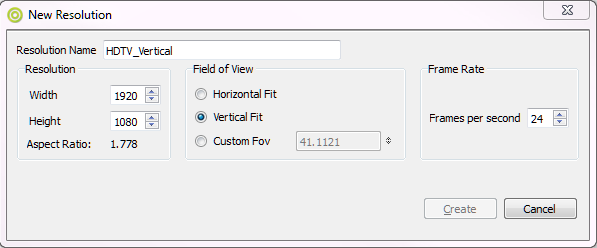
| ‣ | Resolution Name: Type a name for your new resolution. |
| ‣ | Width/Height: Enter the resolution width or height in pixels. These two parameters are linked; changing one changes the other. |
| ‣ | Field of View: Set the field of view to use the horizontal or vertical resolution, or enter a custom field of view. |
| ‣ | Frames per second: Type the scene’s frame rate per second. |
- Click Create.
To open a project from the Welcome screen:
- In the Recent Projects section, click Open Project.
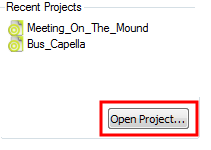
The Open Project browser opens.
- Browse and select the desired *.sboard file.
- Click Open.
To open a recent project from the Welcome screen:
- In the Recent Projects section, select a project from the list.
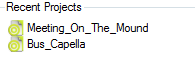
The selected project appears in Storyboard Pro.
The File menu features the commands that allow you to either create a new project or open an existing one. If a project is already open and you want to create a new one, you can use the File menu.
To create a project from the File menu:
- Do one of the following:
| ‣ | Select File > New. |
| ‣ | In the File toolbar, click the New |
| ‣ | Press [Ctrl]+[N] (Windows) or [⌘]+[N] (Mac OS X). |
The New Project dialog box opens.
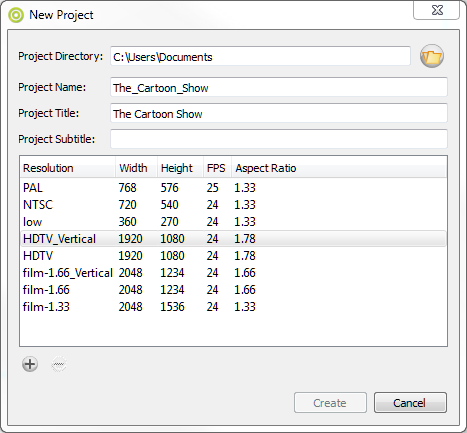
- In the Project Directory field, specify the location of your new project.
- In the Project Name field, type the name of the project. This name will be used as the file name.
- In the Project Title field, type the name of the project title. It can be a good idea to use the Project Name for the Project Title.
You can also type in the name of the Project Subtitle, but it is not mandatory. These titles will appear on the appropriate pages of PDF renders.
- In the Resolution section, do one of the following.
| ‣ | Choose the project’s resolution. By default, the resolution is set to HDTV_Vertical. |
| ‣ | Click the Add |
The New Resolution box opens.
| • | Resolution Name: Type a name for your new resolution. |
| • | Width/Height: Enter the resolution width or height in pixels. These two parameters are linked; changing one changes the other. |
| • | Field of View: Set the field of view to use the horizontal or vertical resolution, or enter a custom field of view. |
| • | Frames per second: Type the scene’s frame rate per second. |
- Click Create.
To open a project from the File menu:
- Do one of the following:
| ‣ | Select File > Open. |
| ‣ | In the File toolbar, click the Browse |
| ‣ | Press [Ctrl]+[O] (Windows) or [⌘]+[O] (Mac OS X). |
The Open Scene browser opens.
- Browse and select the desired *.sboard file.
- Click Open.
Using a Final Draft Script to Create a New Project
Storyboarding and script writing go hand-in-hand. Storyboard Pro lets you use your Final Draft script to create a new Storyboard Pro project. This feature is an amazing time saver as it handles the creation of scenes and panels, as well as inserting all the text in the proper captions automatically.
Creating a New Project from a Final Draft Script
To import a Final Draft script:
- From the top menu, select File > New From Final Draft Script.
The Import from Final Draft window opens.
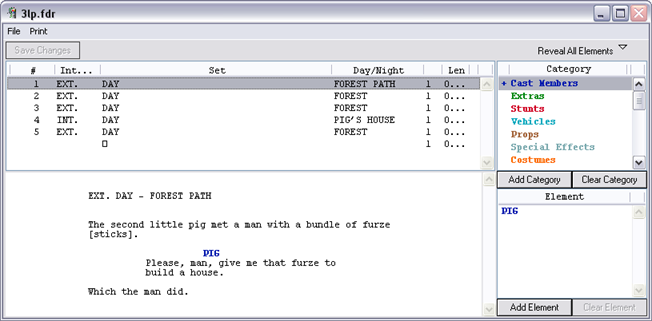
- Use the Browse button to search for an *.fdx or *.xml file exported from Final Draft. After making a file selection, the other options in the window become active.
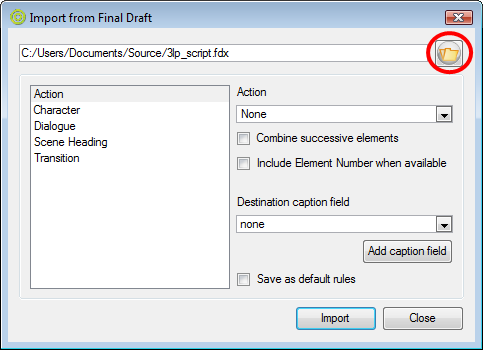
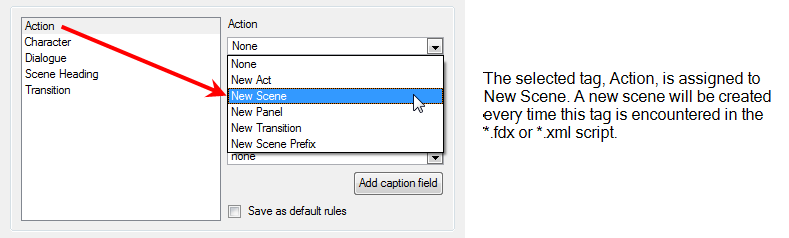
- Select a tag from the left column, then select an item from the Action menu.
- For the selected tag, decide if you want to set the following options:
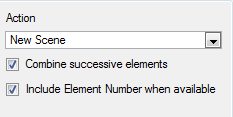
| ‣ | Combine Successive Elements: Combines the selected tag with an identical tag if it occurs successively in the script. For example, you might choose to create a New Panel for every Dialogue tag that appears in the Final Draft script. However, if there are three Dialogue tags in a row without a break due to an Action tag, then selecting this option places these three lines of dialogue together in the same Panel. |
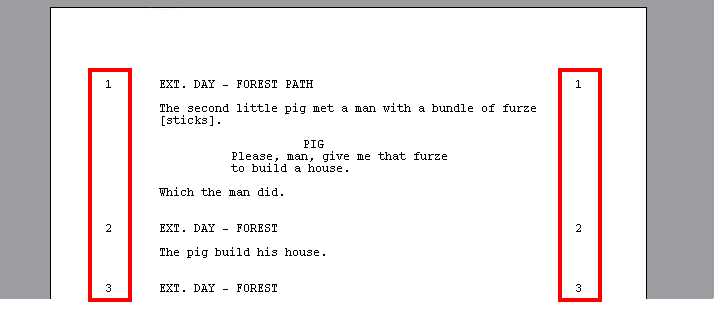
| ‣ | Include Element Number When Available: In a Final Draft script, there are numbers along the right and left margins of the document that indicate a change in scene. Select this option to import these into your Storyboard Pro project. |
- From the Destination caption field menu, select the location in the Panel window in which you want place the text associated with the selected tag.
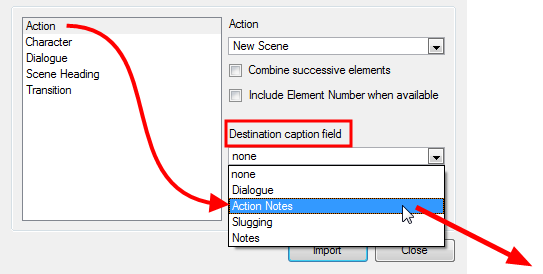
In the example above, Storyboard Pro will take all the text associated with the Action tag in the Final Draft file and put it in the Action Notes section in the Panel window for each new scene that it creates in this project.
- When you have finished setting up your import parameters, click Import.
- Now, you will be asked to create your new project. You will be prompted to save changes to your current scene, before it is closed and your new project, generated from your script, is opened.
For more information on creating a new Storyboard Pro project, see Using the Welcome Screen.
Creating a New Project from a Final Draft 7 Script
If you are working with version 7 of Final Draft, you must use Final Draft Tagger to generate the *.xml file needed to use this feature. After you have produced your export, follow the steps in Creating a New Project from a Final Draft Script and proceed with the import.
To export your script as an XML:
- Start Final Draft Tagger.
- Select File > Import Script or press [Ctrl]+[I].
The Import dialog box opens.
- In the browser, select your script file and click Open.
Your script appears in Final Draft Tagger.
- Select File > Export to XML.
- Close Final Draft Tagger and proceed to import the *.xml file as in the previous section.
Final Draft Import Settings
From the Import from Final Draft dialog box, below is a list of some sample settings for the most common tags:
| Action | Combine successive elements | Destination caption field | |
| Action | New Panel | Action Notes | |
| Character | None | Dialogue | |
| Dialogue | None | Enabled | Dialogue |
| Scene Heading | New Shot | Enabled | Slugging |
| Transition | New Transition | Notes | |
| Parenthetical | None | None |
Try different settings with your style of script and see what works best for you. Remember to select the Save as default rules option once you have your settings just right, so these settings are used as the default the next time you create your Storyboard Pro project from a Final Draft script.
Creating a Project from Harmony Scenes
You can create a project from Harmony scenes. But before you do this, you must mark the frames you want to open in Storyboard Pro. Frames must be marked in an annotation column called "EM". For each marked frame, a panel is created in Storyboard Pro.
Storyboard Pro will look one folder deep for the .digital or .xstage file. The name of the folder containing the scene file is used to name the scene in Storyboard Pro. There should only be one scene file in each folder. If there are more than one, the first one will be used.
To create a project from Harmony scenes:
- From the top menu, select File > New from Harmony Scenes.
The New Project dialog box opens.
- In the Project Directory field, specify the location of your new project.
- In the Project Name field, type the name of the project. This name will be used as the file name.
- In the Project Title field, type the name of the project title. It can be a good idea to use the Project Name for the Project Title.
You can also type in the name of the Project Subtitle, but it is not mandatory. These titles will appear on the appropriate pages of PDF renders.
- In the Resolution section, do one of the following.
| ‣ | Choose the project’s resolution. By default, the resolution is set to HDTV_Vertical. |
| ‣ | Click the Add |
The New Resolution box opens.
| • | Resolution Name: Type a name for your new resolution. |
| • | Width/Height: Enter the resolution width or height in pixels. These two parameters are linked; changing one changes the other. |
| • | Field of View: Set the field of view to use the horizontal or vertical resolution, or enter a custom field of view. |
| • | Frames per second: Type the scene’s frame rate per second. |
- Click Create.
The Select Harmony Scenes Directory window opens.
- Select the folder that contains the Harmony scenes and click Select Folder.
The name of the folder of each scene file is used to name the scene created. Panels are created in the Thumbnails and Timeline views.