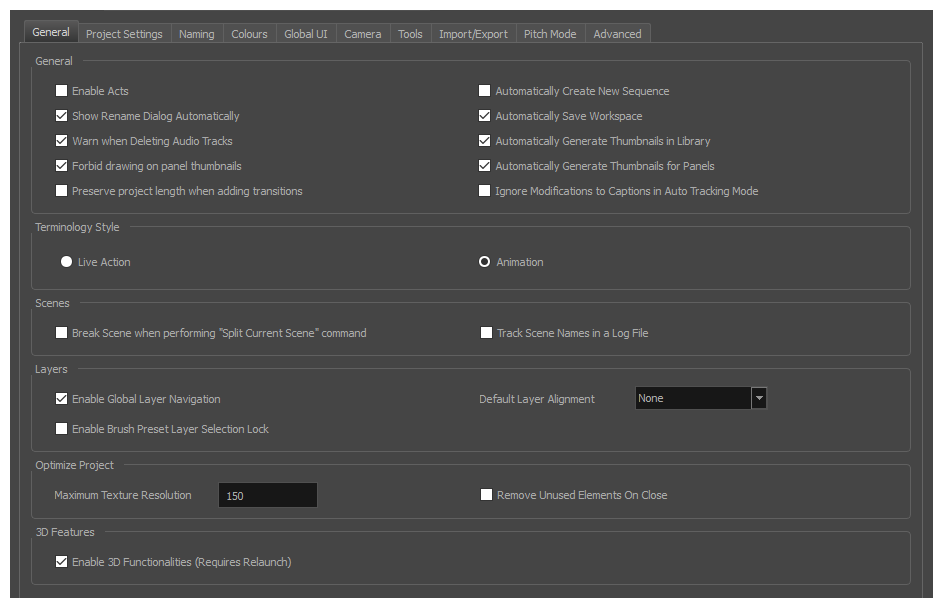
The preferences related to script and panels editing are principally grouped on the General tab.
| Parameter | Description |
|---|---|
|
General |
|
|
Enable Acts |
Starts new acts and joins selected acts which are displayed in the Timeline view. In Storyboard Pro, you can organize panels in scenes and acts. By default, acts are not available because they are not relevant to every script. If you have a story divided into acts, select this option to display and manipulate these sections |
|
Show Rename Dialog Automatically |
When you move scenes around, the Rename Scene dialog box opens prompting you to rename the scenes. This option is enabled by default. When you deselect this option, existing scenes keep their original name and new scenes are automatically named without the Rename Scene dialog box opening |
|
Warn when Deleting Audio Tracks |
Display a confirmation prompt when attempting to delete an audio track. |
|
Forbid Drawing on Panel Thumbnails |
By default, this preference is enabled, preventing you from drawings on the panels in the Thumbnails view. Turn off this option if you want to use all the Drawing tools directly in the Thumbnails view. |
|
Preserve project length when adding transitions |
By default, when adding a transition, the length of scenes is not adjusted. Since the transition causes the next scene to start playing before the current scene finishes playing, this results in the project becoming shorter by the length of the transition. With this option enabled, when a transition is added, both scenes that are joined by the transition are extended by half the length of the transition, resulting in the project remaining in the same length, and all subsequent scenes starting at the same time as before. |
|
Automatically Create New Sequence |
By default, new storyboard projects are created without sequences. Select this option so new projects are automatically created with a sequence |
|
Automatically Save Workspace |
When any change is made to the workspace, such as adding, moving or removing a view or a toolbar, the change is automatically saved to the current workspace. NOTE If you disable this option, you can save your workspace manually by selecting Windows > Workspace > Save Workspace from the top menu.
|
|
Automatically Generate Thumbnails in Library |
Lets you decide if thumbnails are automatically generated in the Library view or not. By default this option is enabled. |
|
Automatically General Thumbnails for Panels |
Lets you decide if thumbnails are automatically generated for panels or not. |
|
Ignore Modifications to Captions in Auto Tracking Mode |
When Auto Tracking Mode is enabled, any change made to a panel will activate tracking changes for that panel. With this option enabled, changes can be made to a panel's captions without automatically enabling tracking changes for that panel. Any other changes made to the panel or its content will still cause the panel to be tracked for changes. |
|
Terminology Style |
|
|
Live Action |
Use live action terminology across the Storyboard Pro user interface, ie: act, scene, shot and panel. |
|
Animation |
Use animation terminology across the Storyboard Pro user interface, ie: act, sequence, scene, and panel. NOTE This option cannot be changed when using Storyboard Pro in Japanese, as the terminology for both production styles are the same.
|
|
Scenes |
|
|
Break Scene when performing "Split Current Scene" command |
By default this option is disabled, this means that when using the Storyboard > Split Current Scene command, the current scene will be split in two before the selected panel. When enabled, the scene will be broken in three, isolating the selected panel in the middle. If you select multiple panels and use the Split Current Scene command, each selected panel will break into a separate scene |
|
Track Scene Names in a Log File |
Tracks scene/shot names in a log file. |
|
Layers |
|
|
Enable Global Layer Navigation |
Maintains the layer selection while navigating between panels. |
|
Enable Brush Preset Layer Selection Lock |
Keeps layer selection to layer specified in selected brush preset. |
|
Default Layer Alignment |
None: Sets the default alignment used when creating a layer. |
|
Faces Camera: The layer is oriented to face the camera, so it rotates around its pivot point to always face the camera, but does not move with the camera. Use this option when you plan to position a 2D layer in 3D space, where that layer belongs in the scene. |
|
|
Pinned to Camera: The layer is oriented to the camera's perspective. The layer always moves with the camera. The advantage of using this option is you can simply draw on top of everything in the scene. |
|
|
Optimize Project |
|
|
Maximum Texture Resolution |
The resolution at which textures will be reduced when using the Reduce Texture option in the Optimize Project dialog box. Value is in dots per field (dpf). |
|
Remove Unused Elements on Close |
Remove unused elements in a project when closing it. |
|
3D Features |
|
|
Enable 3D Functionalities (Requires Relaunch) |
By default, newly created scenes are set to the 2D mode, so your project is not encumbered with unnecessary features if you plan to work in 2D for more than a few scenes. You can convert a scene to 3D, so you can move and rotate 2D and 3D layers in 3D space. This means that even if you do not have any 3D objects in your scene, you can still move 2D objects along the Z-axis to create a multiplane effect. A 3D scene will also allow a camera to be moved in 3D space using the Camera tool. |