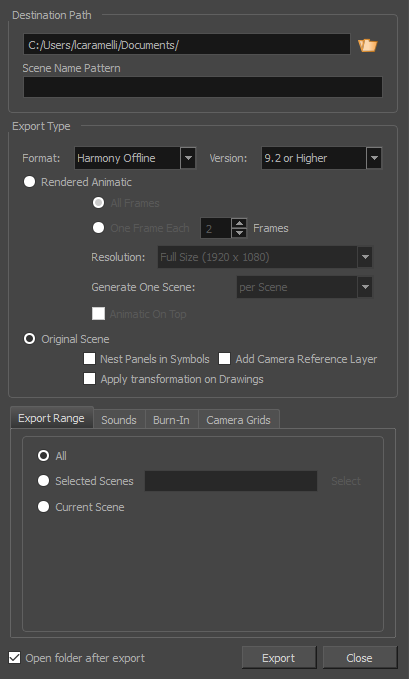
Export to Toon Boom Dialog Box
The Export to Toon Boom window lets you export an animatic as Harmony scene files. You can export the entire storyboard project or a selection of scenes. You can export the entire storyboard project or a selection of scenes. When the export is ready, you can open it in the destination software. When you first save this new scene, the exported file will be converted in the proper format depending on the software you used. The following elements of your storyboard will be exported: layers, layer motion and camera moves.
Before exporting to Toon Boom, you can use the Layers view to deselect specific layers. In the Layers view, deselect the Toon Boom option from the Export To section. Note that this layer will still be exported to Toon Boom, but it will be disabled. You can enter the symbol and re-enable it at anytime.
- Select File > Export > Export to Toon Boom.
The Export to Toon Boom dialog box opens.
| Parameter | Description |
|
Destination Path |
|
|
Path |
Lets you specify the name and location of the XML/AAF file you are creating. |
|
File Pattern |
Allows you to enter the prefix or the pattern for the names of the exported files. You can leave this field blank to use the default file naming pattern, type in a file name to use it as a prefix, or type a full pattern using the following variables:
TIP: Numbers used in file naming patterns are automatically padded by zeros as needed. You can type a number between the % sign and the variable letter to determine the amount of characters you want the variable to use. For example, with the variable %4s, scene 1 would appear as scene 0001.
|
|
Export Type |
|
|
Format |
Lets you select whether to export your animatic into Harmony Offline scenes, Harmony Database scenes or Animate/Animate Pro scenes. |
|
Version |
When exporting Harmony Offline or Harmony Database scenes, lets you select whether to export scenes that are compatible with Harmony version 7.8 or with Harmony version 9.2 or Higher. |
|
Export Style |
|
|
Rendered Animatic |
Exports a storyboard to be rendered in bitmap images and exports to Animate/Animate Pro/Harmony scene. For each scene in your storyboard, an Animate/Animate Pro/Harmony scene will be created. Use this option if you have 3D content and want to export to Animate, Animate Pro, or Harmony 9.2 and earlier. And also to export to Harmony if you have bitmap drawing layers. |
|
All Frames: Renders the full storyboard project. |
|
|
One Frame Each: Renders only one frame for every chosen number of frames you specify. For example, if you choose to render every 5 frames, then a new image will appear every fifth frame, with each image being held for 5 frames to maintain the timing. |
|
|
Resolution: Allows you to select the resolution of rendered frames relative to the project resolution between the following options: Full Size, Half Size or Quarter Size. |
|
|
Generate One Scene: Allows you to select how to separate the project into Harmony scenes:
|
|
|
Animatic on Top: If you generate scenes based on sequences or acts, this option becomes available. When enabled, the animatic is rendered and placed as the top layer and column in Harmony or Animate. |
|
|
Original Scene |
Exports the storyboard in a project where the vector drawings, layers and camera settings are kept as is. For each shot or scene in your storyboard, a Harmony/Animate scene is created. |
|
Nest Panels in Symbols: Upon export to Harmony or Animate, the panel's content will be nested inside symbols. Instead of having several layers in your root timeline, you will have a single one. You will need to enter the symbol to edit its content. |
|
|
Add Camera Reference Layer: Adds a layer containing the different camera frames on top of the other layers to use as a reference in Harmony and Animate. |
|
|
Apply Transformation on Drawings: Applies transformation on the first and last position of each panel. The in-between animation will be lost. |
|
|
Export Range Tab |
|
|
All |
Exports the entire storyboard. |
|
Selected Scenes |
Select this option to export a specific selection of scenes. Then, click on the Select button to open the Scenes Picker dialog box, in which you can:
|
|
Current Scene |
Exports only the currently selected scene. |
|
Sounds Tab |
|
|
Keep Original Files |
|
|
Process Soundtracks Individually |
Creates one audio file per soundtrack. |
|
Merge All Soundtracks |
Creates a single audio file, gathering sounds from every soundtrack of your storyboard |
|
File Pattern |
TIP: Numbers used in file naming patterns are automatically padded by zeros as needed. You can type a number between the % sign and the variable letter to determine the amount of characters you want the variable to use. For example, with the variable %4s, scene 1 would appear as scene 0001.
|
|
Sample Rate |
Sets the frequency rate of the exported audio files. It is recommended to export sound files at the rate at which they were originally created. For reference, the standard sample rate is 48.0 kHz for broadcasting and DVD. |
|
Bit Depth |
Sets the precision level of each wavelength in the sound file. The standard bit depth is 16 bit. Setting this to 8 bit will cut the size of audio files in half, but will significantly impact sound quality. NOTE: On Windows, audio can only be exported in 16 bit unless QuickTime Player is installed.
|
|
Channels |
Allows you to select whether to export sound in Mono or Stereo. Stereo sound uses a separate track for the left and right speakers, which allows to simulate a realistic sound environment. Mono uses a single track for both speakers, which saves disk space. |
|
Burn-In Tab |
|
|
Print Time Code |
Prints the project timecode on the video as an overlay on your video. |
|
Print Scene Names and Panel Numbers |
Prints the scene names and panel numbers as an overlay on your video. |
|
Print Additional Duration |
Prints an additional duration on your video, defined by the Units and Repeat menu. |
|
Units |
Displays additional duration information using Time Code or Frames units. |
|
Repeat |
Displays additional duration information per panel, scene or sequence. |
|
Camera Grid Tab |
|
|
Project Safety |
Prints the safe area on your video |
|
4:3 Safety |
Prints the 4:3 safe area on each panel of your storyboard that has a camera movement. |
|
4:3 Reference |
Prints the 4:3 area on each panel of your storyboard that has a camera movement. |
|
Open folder after export |
Opens the folder after export. |