Creating Projects from Harmony Scenes
You can create a project from Harmony scenes. Before you do this, in Harmony, you must mark the frames you want to use as panels in your project. Frames must be marked in an annotation column called "EM". For each marked frame, a panel is created in Storyboard Pro. If you don't mark your frames, the first frame of each Harmony scene will be used.
You must group all your different Harmony scenes in one folder. Storyboard Pro will create one scene per Harmony scene. If your Harmony scene contains several EM markers in the annotation column, Storyboard Pro will create multiple panels within the scene.
- From the top menu, select File > New from Harmony Scenes.
The New Project dialog box opens.
- In the Project Directory field, specify the location of your new project.
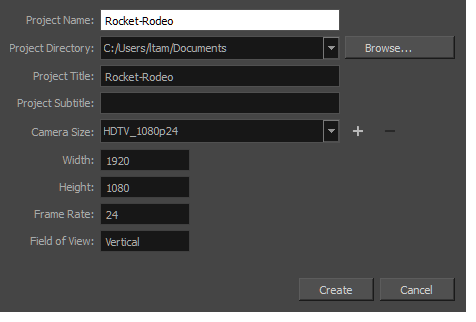
- In the Project Name field, type the name of the project. This name will be used as the file name.
- In the Project Title field, type the name of the project title. It can be a good idea to use the Project Name for the Project Title.
You can also type in the name of the Project Subtitle, but it is not mandatory. These titles will appear on the appropriate pages of PDF renders.
- In the Resolution section, choose the project’s resolution—see Creating Custom Resolutions.
- Click Create.
The Select Harmony Scenes Directory window opens.
- Select the folder you created that contains your multiple Harmony scenes; do not select the Harmony scene folder directly. Click Select Folder.
The name of the folder of each scene file is used to name the scene that is created. Panels are created in the Thumbnails and Timeline views.