Creating Projects from Final Draft
T-SBADV-001-001
Storyboarding and script writing go hand-in-hand. Storyboard Pro lets you use your Final Draft script to create a new Storyboard Pro project. This feature is a time saver as it handles the creation of scenes and panels, as well as inserting all the text in the proper captions automatically.
If you are working with version 7 of Final Draft, you must use Final Draft Tagger to generate the *.xml file needed to use this feature. After you have produced your export, follow the steps to create a project from a Final Draft script.
- Select File > New From Final Draft Script.
The Import from Final Draft window opens.
- Use the Browse
 button to search for an *.fdx or *.xml file exported from Final Draft. After making a file selection, the other options in the window become active.
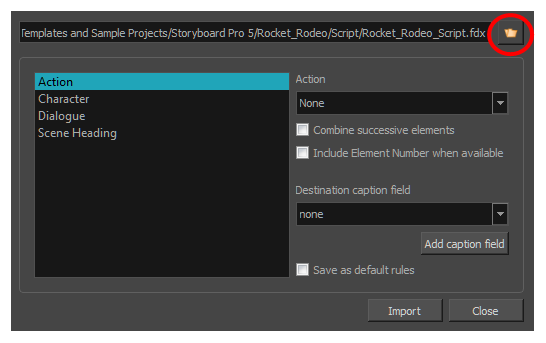
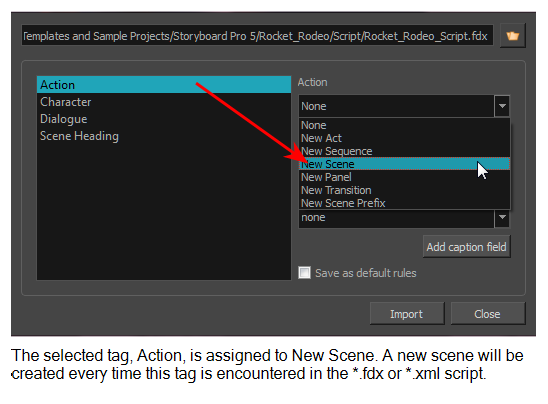
- Select a tag from the left column, then select an item from the Action menu.
- For the selected tag, decide if you want to set the following options:
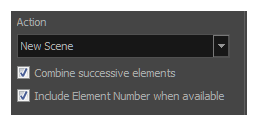
- Combine Successive Elements: Combines the selected tag with an identical tag if it occurs successively in the script. For example, you might choose to create a New Panel for every Dialogue tag that appears in the Final Draft script. However, if there are three Dialogue tags in a row without a break due to an Action tag, then selecting this option places these three lines of dialogue together in the same Panel.
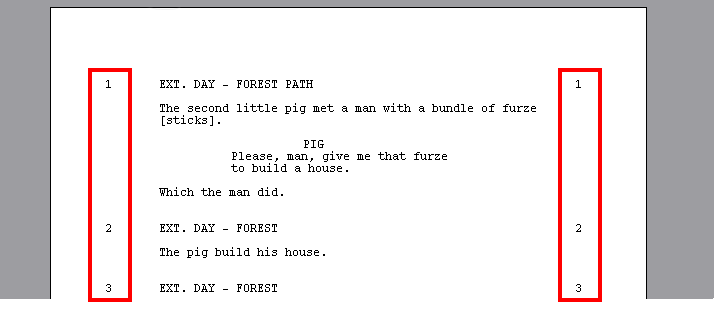
- Include Element Number When Available: In a Final Draft script, there are numbers along the right and left margins of the document that indicate a change in scene. Select this option to import these into your Storyboard Pro project.
- From the Destination caption field menu, select the location in the Panel window in which you want place the text associated with the selected tag.
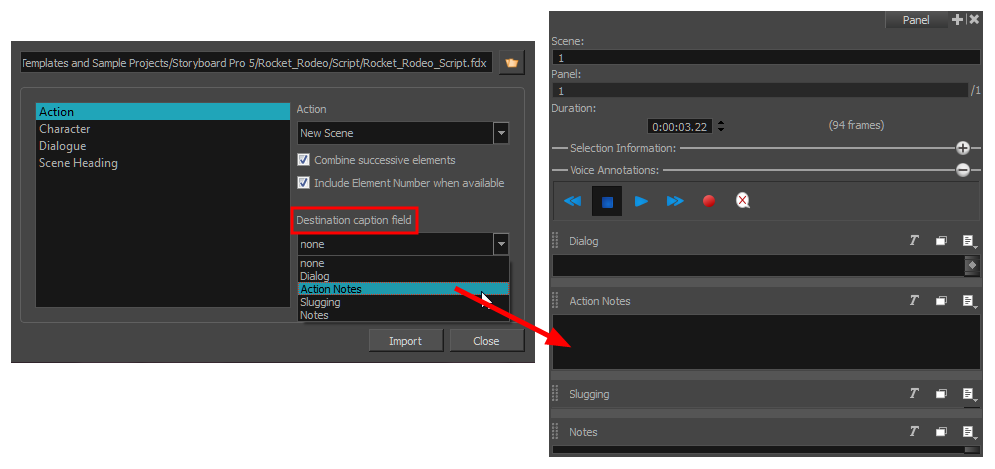
In the example above, Storyboard Pro will take all the text associated with the Action tag in the Final Draft file and put it in the Action Notes section in the Panel window for each new scene that it creates in this project.
From the Import from Final Draft dialog box, below is a list of some sample settings for the most common tags:
Action Combine successive elements Destination caption field Action New Panel Action Notes Character None Dialogue Dialogue None Enabled Dialogue Scene Heading New Shot Enabled Slugging Transition New Transition Notes Parenthetical None None Try different settings with your style of script and see what works best for you. Remember to select the Save as default rules option once you have your settings just right, so these settings are used as the default the next time you create your Storyboard Pro project from a Final Draft script.
- When you have finished setting up your import parameters, click Import.
- Now, you will be asked to create your new project. You will be prompted to save changes to your current scene, before it is closed and your new project, generated from your script, is opened.
For more information on creating a new Storyboard Pro project, see Creating Projects.
- Start Final Draft Tagger.
- Select File > Import Script or press Ctrl + I.
The Import dialog box opens.
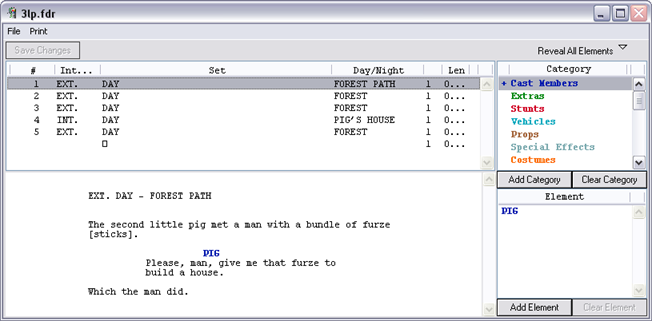
- In the browser, select your script file and click Open.
Your script appears in Final Draft Tagger.
- Select File > Export to XML.
- Close Final Draft Tagger and proceed to import the *.xml file as in the previous section.