How to Create an Animatic
An animatic is the next step in the storyboarding process which involves adding sound, camera movements, animation, and scene transitions.Storyboard Pro has all the tools necessary to synchronize your storyboard with sound, add camera and layer movements, and transitions before you export to the final video format.
About the Timeline View
The Timeline view is where you assemble the timing of a scene’s visuals and sounds. You can add sound track layers, as well as edit audio files imported into the sound tracks. You can also add transitions and control the playback of a selected panel or the entire storyboard from this view.
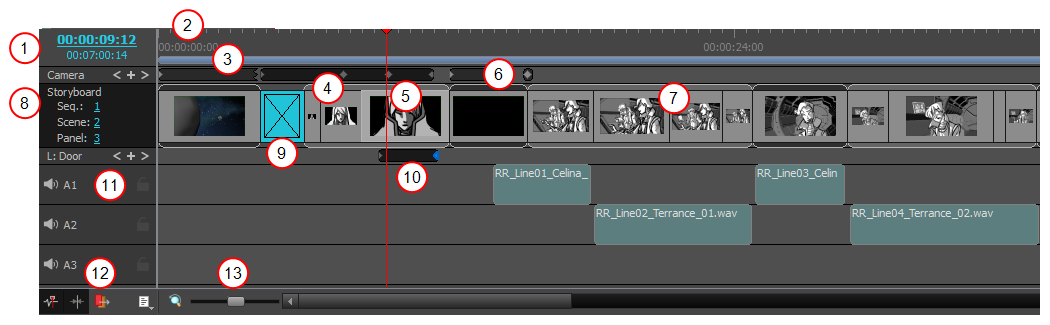
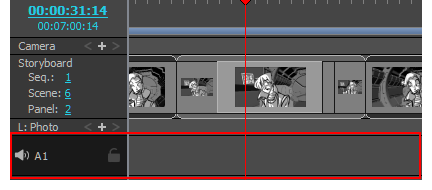
| 1 | The current timecode (playhead position) is displayed in the top-left corner of the Timeline view. The total duration of the project is displayed the current timecode. |
| 2 | The names and beginnings of the different acts are indicated by small flags at the top of the Timeline view. |
|
3 |
Sequences are displayed as blue bars. |
| 4 |
Scenes are represented by grey frames at the top and bottom of the panels. |
| 5 |
Each panel displays a thumbnail. |
|
6 |
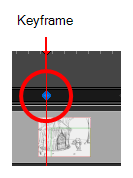
Camera movements are displayed as black bars in the Camera track and keyframes as blue diamonds (when selected). |
| 7 |
The audio blocks appear below the scenes. |
|
8 |
The current sequence, scene, and panel names are displayed at the beginning of the panel row. |
|
9 |
Transitions are displayed as blue rectangles between scenes. |
|
10 |
Layer movements are displayed as black bars in the Layer track and keyframes as blue diamonds (when selected). |
|
11 |
The soundtrack names and Mute and Lock icons are displayed at the beginning of the audio rows. |
|
12 |
Sound options are available for manipulating the audio. |
|
13 |
The Zoom tool increases or reduces the width of the frames in the Timeline view. |
- Do one of the following:
| ‣ | In a view area, click the Add View |
| ‣ | Select Windows > Timeline. |
Setting the Panel Duration
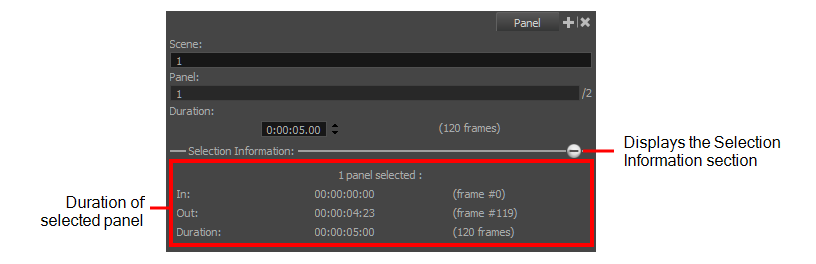
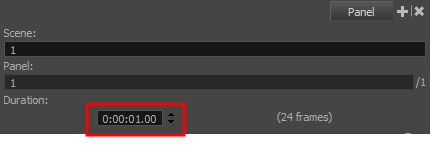
An accurate way of setting the duration of a panel is to use the Panel view, which will display, among other things, the exact timecode information for the selected panel. You can also use the Add Frame to Panel and Remove Frame from Panel commands, in the Storyboard Pro menu, to adjust the length of the selected panel frame by frame.
- In the Timeline or Thumbnails view, select a panel.
- In the Duration field of the Panel view, lengthen or shorten the selected panel by using the up and down arrows or type in a value.
Animating Layers
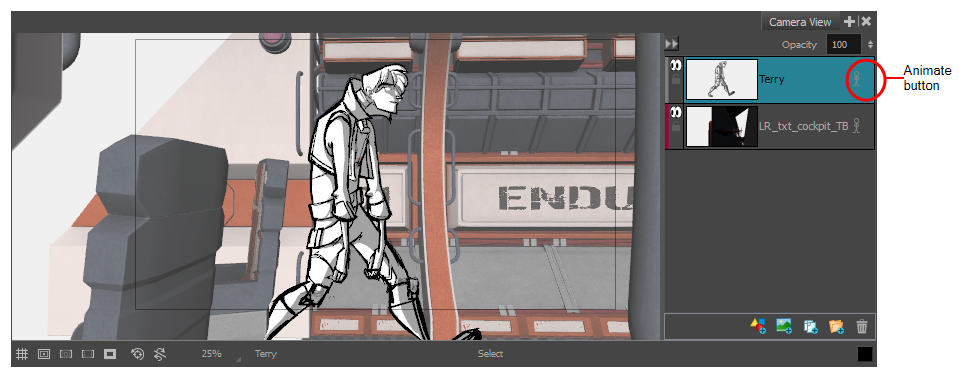
By default, layers are not animated. To animate a layer, begin by setting a keyframe on the desired position. You can then use the Transform tool to move the layer and set as many keyframes as needed for your animation. You can then edit the keyframes and timing using the layer track controls in the Timeline view.
If you decide to delete the keyframes from a layer, you can clear all of them by clicking the Animate button. Once cleared the keyframes are cleared, the layer remains at the position of the current frame.
- In the Timeline or Thumbnails view, select the panel with the layer you want to animate.
In the Stage view, the layer is highlighted in blue.
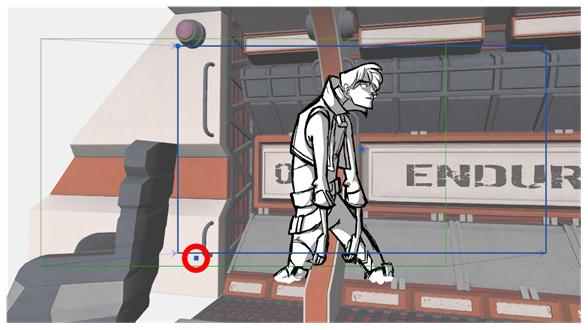
- In the Stage or Camera view, select a layer to animate and click its Animate
 button.
The Animate button turns yellow and changes shape:  .
.
In the Timeline view, the current frame becomes the first frame of the current panel.
- From the Tools toolbar, click the Layer Transform
 button.
The 3D manipulators are displayed, letting you rotate and position the 2D layer within the 3D space
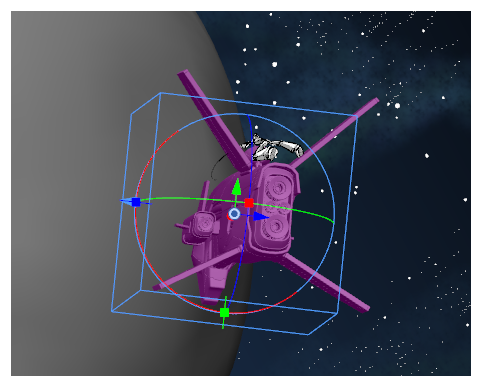
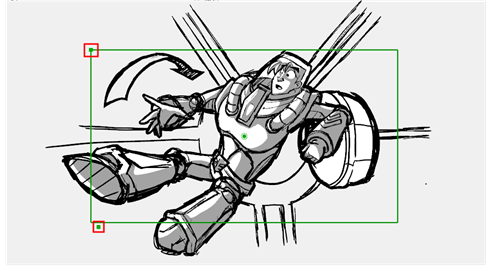
- Select an element in the scene and place it in its initial state. Use the transformation handles to scale, rotate and move the layer.
- In the Layer Transform tool properties, click the Add Keyframe button
 to set a keyframe.
A keyframe is added at the current frame.
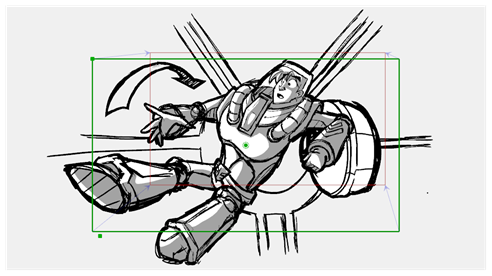
- Select the same element and place it in its next state. Keep setting keyframes until your animation is complete.
- Click the Play
 button to see the animation of the element.
- Select a layer that contains animation. This is indicated by the yellow Animate icon.
- Click the Animate icon.
The following message appears when turning off the Animate mode.
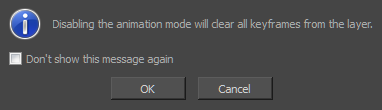
- Click OK.
All keyframes are cleared and the layer remains at the position of the current frame. The Animate icon on the layer turns grey to indicate that it does not contain animation.
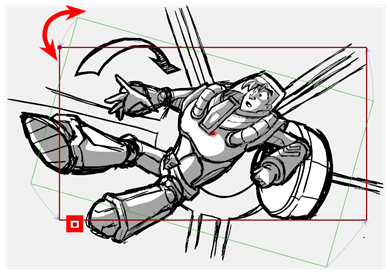
Animating the Camera
In order to create any animated camera for a scene, you need at least two keyframes. Create these keyframes before you change the position of the camera if you plan to move it.
- In the Timeline view, drag the red playhead to the frame on which you want add a keyframe.
- From the Tools toolbar, select the Camera
 tool.
tool.
- Do one of the following:
- Select Camera > Add Camera Keyframe at Current Frame.
- In the Tool Properties view, click the Add Keyframe
button.
A keyframe is added in the Timeline view at the exact position of the red playhead.
NOTE: Enabling the Camera Label in the Stage view can be very helpful when manipulating keyframes. You can do this via the Stage view status bar.

- Do one of the following:
- From the Tools toolbar, select the Camera
- Select Tools > Camera.
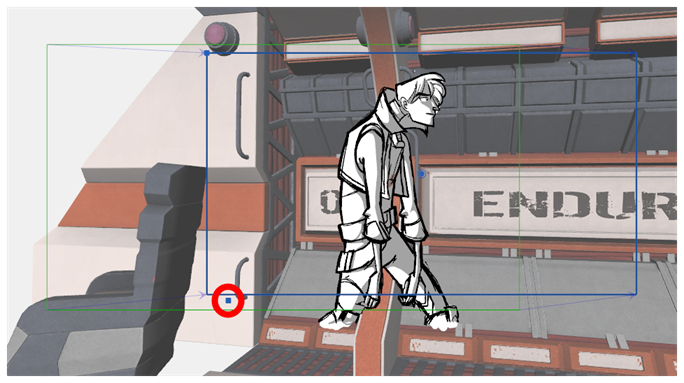
- In the Stage view, select the camera keyframe to modify.
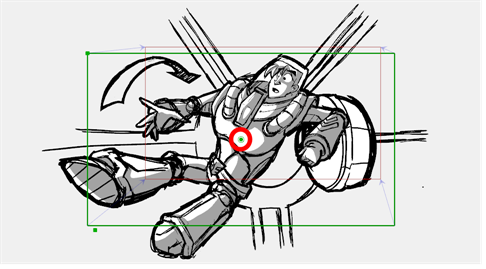
- Use one of the following methods to modify the camera keyframe:
- Truck In, Truck Out: To position the selected keyframe along the Z axis, creating a truck in or truck out movement, drag the top-left corner of the frame when you see the Truck
icon.
When you release the mouse, the keyframe is set, and blue arrows appear to indicate the direction of the camera movement. In this case, it would be zooming out from position A to position B.
- Rotate: To rotate the selected keyframe, drag the top-left corner of the frame when you see the Rotate
icon.
- Move: To move the selected keyframe, drag the frame from the centre pivot point or the outer edge of the camera frame when you see the Drag
icon.
- Nudge: You can also nudge the selected keyframe by pressing the arrow keys on your keyboard.
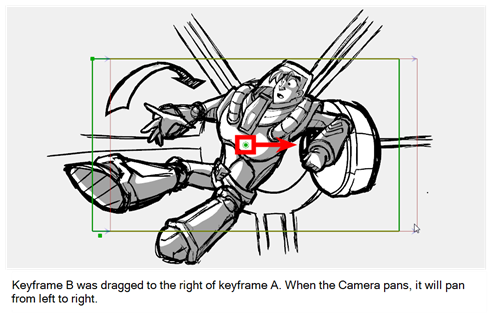
At this point, if you wanted to, you can select the B position keyframe and move it to a new location. When you play back the scene, the camera will move from position A to B.
Adding Sound
You can add new audio tracks to your project. To do so, you must work in the Timeline view
- Do one of the following:
- In the top menu, select Sound > New Audio Track.
- In the Timeline view, either right-click on an existing audio track or underneath all tracks, then select New Audio Track.
- In the Sound toolbar, click the New Audio Track
button.
Once you add a new audio track, you are ready to import a sound.
Importing a Sound Clip
You can import sound clips (.wav, .aif, .aiff, or .mp3) into an audio track at the first frame or at the current frame. If the sound clip does not already exist in your project, Storyboard Pro copies the file from its present location to the audio folder in your storyboard project folder. You must work in the Timeline view.MP3 files are not recommended for long sequences because it is a compressed file format. For optimal results, use .wav or .aif sound files when working on a long sequence.
- In the Timeline view, select an audio track.
- Do one of the following:
- Select File > Import Sounds.
- Right-click the audio track and select Import Sound Clips.
- In the Sound toolbar, click Import Sound Files
button.
The Import Sound Clips dialog box opens.
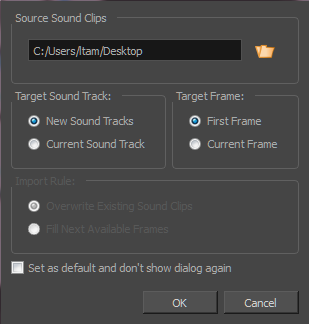
- Select a sound clip to import by typing in the file path or using the Browse button to search for the file.
- In the Target Sound Track section, specify whether you want to create an audio track and import the clip into it or import the clip into the selected audio track.
- In the Target Frame section, indicate the frame at which the sound will begin.
- If you selected the Current Sound Track option, specify the Import Rule:
- Overwrite Existing Sound Clips: By default, when you import a sound, it will replace sounds that exist in the target frames.
- Fill Next Available Frames: Imports the sound clip into the first available empty frames after any existing sound selection.
- Select the Set as default and don’t show dialogue again option if you want to use the current settings the next time you import sound and open a browse box to select a sound automatically.
Creating a Transition
Adding a transition between scenes is an effective way to move your story along.
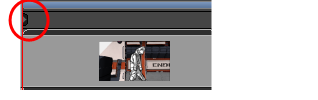
- In the Timeline view, select the scene in which you want to add a transition.
![]()
- Do one of the following:
| ‣ | From the Storyboard toolbar, click the New Transition |
| ‣ | Select Storyboard > Add Transition. |
| ‣ | Right-click the scene thumbnails and select Add Transition. |
![]()