About the Brush Tool
The Brush tool is used to draw and sketch on vector and bitmap layers.
The Brush tool is pressure sensitive and lets you create a contour shape with a thick and thin line effect, as if the drawing was made with a brush.
If you want sketch a drawing using a semi-transparent colour to get a paper-like feel, then use the Brush tool as it produces a more realistic and natural feel.
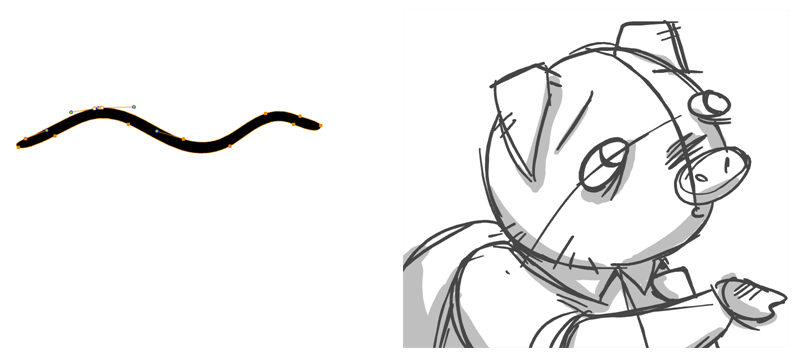
Vector Brushes and Pencils

Vector strokes produce files that are very light, and are ideal for long projects because you do not have to compromise on efficiency during playback. Also, you can modify the shape of the lines after you draw them using the Contour Editor or Perspective tool. The strokes are stored as separate lines until the drawing is flattened.
| • | Advantage: File sizes are light. |
| • | Disadvantage: Cannot get natural media-style textured drawings. |
| • | Recommended Use: For clean drawings, sketchy vector drawings, drawings you want to reuse from different distances (close, mid, far). |
Textured Brushes
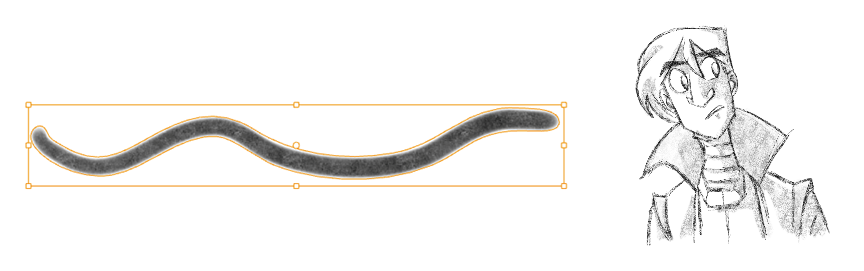
Textured brushes allow you to create lines that feel more like natural media, like working with a pencil on paper for example. With this kind of stroke, you can still move the strokes around after you draw them. You cannot, use the Contour Editor or Perspective tool on this kind of line.
| • | Advantage: You can get a natural media feel, and still have the ability to modify the position of lines after you draw them. |
| • | Disadvantage: File sizes can get heavy. Although some strokes can be flattened, they cannot be flattened when you use different colours. Also, you can only have one colour/shade applied for the entire length of the line. |
| • | Recommended Use: For textured drawings in which you can adjust the position of the lines later. |
Brushes on Bitmap Layers

Bitmap layers allow you to create 2D graphics. The bitmap lines you create are composed of pixels on a grid that resemble tiny dots, which altogether make up the drawing you are creating or artwork you are importing. Bitmap graphics impart a more natural and soft look to your work. The colour is defined on a pixel-by-pixel basis.
Drawing on a bitmap layer is similar to drawing with a bitmap tool in Photoshop or Painter. You can select and move bitmap strokes. However, layering strokes on top of each other will merge (flatten) them. Instead of drawing lines, you are laying down the individual pixels. This gives you finer control over the brush itself, as well as the shading and colour of the drawing. However, the strokes cannot be edited with the Contour Editor or Perspective tool. It is more efficient for storing texture information than a textured brush on a vector layer, so if you are creating drawings with a lot of texture, this may be a better option.
| • | Advantage: File sizes are not as heavy as when you use textured brushes on a vector layer, since each stroke does not have to be remembered individually. Also, you have full artistic control over the style of the drawing. |
| • | Disadvantage: You cannot modify the lines after you draw them. Simply draw and erase, like you would on paper. Also, it can be difficult to reuse the drawing at multiple distances. |
| • | Recommended Use: When creating drawings with a lot of texture, for a natural media feel. Particularly when you want a wide variety in colour and shading, this is where you will see the real advantage. |
Vector-to-bitmap conversion includes flattening individual drawings into a single image. Flattening means that it will not be possible to select non-overlapping or overlapping elements as individual objects with the Select tool. Instead, the selection of one drawing will initiate the selection of all elements, with a single vector frame surrounding them.
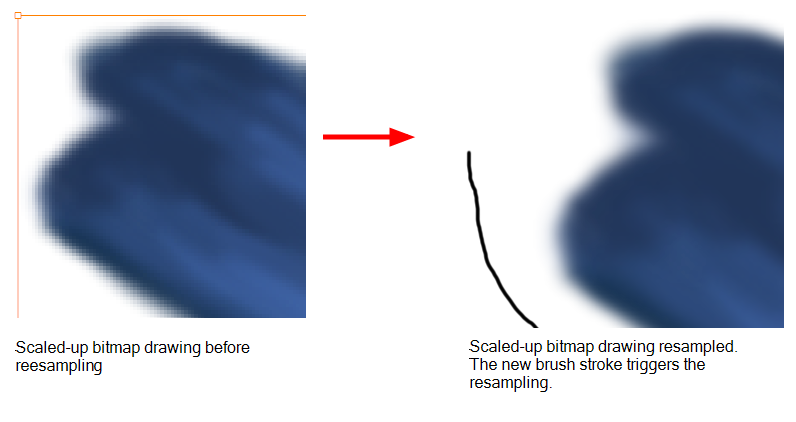
Resampling is also triggered on bitmap layers with the use of a bitmap drawing tool. For example, if you draw the outline of a circle, scale it down and then zoom into it, you will see tiny square pixels along the edge of the line. If you then draw a line right next to it, you will notice two things: first that the square pixels of the new line are gigantic by comparison and that the pixels in the line of your circle suddenly become the same size. This is because the circle was resampled. It was not resampled when you scaled it down. It was resampled when you used a bitmap drawing tool. It is resampled so that all the drawn objects are scaled to the same bitmap grid, in other words that their basic unit, the pixel, is the same size. The grid is defined by the bitmap layer's resolution.
Before you start drawing in bitmap, it is important to understand that your artwork will now be resolution dependent. If you zoom in your scene, you artwork will be enlarged. It is important to plan ahead and decide how high of a resolution you need your artwork to be. If you plan to zoom in your scene, the smallest section of the image that the camera will frame must be 100% the size of your scene resolution. For example, if your scene resolution is set to 1920 x 1080 and you zoom- in 300% with your camera, then the resolution of the bitmap layer also has to be set to 300%, otherwise its elements will look pixelated in the final render. It is important to change the bitmap layer resolution before you start drawing.

The bitmap resolution can be set at the scene level or drawing level. The setting at the scene level affects newly created bitmap art layers.
Note that even if your drawing resolution is set to be very large, it doesn't mean that your file will be very heavy. It depends on the amount of artwork you draw in it.

There is a function to Lets you change the resolution of bitmap art for individual drawings. You can reduce the resolution of your bitmap file as well as increase it. Be careful because enlarging the bitmap resolution on an existing drawing will result in a loss of quality.Storyboard Pro will perform a pixel smoothing pass (resampling) and create additional pixels to avoid losing too much quality, but only to a certain extent. This feature is very useful when you need to have a full resolution of a bitmap image (such as imported bitmaps as .psd or .tga for the background) for tracing to create a matte directly in Storyboard Pro.By default, Storyboard Pro creates small thumbnail images when imported as bitmap in order to increase performance by using a small thumbnail image instead of using the original large size bitmap for animation work in Storyboard Pro. This will make difficult to view details or trace due to the low resolution (blurry). This option temporary increases the resolution of bitmaps up to their original bitmap resolution to make tracing easier.
For example, what if you used the default scene’s resolution for some bitmap art, but then discover you are zooming-in quite close? If you do not want to see the pixels appear too much when you are zoomed in, you can set the bitmap resolution to 200% and the bitmap art will have a higher resolution with smaller pixels, but will NOT retain 100% of its quality. You can use this function on multiple drawings using the Apply to All Drawings option. Changing this option will affect existing and selected bitmap art layers.
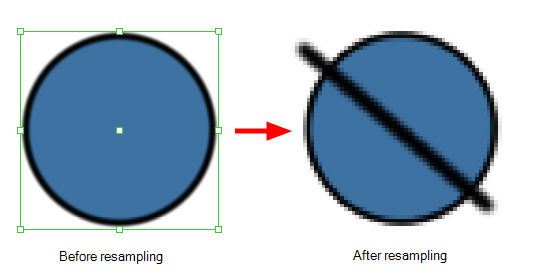
You should avoid scaling up your bitmap strokes using the Select tool. If you do, keep in mind that when you continue drawing, your image will be resampled and your new strokes will be scaled to the scene resolution.