Animating Layers
Like the camera, individual layers can be animated in your panels. This is helpful to test the potential animation of scene elements. In Storyboard Pro, you can set the position of a layer at the beginning of a panel and set a different position for the end. As the panels play back, the layer moves from position A to position B.
To animate a layer, you will use the First and Last Frame Transform tools.
This section includes the following topics:
| • | Setting the Pivot for a Layer |
| • | First Frame Transform and Last Frame Transform Tools |
| • | Setting First and Last Frame Positions |
| • | Adjust First and Last Frame Transformation Positions |
Setting the Pivot for a Layer
If you plan to animate a layer, it is wise to first set that layer’s pivot point. If you do not intend to animate a layer, there is no need to set the pivot.
To set the pivot for a layer:
- In the Timeline view, select the panel on which you want to animate a layer.
- From the Tools toolbar or the Tools menu, select the First Frame Transform
 tool.
tool.
- In the Stage view, select the layer you want to animate.
The currently selected layer’s transformation controls and pivot point become visible. The pivot point is a blue circle situated at the centre of the camera frame.
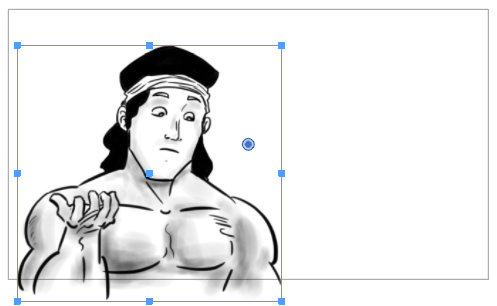
- In the Stage view, click and drag the pivot point to the desired position.
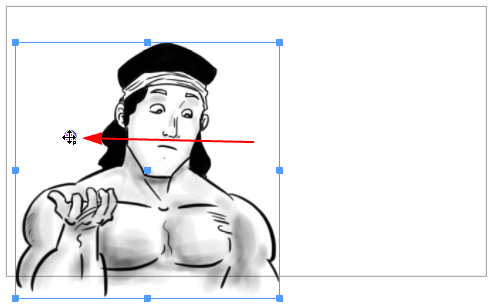
Now both Layer Transform ![]()
![]() tools will use this point as reference when applying transformations.
tools will use this point as reference when applying transformations.
To set the pivot point at the centre of a selection:
- In the Timeline view, select the panel containing the layer on which you want to set the pivot.
- From the Tools toolbar or the Tools menu, select the First Frame Transform
 tool.
tool.
- In the Stage view, select the layer which pivot you want to set at the centre.
- In the First Frame Transform Tool Properties view, click on the Center Pivot on Selection
 button, or select Layer > Pivot > Center Pivot on Selection.
The pivot position will be set to the centre of the selection.

To reset the pivot position:
- In the Timeline view, select the panel containing the layer on which you want to reset the pivot.
- From the Tools toolbar or the Tools menu, select the First Frame Transform
 tool.
tool.
- In the Stage view, select the layer which pivot you want to reset.
- In the First Frame Transform Tool Properties view, click on the Reset Pivot
 button, or select Layer > Pivot > Reset Pivot.
The pivot position will be reset to the centre of the camera frame.
First Frame Transform and Last Frame Transform Tools
The First Frame Transform ![]() and Last Frame Transform
and Last Frame Transform ![]() tools are two separate tools that will set either the first or last position for a layer when you want it to move over the length of your panel. You can find them in the Tools toolbar or in the top menu under Tools > First Frame Transform or Last Frame Transform.
tools are two separate tools that will set either the first or last position for a layer when you want it to move over the length of your panel. You can find them in the Tools toolbar or in the top menu under Tools > First Frame Transform or Last Frame Transform.
With the First Frame Transform and Last Frame Transform tools selected, their operations are displayed in the Tool Properties view. Both tools have the same operations.
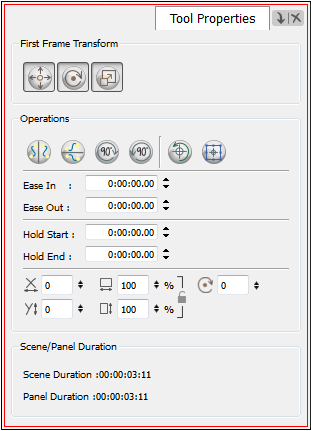
| • | Show Translate Controls |
| • | Show Rotate Controls |
| • | Show Scale Controls |
| • | Flip Horizontal and Flip Vertical |
| • | Rotate 90 degrees CW and Rotate 90 degrees CCW |
| • | Reset Pivot |
| • | Center Pivot on Selection |
| • | Ease In and Ease Out |
| • | Hold Start and Hold End |
| • | X and Y Position Offset Field |
| • | Scale |
| • | Angle of Rotation |
 Show Translate Controls
Use this button to show or hide the translation controls in the Stage view when using the First Frame Transform or Last Frame Transform tool on a layer. The controls are displayed by default.
 Show Rotate Controls
Use this button to show or hide the rotation controls in the Stage view when using the First Frame Transform or Last Frame Transform tool on a layer. The controls are displayed by default.
 Show Scale Controls
Use this button to show or hide the scaling controls in the Stage view when using the First Frame Transform or Last Frame Transform tool on a layer. The controls are displayed by default.

 Flip Horizontal and Flip Vertical
Use these buttons to flip your layer horizontally or vertically.

 Rotate 90 degrees CW and Rotate 90 degrees CCW
Use these buttons to rotate your layer in 90 degree increments either clockwise or counter clockwise.
 Reset Pivot
The Reset Pivot button resets your current layer’s pivot point to its original position at the centre of the camera frame. This command is also available from the top menu: Layer > Pivot > Reset Pivot.
 Center Pivot on Selection
By default, the pivot is positioned at the center of the camera frame. Use this button to set the pivot at the centre of the selected layer. This command is also available from the top menu: Layer > Pivot > Center Pivot on Selection.

Ease In and Ease Out
Modifying these numbers will change the velocity of the layer movement.
Hold Start and Hold End
Modifying these numbers will change how long the layer will be held without moving at the beginning and end of the panel
X and Y Position Offset Field
These fields are used to manually position the layer along the X and Y axies. Note that these fields are only available while working in 2D mode.
Scale
These fields are used to manually scale the layer vertically and horizontally. You can click on the lock icon to constrain proportions. Note that these fields are only available while working in 2D mode.
Angle of Rotation
This field is used to manually set the rotation angle of the layer. Note that this field is only available while working in 2D mode.
Setting First and Last Frame Positions
Animating a layer is very simple when you use the First Frame Transform and Last Frame Transform tools.
To set the first position for a layer’s animation:
- In the Timeline view, select the panel with the layer you want to animate.
- In the Stage view, select a layer to animate.
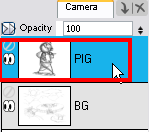
- From the Tools toolbar or the Tools menu, select the First Frame Transform
 tool.
tool.
In the Stage view, the layer is highlighted in blue.
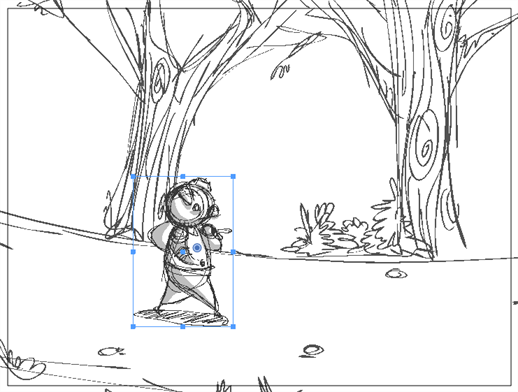
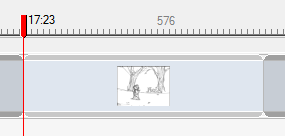
In the Timeline view, the current frame becomes the first frame of the current panel.
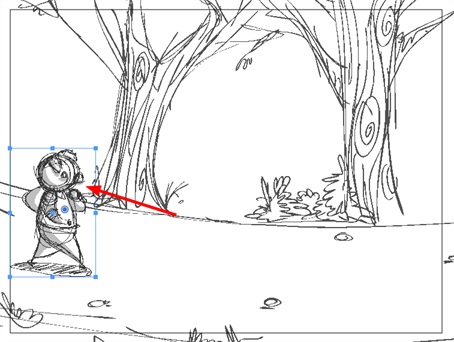
- Using the transformation handles, scale, rotate and move your layer.
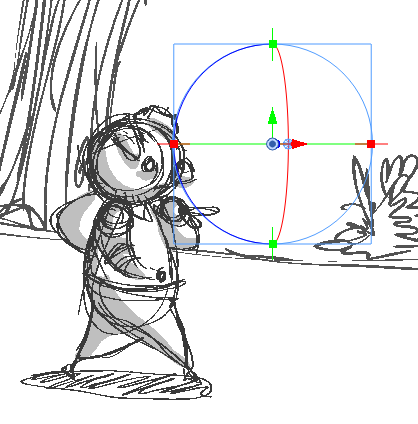
If 3D is enabled, 3D manipulators are displayed, letting you rotate and position the 2D layer within the 3D space
To set the last position for a layer’s animation:
- In the Timeline view, select the panel which contains the layer you want to animate.
- In the Stage view, select a layer to animate.

- From the Tools toolbar or the Tools menu, select the Last Frame Transform
 tool.
tool.
In the Stage view, the layer is highlighted in blue.

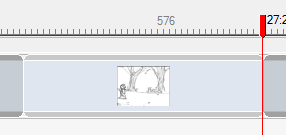
In the Timeline view, the current frame is now the last frame of the current panel.
- Using the transformation handles, you can scale, rotate and move the layer.
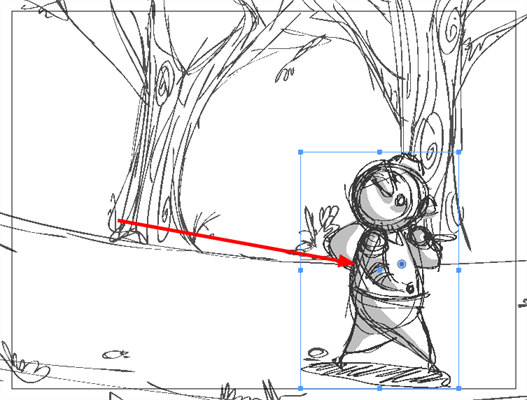
When you play back, the panel shows the layer on which you set first and last frame transformations.
Coordinate Toolbar
You can also use the Coordinate Toolbar, which displays the current translation, scale and rotation values of a selected layer, as well as allowing you to type specific values for each of these parameters. This toolbar is available from the top menu by selecting: Windows > Toolbars > Coordinate.

Translation

The translation field displays the X, Y and Z translation values of the selected layer. You can use these fields to type in precise values to set the first frame and last frame position of a layer. By default the Z value field is disabled, it will automatically become active when the 3D option is enabled.
Scale

The scale field displays the X, Y and Z scaling values of the selected layer. You can use these fields to type in precise values to set the first frame and last frame size of a layer. By default the Z value field is disabled, it will automatically become active when the 3D option is enabled.
Rotation

The rotation field displays the X, Y and Z rotation values of the selected layer. You can use these fields to type in precise values to set the first frame and last frame rotation of a layer. By default the X and Y value fields are disabled, it will automatically become active when the 3D option is enabled.
Adjust First and Last Frame Transformation Positions
Once you set your first and last layer transformation positions, there are several ways to adjust them.
| • | Ease In and Ease Out |
| • | Hold |
| • | Copy Start Position to End Position |
| • | Copy End Position to Start Position |
| • | Spread Layer Motion |
| • | Reset Transformation |
Ease In and Ease Out
The Easing function allow you to set the ease in and ease out cushioning for your layer transformations. This will help adjust the timing of the layer movement.
To set ease in/out for a layer transformation:
- In the Timeline view, click to select the panel that contains layer transformation.
- In the Stage view, select the layer on which you want to modify the ease in and ease out.

- From the Tools toolbar or the Tools menu, select a Layer Transform tools

 .
.
- In the Ease In or Ease Out section of the Tool Properties view, enter the duration of the ease in after the first frame in which the gradual change in layer movement begins. For example, if you want to slowly accelerate to the normal layer speed from frame 1-10, enter a value of 10.

Hold
The Hold function lets you delay layer transformations at the beginning or end of a panel. This helps you adjust the timing of the layer movement.
To create a hold:
- In the Timeline view, select the panel that contains layer transformation.
- In the Stage view, select the layer on which you want to modify the hold.

- From the Tools toolbar or the Tools menu, select a Layer Transform

 tools.
- Hold at beginning: In the Hold Start section of the Tool Properties view, enter the number of frames the layer should hold before it starts to move.

- Hold at end: In the Hold End section of the Tool Properties view, enter the number of frames the layer should hold before the layer transformation ends.

Copy Start Position to End Position
Uses the position of the first frame from the current layer and paste it over the last frame.
To copy the end position from the start position:
- In the Timeline view, select the panel that contains the start position you want to copy.
- From the top menu, select Layer > Copy Start Layer Position to End.
Copy End Position to Start Position
Uses the position of the last frame from the current layer and pastes it over the position of the first frame.
To copy the start position from the end position:
- In the Timeline view, select the panel that contains the end position you want to copy.
- Select Layer > Copy End Layer Position to Start.
Spread Layer Motion
You can spread the current layer motion across all panels in the same shot or a specified number of adjacent panels after the current panel in the same shot.
A new layer will be added and the drawing will be duplicated for those panels that do not have the same name in the defined range.
To spread the motion from one panel to more than one panel:
- In the Timeline view, select the layer with the motion you want to spread.
- Do one of the following:
| ‣ | Select Layer > Spread Layer Motion. |
| ‣ | In the Layer Toolbar’s extra buttons, click the Spread Layer Motion The Spread Layer Motion dialog box opens. |
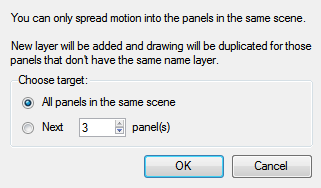
- Do one of the following:
| ‣ | To spread layer motion over all panels in the same shot, select All panels in the same shot. |
| ‣ | To spread layer motion a specified number of adjacent panels after the current panel in the same shot, select Next panel(s) and enter or select the number of adjacent panels. |
Reset Transformation
To reset your layer animation back to its default state:
- In the Timeline view, select a layer.
- Select Layer > Reset Transform or press [Ctrl]+[R] (Windows) or [⌘]+[R] (Mac OS X).
