Colours
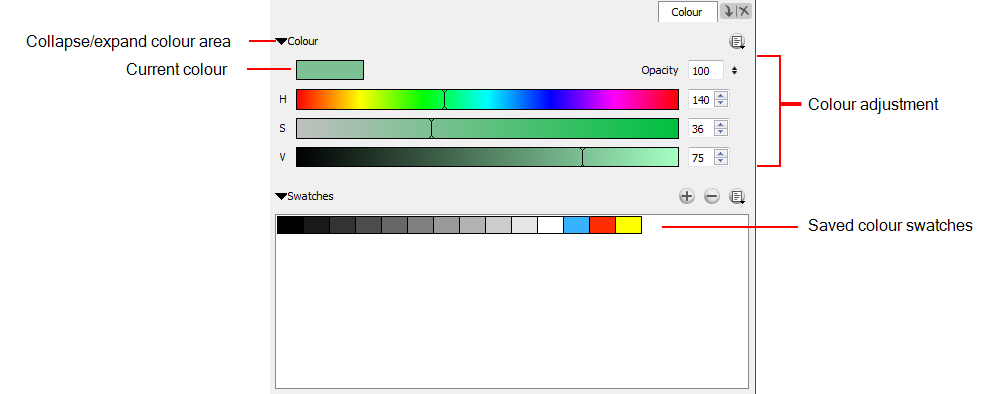
To paint drawings and select colours, you will use the Colour view. There is an active colour swatch at the top, that indicates the current colour. You can modify the colour and opacity using the sliders beneath. If you are going to frequently use a colour, then you can save this colour for reuse by creating a colour swatch out of it.
Like other views, you can dock and undock the Colour view. When you first open the Colour view in the Panel view, it is docked. You can undock it so that it becomes its own window which you can move around freely.
Views contain specific groupings of tools that are displayed in the Panel view or as windows that you can position anywhere on your screen. However, you can undock a view that is displayed in the Panel view. When you do this, it becomes a window.To add a view, do one of the following:Select Windows > desired view.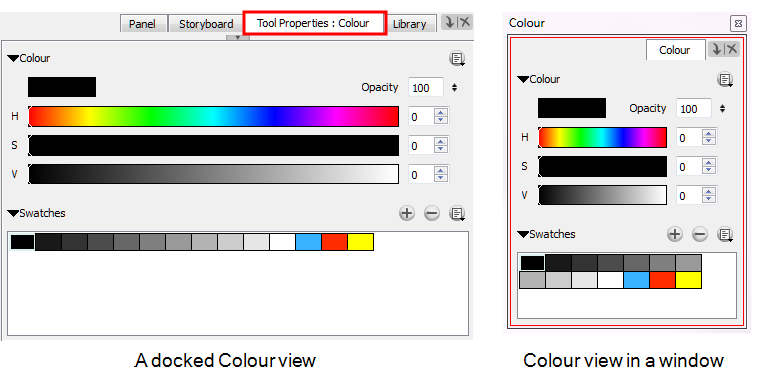 In a Panel view, click the View Menu
 ![]() button and select a view from the menu.To dock a window in the Panel view: Drag the window’s tab onto the Panel view and dropping it in the tab area.The view is added to the Panel view.
button and select a view from the menu.To dock a window in the Panel view: Drag the window’s tab onto the Panel view and dropping it in the tab area.The view is added to the Panel view.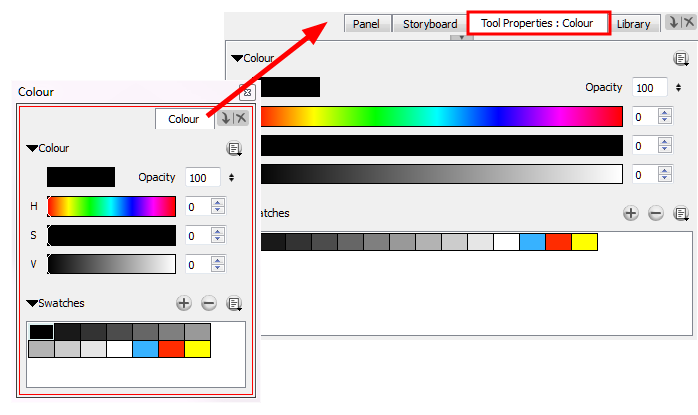 To undock a view:In the Panel view, drag a view by the tab, moving away from the Panel view. The view turns into a window.
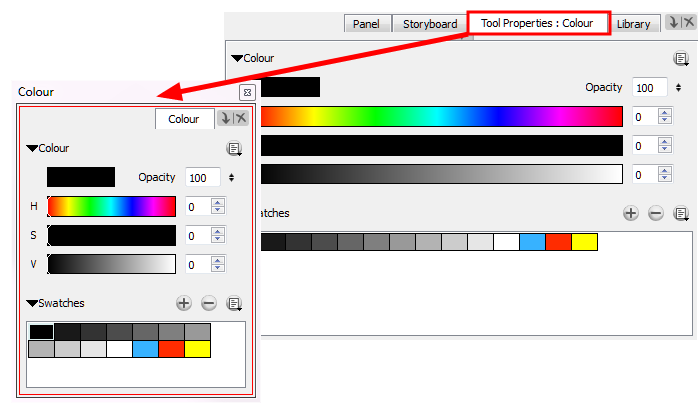
To open the Colour view, in the Panel view, select the Tool Properties: Colour tab. If you have separated the Tool Properties and Colour view, select the Colour tab—see Managing the Views.
This section includes the following topics:
| • | Modifying the Current Colour |
| • | Creating a Gradient |
| • | Adding a Colour Swatch |
| • | Deleting a Colour Swatch |
| • | Naming and Ordering Colour Swatches |
| • | Working with Colour Palettes |
Modifying the Current Colour

There are several ways to modify the current colour. It can be modified directly in the Colour view using the sliders (HSV or RGB), or using the Colour Picker window.
To modify the current colour in the Colour view:
- In the Colour view, make sure the Colour area is expanded by clicking on the Collapse/Expand arrow.
- In the Colour view, slide the H,S,V sliders left or right to adjust the colour. You can also decrease and increase the colour's alpha using the Opacity arrows.
| ‣ | In the HSV/RGB menu, you can toggle between H,S,V and R,G,B sliders. |
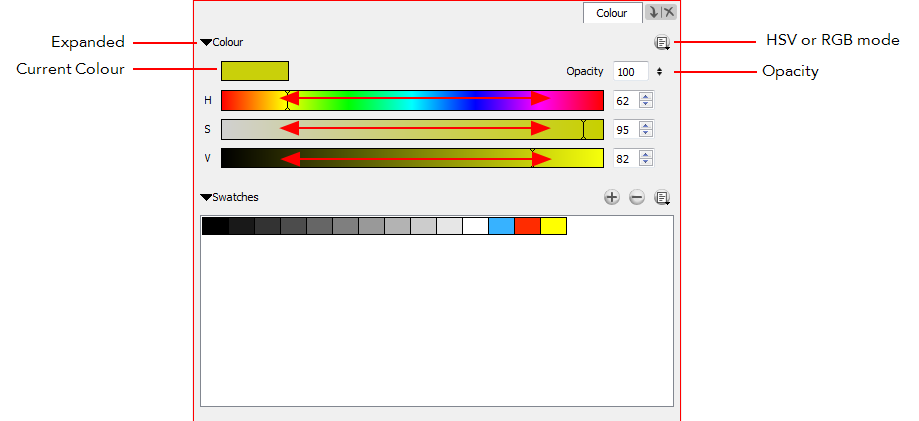
To modify the current colour in the Colour Picker window:
- In the Colour view, make sure the Colour area is expanded by clicking on the Collapse/Expand arrow.
- Double-click on the current colour swatch to open the Colour Picker window.
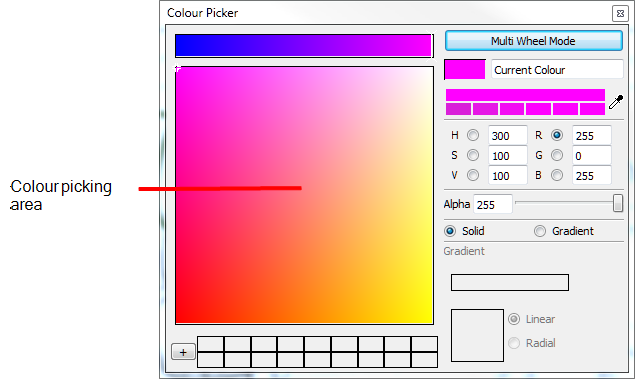
- In the Colour Picker window, do one of the following to modify the current colour:
| ‣ | In the colour picking area, click to select a colour. |
| ‣ | Type in the HSV or RGB values in the corresponding fields. Select the R,G,B or H,S,V options to change the look of the colour picking area. |

| ‣ | Click the Dropper  button to select any colour from the Storyboard Pro interface. button to select any colour from the Storyboard Pro interface. |
You can also click the Multi Wheel Mode button to open the Multiwheel Colour dialog box. This displays all the picking area styles and a picking undo list. Click the Single Wheel Mode button return to the regular Colour Picker window.
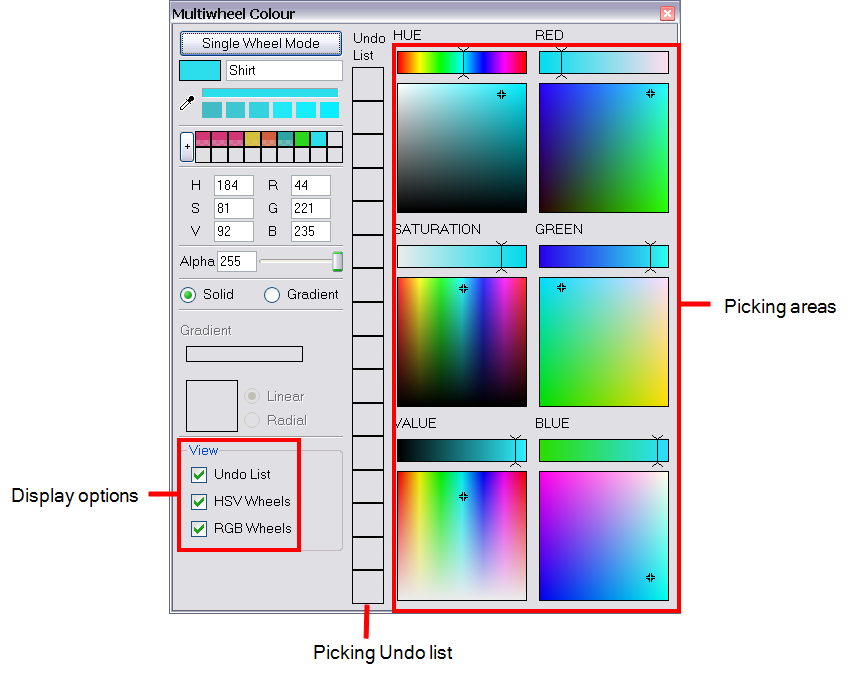
- Click the Shade Scale swatches to modify the shade of the selected colour.

- Adjust the level of transparency with the Alpha slider, or type the value directly in the Alpha field.
- Click the Add button to add the current selected colour to the Colour Storage Library, so you can quickly access it later.

- You can rename the colour swatch in the Colour Picker window or directly in the colour list by double-clicking its name.


Creating a Gradient

Vector drawings can be painted using linear and radial gradients. Once painted, you can modify the position of the gradient—see Editing Gradients and Textures.
To create a gradient colour:
- In the Colour view, double-click the current colour swatch.
The Colour Picker window opens.
- Select the Gradient option.
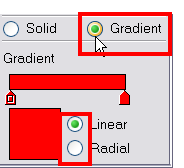
- Select the Linear or Radial option.
- In the color picking area, use the gradient arrows to modify the colours.
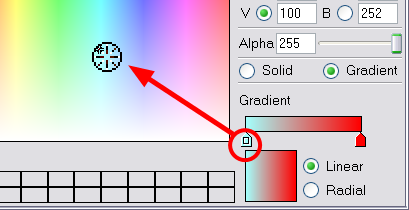
| ‣ | Click between the arrows to add extra colours. |
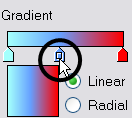
| ‣ | Drag the arrows downwards to remove them. |
| ‣ | Drag the arrows left and right to modify the gradient distance. |
Adding a Colour Swatch
You can use two different types of colour swatches, these are described in the following sections:
| • | Vector Colour Swatch |
| • | Bitmap Texture Swatch |
Vector Colour Swatch
You can paint your drawings with vector swatches, which are the solid and gradient colours.
To add a vector colour swatch:
- In the Colour view, make sure the Colour area is expanded by clicking the Collapse/Expand arrow.
- Using the Colour view sliders or the Colour Picker window, adjust the colour for your new swatch.
- Click the Add Colour
 button or select New Colour Swatch from the Colour Swatch menu.

Bitmap Texture Swatch
You can paint your vector drawings with bitmap texture swatches. You can import your own texture and add them to your palette. Texture have to be *.psd or *.tga files. Transparency is supported. Once painted the position of the gradient can be edited—see Editing Gradients and Textures.

To create a bitmap texture swatch:
- In the Colour Swatch menu, select New Texture.

A browser window opens.
- Browse for a PSD or TGA bitmap file created in a third party software and click Open.

A textured colour swatch is added to the swatch palette.
Deleting a Colour Swatch
To delete a colour swatch:
- In the Colour view, select a colour swatch to delete by clicking a swatch. To select multiple swatches, press [Ctrl] (Windows) or [⌘] (Mac OS X), and click the swatches to delete. To select multiple swatches in a range, press Shift, click the first swatch to delete and then click the last swatch.
- Do one of the following:
| ‣ | Press [Delete]. |
| ‣ | From the Colour Swatch menu, select Delete Swatch. |
| ‣ | Click the Remove Colour |

Naming and Ordering Colour Swatches
If you plan on adding a lot of colour swatches to your palette, it is a good idea to organize them by naming and ordering them.
To name a colour swatch:
- In the Colour Swatch menu, deselect the Swatch Mode option.
- In the Colour list, double-click on a swatch name to rename it.
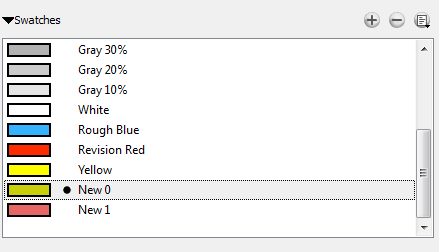
- Once you are done renaming the swatch, press Enter/Return to validate the entry.
To order your swatches:
| ‣ | In the Colour list, either in Swatch mode or List mode, drag and drop your swatches to change the order. |
Working with Colour Palettes
Once you have established the colours to be used throughout your storyboard, you can save it as your default colour palette for the project. You can also import and export colour palettes so that everyone on your team is consistently used the same colours.
To save a default colour palette:
| ‣ | In the Colour View, click the Colour Swatch menu and choose Save as Default Palette. |

To export a colour palette:
- From the Colour Swatch menu, select Export Colours.
- In the Export Colours window, give your palette a name and click Save.
To import a colour palette:
- From the Colour Swatch menu, choose Import Colours.
