Layer Effects
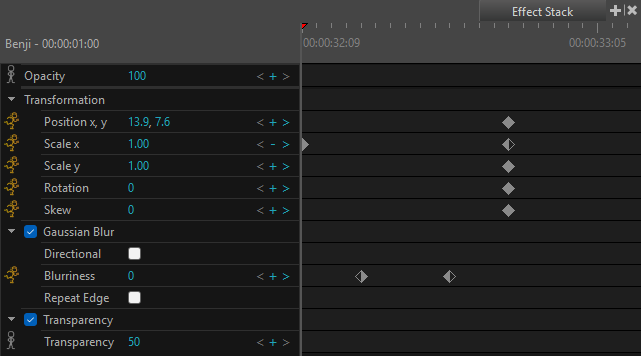
You can apply effects to individual layers using the Effect Stack view. You can apply effects like blurs and blending modes or transformations (scale, rotation, opacity, position) to the elements on your Drawing layers. When the keyframes are applied in the Effect Stack view, your effects will interpolate based on all the values input upon playback.

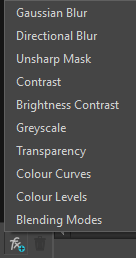
When you select a layer, the Effect Stack view will display the parameters of that current layer. If there are no effects added, the only effects that will appear in the Effect Stack are the Opacity and Transformation properties. You can add effects by selecting the Add Effects button. Once your effects are added to the effect list in the Effect Stack, you can begin to apply your keyframes in the Effect Stack view.
-
Access the Effect Stack view by doing one of the following:
-
Select Windows > Effect Stack.
-
Click the Add View button and select Effect Stack.
-
-
Move the playhead to the location where you would like to add an effect keyframe to your layer.

-
In the Effect Stack view, select the plus sign
 to the right of the effect value to add the first keyframe.
A keyframe is added and will be visible in the Effect Stack view.
NOTE To add an effect to the Effect Stack view, select Add Effect.
-
In either the Effect Stack view or the Timeline view, move the playhead to the location where you would like to add the second keyframe.

-
Select the plus icon
 to the right of the effect value to add a second keyframe.NOTE Selecting the left and right arrows will allow you to shift between keyframes.
 -
In the Effect Stack view, enter the effect parameters for your second keyframe by clicking the numerical value to the right of each effect and entering a new value.
NOTE Moving the playhead to a new location and changing the effect value will create a keyframe automatically.When you play back your storyboard, the effect value will interpolate from the value of the first keyframe to the value of the second keyframe.
-
NOTE The zoom slider in the lower-right corner of the view allows you to scale the timeline. You may use the horizontal scrollbar to focus on a certain region.
-
NOTE You may perform scrubbing by dragging the playhead in the both the Effect Stack view and the Timeline view
-
You will be able to see how the effects will render in real time. The changes to the properties of the effects will be reflected in the Drawing view. The properties can be adjusted in the dropdown menus of the individual effects. Once opened, you can apply a keyframe and adjust the values of your effect. When a keyframe is applied to the Effect Stack view, the stick man  will turn yellow
  to indicate animation on the layer.
To remove an effect keyframe, do the following:
-
In the Effect Stack view, move the playhead over a keyframe and press the minus
 button.
 -
In the Effect Stack view, select a keyframe and press Delete.
The effect keyframe will be deleted.