AI Erase and Replace
The  AI Erase and Replace operation removes elements from your imported image. The AI processor will remove any elements that are masked and reconstruct the image by replacing the masked elements with whatever the AI processor believes would exist in its place.
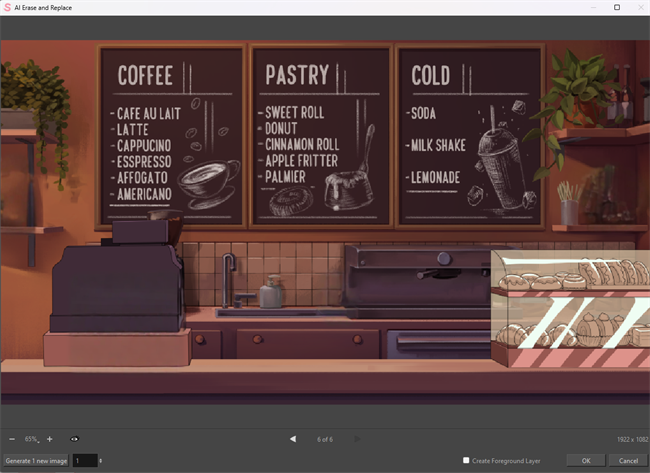
The AI Erase and Replace dialog is where you can view the output image that has been processed. This will allow you to preview how the AI has interpreted the removal and substitution of the masked areas. The AI Erase and Replace dialog will also indicate the size of the rendered image.
| Property | Description |
|---|---|
| Preview Window | Preview the newly generated AI image with your masked elements removed. |
| Zoom Level |
The Zoom menu lets you enlarge or reduce the Camera or Drawing view display. To make the camera frame size always match the size of your view, select the Fit to View option. Click the drop-down arrow and select a zoom level or press 1 and 2.
|
 Zoom In Zoom In |
Enlarge your preview image. TIP You can zoom in using the hotkey 2.
|
 Zoom Out Zoom Out |
Reduce your preview image. TIP You can zoom out using the hotkey 1.
|
 Show Original Image Show Original Image |
Show the original unprocessed image in the Preview window. Seeing the original image will allow you to compare your original unprocessed image to the newly generated AI image. You can flip back and forth to compare how your new image differs from the original. TIP You can Show the Original Image using the hotkey Alt.
|
| Generate New Image |
Create an alternate AI generated image using the set AI Masks. This option allows you to preview a variety of different AI generated image outputs. |
| Number of New Generated Images | A number box to indicate the number of new images you want to generate. |
| Current Generated Image | Preview of the current selected AI generated image. |
| Previous Image |
Preview the previous AI generated image. TIP You can show the previous image with the left arrow key.
|
| Next Image |
Preview the next AI generated image. TIP You can show the next image with the right arrow key.
|
| Image Resolution | The resolution of the image being generated. |
| Create Foreground Layer |
When enabled, a new layer will be created containing all the elements that have been removed. IMPORTANT The new layer generated with AI Erase and Replace will be labelled with an “f” for foreground. This will indicate that the foreground elements were removed with AI.
|
| OK |
Confirm the changes being applied to your image. NOTE Storyboard Pro will only generate the changes of the current image in the Preview window.
IMPORTANT The new
|
| Cancel | Reject all generated changes. |
