Using AI
Through Toon Boom Ember, you have access to a suite of AI-powered tools to enhance your workflow. By opting into Ember, you will be able to utilize the AI tools to automate time consuming and repetitive tasks and enhance visual quality of lower resolution images. Toon Boom has collaborated with AI providers to facilitate the integration of AI into your creative pipeline.
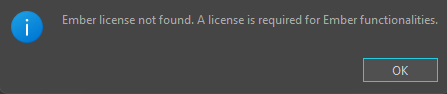
By default the AI features are disabled. In order to be enabled, you will need a license for both Storyboard Pro and Ember as well as to enable the AI features in the Preferences dialog.
After enabling Ember, you will be required to relaunch the software in order to access the AI tools.
If you are not using a subscription license, you will need to request a free Ember license add-on by sending an email to licensor@toonboom.com. Please include the email address linked to your Toon Boom account in the email.
You require an Ember credit balance in order to use Ember. The Show Ember Credits will display the amount of AI functionalities that have been consumed using Ember in your current project. You can refer to these credits to see how much you have consumed.
For more information about Ember credits, see Activating Ember.
AI Masking
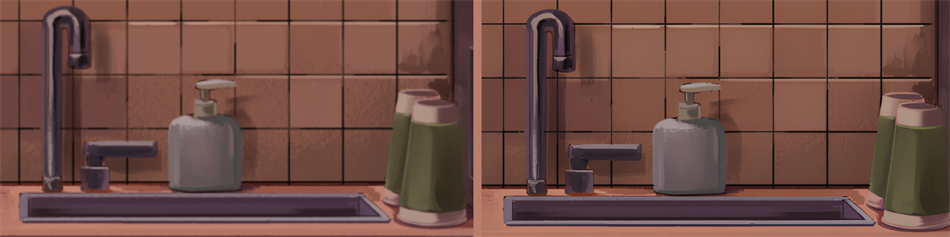
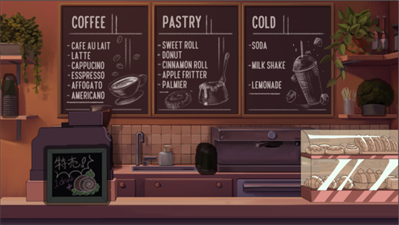
AI Masking allows you to isolate individual elements in an imported image. Once isolated, these elements can be removed and substituted by the AI.
Depending on the sharpness, level of contrast and resolution of the image, the AI can distinguish specific details. The sharper the image and the higher the resolution, the more accurate the AI will be when processing your image.
You can use the following AI Masking tools to apply an AI Mask:
-
 AI Mask Selector.
 -
 AI Mask Brush.
 -
 AI Mask Eraser.
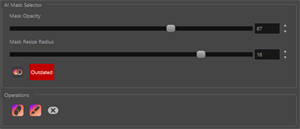
You can use both the AI Mask Selector and AI Mask Brush to mask your image. The AI Mask Selector will select shapes and objects detected by the AI once an AI Mask has been generated. Meanwhile the AI Mask Brush is a pressure sensitive brush that applies an AI Mask by drawing strokes over your image.
-
Select the
AI Mask Selector tool. -
Select your
-
Open the Tool Properties view.
-
Click the
 Generate AI Masks icon.
A progress bar will appear, uploading your image to the server to be processed by the AI.
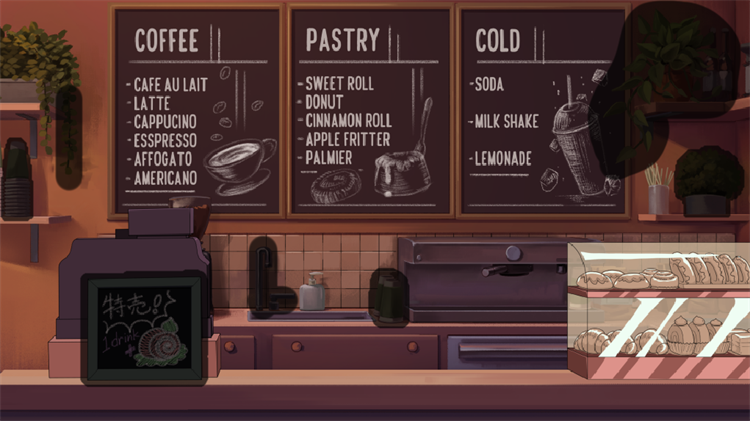
Once you have created your AI masks using the AI Mask Selector, AI Mask Brush or both, you can use the AI Generative Fill operation to generate visual content based on written prompts. The prompts that are entered into the AI Generative Fill window will generate content and reconstruct the image by replacing the masked elements with whatever the AI processor believes would exist in its place.
-
Apply masks to your image using the AI Masking tools.
-
Open Tool Properties.
-
Select
 AI Generative Fill from the Tool Properties.
The AI Generative Fill window will appear.
-
In the Prompt textbox, add text to describe what you would like the AI to generate in your image.
NOTE It is very important to be specific when creating prompts for the AI processor to generate. -
Click Generate.

A progress bar will appear as your image is processed with AI.
Once processed, the AI Generative Fill dialog will open.
-
Review the image generated based on your prompts.
-
Click OK.
Once you click OK, a new exposure will be created with the generated image.
 Show Original Image icon.
Once your AI masks are applied, you can use the AI Erase operation to remove any elements that are masked and reconstruct the image by replacing the masked elements with whatever the AI processor believes would exist in its place.
-
Apply masks to your image using the AI Masking tools.
-
Open Tool Properties.
-
Select
 AI Erase from the Operation options.
A progress bar will appear as your image is processed with AI.
Once processed, the AI Erase dialog will open.
-
Click OK.
Once you click OK, a new layer containing the generated image will be created above the original image layer.
Show Original Image icon.
Expand Image
The Expand Image operation allows you to enlarge your bitmap images without sacrificing image resolution. Any images that need to be scaled up will be processed with AI to generate an extension to the existing image. The AI operation can also be used to expand an image to fit the boundary of a static or dynamic camera.
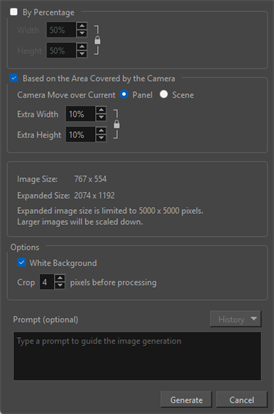
You can opt to use the Prompt textbox in order to generate content in the expanded regions of your image. The Prompt textbox is available when expanding your image both by Percentage and Based on the Area Covered by the Camera. Whatever is written into the Prompt textbox will be additive. The AI processor will interpret what is written when generating new content for the expanded section of your image. For this reason, it is important to be specific when writing text into the Prompt textbox so that the AI can more accurately interpret your vision.
Any text written into the Prompt textbox will be saved in the History dropdown list. When utilizing AI prompts on other images, you can access the history to use the same prompts or other saved prompts that have been previously input.
You can expand your image the following ways:
-
By Percentage: Scale up your image using a percentage value. When the percentage option is checked, the AI will expand your image based on a percentage of the total resolution of the selected image.
-
Based on the Area Covered by the Camera: Scale up your image using the Based on the Area Covered by the Camera option. This option will expand your image to fit within the camera’s view and apply padding to ensure your image is action safe.
-
Select your image.
-
Select
-
Open the AI Operations dropdown menu.
-
Select Expand Image.
The Expand Image dialog will appear.
-
Select one of the following checkboxes:
-
By Percentage.
-
Based on the Area Covered by the Camera.
-
-
Input the percentage values in the X and Y-axes.
-
Optionally: In the Prompt textbox, add text to describe what you would like the AI to generate in the expanded portion of your image.
NOTE It is very important to be specific when creating prompts for the AI processor to generate. -
Click Generate.
The Expand Image window will appear.
-
Review the processed expanded image.
-
Click OK.
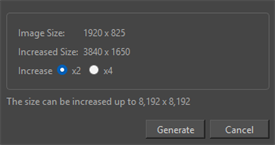
Increase Image Resolution
You can increase the resolution of bitmap images on both bitmap and vector layers. However, when an image on a vector layer is processed using this AI operation, the generated image will be a soft rendered texture on a vector layer.
-
Select your image.
-
Select
-
Open the AI Operations dropdown menu.
-
Select Increase Image Resolution.
The Increase Image Resolution dialog will open.
-
Select the increase multiplier x2 or x4.
-
Click Generate.
A progress bar will appear.
Analyze Script with AI
The Analyze Script with AI tool processes unformatted scripts and breaks them down into their basic components. These unformatted scripts are input and converted into panels and scenes in the Panel and Timeline view. In order for the AI to read the unformatted scripts, it must be imported into the Storyboard view.
-
Import a script file.
NOTE The script you import should be in .txt of .rtf format. -
Select File.
-
Open the AI Tools dropdown menu.
-
Click Analyze Script with AI.
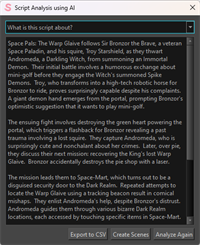
The Script Analysis using AI dialog will appear.
-
Click Analyze.
Storyboard Pro will send the script to the server to analyze.
-
Click Create Scenes or Export to CSV.
Select Character Voice
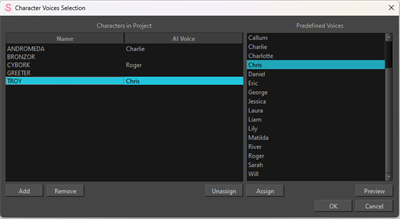
The Select Character Voice operation will apply an AI voice to the characters in your script to recite dialogue. The Select Character Voice operation will compile a list of the characters in your script from the Panel view. Once compiled, you can apply an AI voice to each character from the list of Predefined Voices in the Select Character Voice dialog. You can use the Select Character Voice to apply an AI voice to your storyboard. This can help to differentiate your different characters and help you time your sequences.
-
Select File.
-
Open the AI Tools dropdown menu.
-
Click Select Character Voices.
The Select Character Voices dialog will appear.
-
Select a character from the Name list.
-
Select an AI voice from the Predefined Voices list.
-
Click Assign.
-
Repeat until all your characters have an AI voice assigned.
-
Click OK.
Generate Scene Length with AI
The Generate Scene Length with AI operation will set the timing of your storyboard panels and scenes based off of the dialogue in your script. Your script will need to be broken down into its individual panels and scenes in both the Panel view and Timeline view.
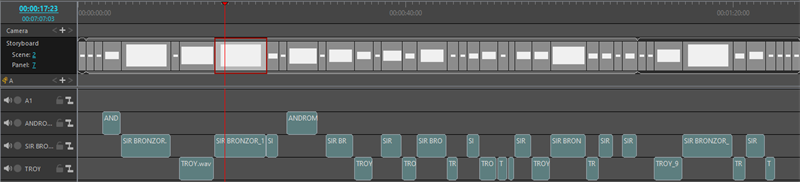
The Generate Scene Length with AI will extract all the dialogue information from the Panels view and the AI will set the timing based on how it interprets the dialogue when processing.
-
Select File.
-
Open the AI Tools dropdown menu.
-
Click Generate Scene Length with AI.
The Scene Generation Options dialog will appear.
-
Select one of the following:
-
All scenes and panels.
-
Selected scenes and panels.
NOTE You will need to select your panels prior.
-
-
Select one of the following:
-
Selected AI voices.
TIP The Selected AI voices will be the AI Voices assigned in the Select Character Voice dialog. -
Default AI voices.
-
-
Select Create Rough Tracks if you want audio to be generated.
-
Select whether or not you would like to add padding to your panels.
-
Click Generate with AI.