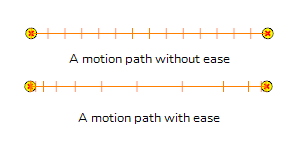
By default, when you animate a video clip, it will move from its position in one keyframe to its position in the next keyframe by progressing towards it at a constant pace, then stop moving abruptly. If you want it to speed up as it starts moving and to slow down before it stops, you can do this by adding ease-in and ease-out to its animation. Adding ease-in to an animation will make it start slowly and gain in speed as it goes. Adding ease-out to an animation will make it slow down before it stops.
You can set the ease-in and ease-out for an animation in the Tool Properties view.
![]()
- In the Tools toolbar, select the Layer Transform
 tool.
tool.
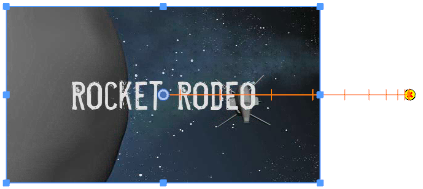
- In the Timeline view, select the clip for which you want to add ease-in and ease-out
The motion path for the selected clip's animation will appear in the Stage and Camera views.

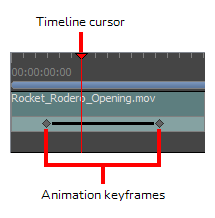
- In the Timeline view, move the timeline cursor between the first and last keyframe of the clip animation to which you want to add ease.
- In the Tool Properties view, enter the desired length of the ease-in in the Ease In field in the H:MM:SS:FF format, where H means hours, MM means minutes, SS means seconds and FF means frames. The longer the length of the ease-in, the smoother it will be.
- Enter the desired length of the ease-out in the Ease Out field, in the same format. The longer the length of the ease-out, the smoother it will be.
As you make adjustments to the ease-in and ease-out of the animation, the notches in the motion path change place, giving you an idea of how the ease is affecting the timing of the movement.
- To test your animation, move the timeline cursor to a point just before the start of the animation. Then, in the Playback toolbar, click on the Play
 button.