When you open Storyboard Pro for the first time, two dialogs appear. The first one provides links for:
- Learning how to use Storyboard Pro.
- Details on what's new in this version of Storyboard Pro.
- Joining the Toon Boom Forum, where you can exchange with other Storyboard Pro users, ask questions, and get answers to your questions.

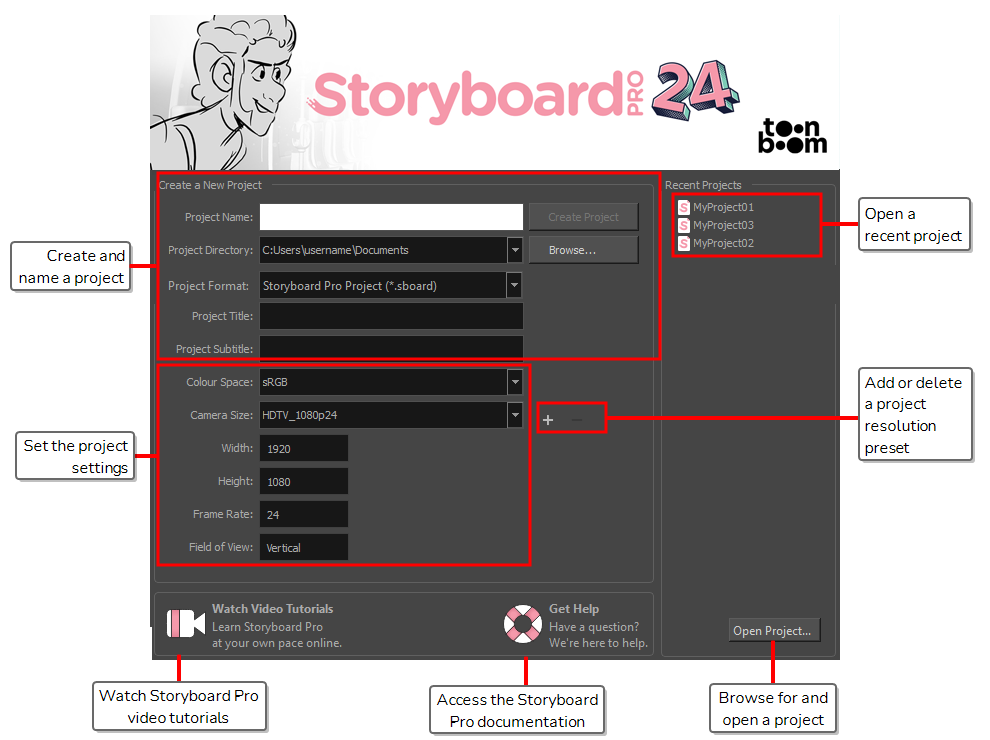
When you close the first Welcome screen, the second one displays, in which you can create and open projects.
TIP Once in the main application window, you can return to the Welcome Screen by selecting Help > Show Welcome Screen from the top menu.
- In the Project Name field, type the name of the project. This name will be used to name the project's folder and the main project file.
- Next to the Project Directory field, click on the Browse button to navigate to a location to save your project.
- In the Project Title field, type the name of the project title. By default, this field will already be filled with what you typed in the Project Name field.
- If you want your project to have a subtitle, type it in the Project Subtitle field. This is not mandatory.
- In the Colour Space drop-down menu, select a colour space to use, or stay with the default sRGB.
- In the Camera Size drop-down, choose the resolution for your project.
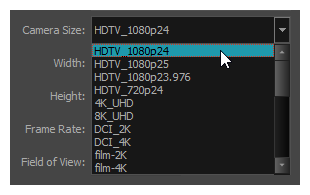
The Width, Height, Frame Rate and Field of View automatically update based on the Camera Size selection.
- In the Colour Space drop-down, select a colour space for your project.
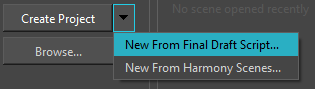
- Click Create Project or one of the following options from the drop down menu.
- New From Final Draft Script to create a new project from an existing Final Draft script.
- New From Harmony Scenes to create a new project from an existing Harmony scene.