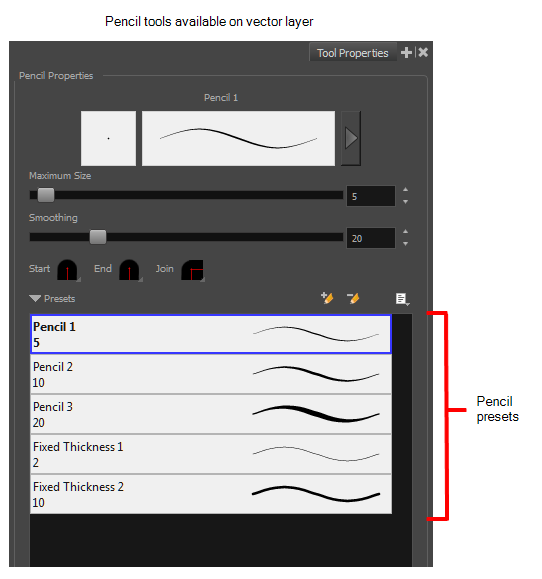
When you select the Pencil tool, its properties and options appear in the Tool Properties view. You can use these properties to change the size of the pencil line, define how the line size responds to pressure on the stylus, how the line acts in relation to other lines in the scene, and how to modify the line’s direction and size after it has been drawn.
The Preview area lets you see a preview of the stroke your drawing tool will make.

You can set the minimum and maximum sizes of your tool, which will produce the thick and thin effect on your line. This works with the pressure sensitivity of a pen tablet.
Also, you can optimize the smoothness of the contour of lines. You can modify the central line smoothness of your line using this option. This parameter smooths the initial movement of your line. Increasing the value will result in a smoother line with fewer less control points.
There are several line shapes to choose from. You can select how the start, end, and joints in the pencil line are drawn.
Using the Pencil tool, you can draw invisible lines. This can be useful to draw tones and highlights directly on the character.

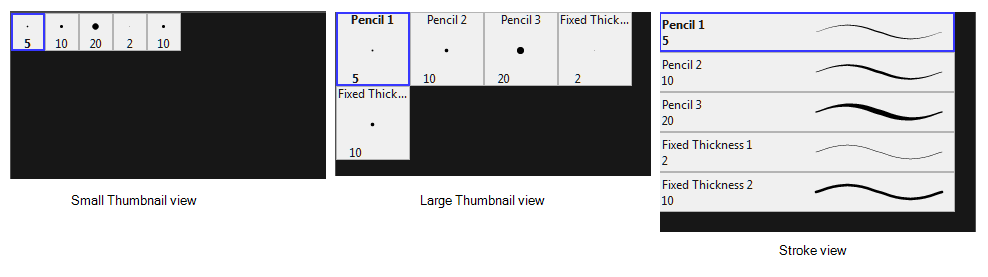
- In the Tool Properties view, click the Brush
 menu, and select Small Thumbnail, Large Thumbnail, or Stroke View.
- In the Tool Properties, select a pencil style from the Presets section.
- Click the Add Brush
 button. The new pencil style appears in the list of presets.
- In the Tool Properties view, select a pencil to rename.
- From the Brush menu, select Rename Brush.
- Type in a new name for the pencil.
- In the Tool Properties view, select a pen to delete.
- Do one of the following:
| ‣ | Click the Delete Brush |
| ‣ | From the Brush menu, select Delete Brush. |
- In the Tools toolbar, select either the Brush
 , Pencil
  or Eraser
  tool.
tool.
- In the Tool Properties view, open the Brush Preset menu and select Export Brushes.
The Export Brushes dialog opens. This dialog allows you to export brush presets for the Brush, Pencil and Eraser tools.
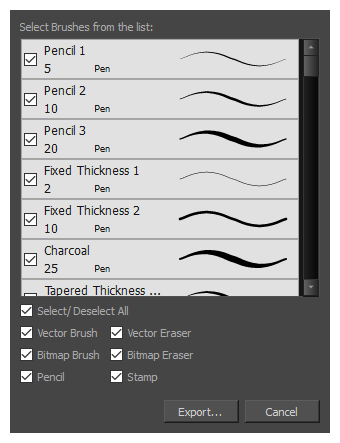
- By default, the presets for all your tools will be selected for export. If you only wish to export presets for specific tools, uncheck Select/Deselect All and select the tools for which you want to export the presets.
- Click Export.
- In the Export Presets dialog that appears, browse to the location where you want to save the .xml file and enter its file name.
- Click Save.
- In the Tools toolbar, select either the Brush , Pencil or Eraser tool.
- In the Tool Properties view, open the Brush Preset menu and select Import Brushes.
- In the browser window that appears, navigate to and select the
.xmlfile in which you exported your brush presets.
- Click Open.
The Import Brushes dialog box opens.
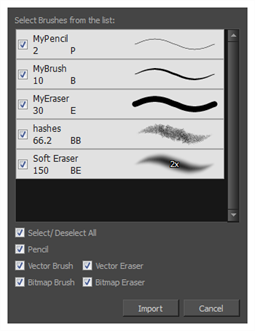
- By default, the presets for any tools included in the file will be selected for import. If you only wish to import presets for specific tools, uncheck Select/Deselect All and select the tools for which you want to export the presets
- Click Import.
The imported brush, eraser and pencil styles will appear in the Presets list.
- Select the panel and layer on which you want to draw.
- In the Tools toolbar, select the Pencil tool or press Alt + 9.
- In the top menu, select View > Extras > Show Strokes to display the invisible lines in the Stage view.
- In the Tool Properties view, set the size to 0. You can also adjust the smoothness.
- In the Stage view, start drawing.
- You can modify the stroke shape with the Contour Editor
 tool—see About the Contour Editor Tool.