When you select the Brush ![]() tool or the Stencil Brush
tool or the Stencil Brush ![]() tool, the Tool Properties view displays the different Brush modes that can control how the brush strokes behave for that tool. Click on the Brush Mode buttons to enable or disable the different modes.
tool, the Tool Properties view displays the different Brush modes that can control how the brush strokes behave for that tool. Click on the Brush Mode buttons to enable or disable the different modes.
When drawing on a
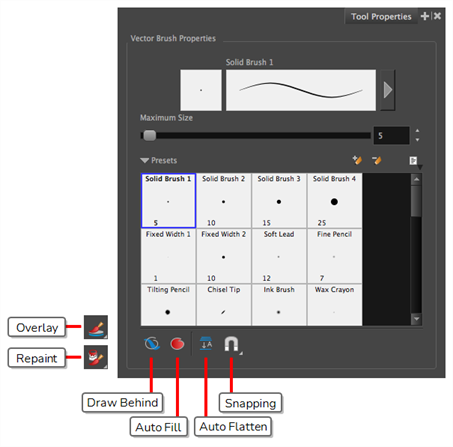
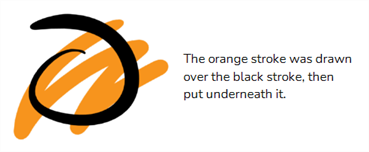
 Draw Behind Mode
When enabled, your drawing strokes will be added underneath the existing artwork instead of over it.
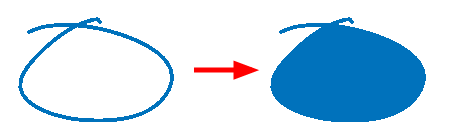
 Auto-Fill Mode
When enabled, if you draw a closed shape, it will automatically be filled with the selected colour.
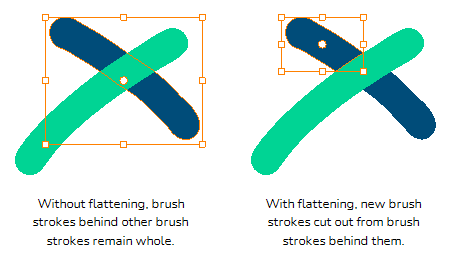
 Auto Flatten Mode
By default each brush stroke you draw is stored as a separate drawing object that can be manipulated individually. With the Auto Flatten option enabled, all overlapping brush strokes will be merged together into a single drawing object. This will make your artwork lighter in both file size and processing time, but may limit your ability to tweak and modify your artwork.
 Snapping
Opens a pop-up menu in which you can enable or disable the Snap to Alignment Guides option. When this option is enabled, the ![]() Brush
Brush
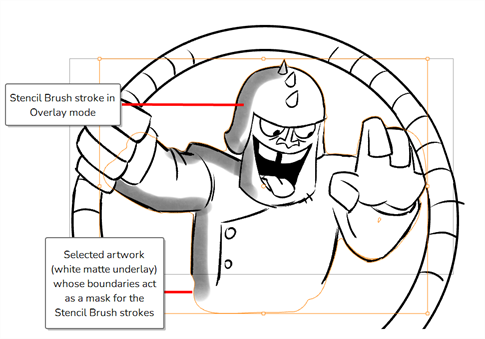
 Overlay
Only available if the Stencil Brush tool and a vector layer are selected.
In this mode, existing artwork form the boundaries of a mask by having their layers selected. Drawing or painting over existing artwork results in these strokes being cut by the boundaries of the mask. These strokes are not flattened with the existing artwork and remain editable. This can be useful to quickly add shadows to drawings.
 Repaint
Only available if the Stencil Brush tool and a vector layer are selected.
In this mode, existing artwork is repainted, ignoring empty zones.