If you have imported a 3D model into your panels, and you find that its default size is too big or too small for your project's purposes, you can adjust its scale factor. The 3D Model's scale factor will affect its size in every panel in which it appears in the project.
- In the Library view, select the 3D Models library.
- Select the 3D model for which you want to set the scale factor. If you have not imported your 3D object to the 3D models library yet, see Importing 3D Objects to your Project Library.
- So that you can see the effects of the scale factor on your 3D model, add the 3D model to the current panel by dragging and dropping it to the Stage or Camera view. If the model is already in the current panel and has not been scaled up or down, skip this step. You can delete the model from your panel once you're done setting the scaling factor, if it is not needed in this panel.
-
Right-click on the 3D model and select Set Scale Factor.
The Model Properties dialog appears.
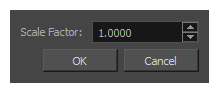
By default, the model's scale factor is set to 1.000 (or 1), which means the model is neither scaled up or down.
- Do one of the following:
- If you want the model to appear smaller, enter a value between 0 and 1. For example, to make the model half of its original dimensions, enter 0.5.
- If you want the model to appear bigger, enter a value above 1. For example, to make the model twice its original dimensions, enter 2.
-
Click on the OK button.
The model's new scale factor is applied to all its instances in the project. If the model is currently visible in the Stage or Camera view, its size will update to match the new scale factor.