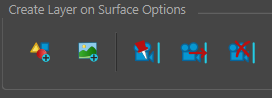
Create Layers on Surfaces
In Storyboard, you can create a  vector or
  bitmap drawing on the surface of a 3D model. The new layer will be positioned at the point in Z-depth on which you clicked and be positioned on the same plane of the 3D surface. In order to apply
 ![]() Create Layers on Surface, you will need to be in the Camera or Stage view.
Create Layers on Surface, you will need to be in the Camera or Stage view.
-
In the Tools toolbar, select the
 Create Layers on Surface tool.
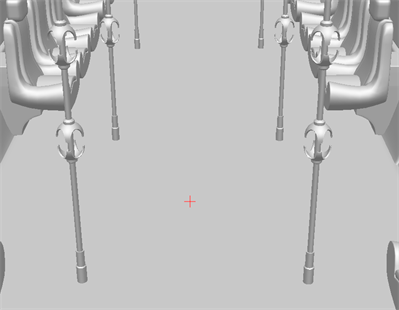
A red crosshair appears in the Camera or Stage view.
-
In the Tool Properties, select a layer type:
 Vector or
  Bitmap.
 -
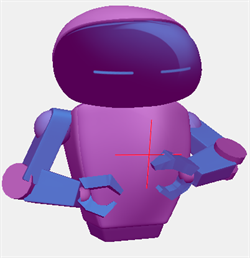
In the Camera view, move the crosshair around to see where it is possible to create a 2D Layer.
By clicking and dragging the cursor, a 12-Field Grid will appear.
-
Use the Left and Right arrow keys to cycle between Alignment modes.
-
When you are satisfied with the position, release the mouse button.

Once you release your mouse, a new layer will appear in the layer view aligned with the 3D model.

To create the layer and initially parent the 2D drawing to the 3D model, hold Ctrl/Apple when releasing the mouse. If the 2D drawing is parented, it will appear beneath the 3D Layer in the Layer view. When the 3D model is transformed, the 2D drawing will be transformed with the 3D model.
-
 TIP You can also Create a Layer on Surface on a 2D drawing.NOTE You can parent a 2D drawing to a 3D object using Ctrl. You cannot parent a 2D drawing to another 2D drawing.
When the Create Layers on Surface tool is selected, a red crosshair will appear in the Stage and Camera view. The crosshair will show the plane at the origin of the 2D layer that will be created on the surface of the 3D model.
When you click and drag your cursor in this mode, a 12-Field Grid will appear and align to the plane. The 2D drawing can now be applied to a plane with a rotation up to 60 degrees from the Camera view plane.
By holding Alt, a blue line will appear perpendicular to the current plane. While holding Alt, the red crosshair will move along the blue perpendicular line, allowing you to create the layer at the same orientation but at a defined distance away from the model. This is particularly useful for creating layers on a surface above the model in order to avoid clipping into that model with the drawing.
When dragging the plane in the Camera or Stage view, the creation of a new layer can be cancelled by pressing Esc. This will cancel the current operation and no new layer will be created when the mouse button is released.
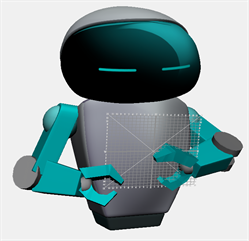
Once the layer is aligned to the surface, the layer will retain the alignment information. You can activate the
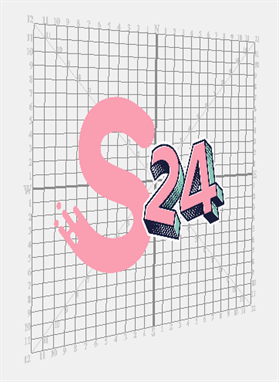
 12-Field Grid and draw on your new plane with either a brush or pencil tool.
In the example below, the Storyboard Pro logo has been pasted onto the 12-Field Grid that has been set using Align to Surface.
The orientation of the plane being created will depend on the Alignment mode selected. There are three alignment modes that can be selected.
The three Alignment modes are the following:

Align Layer to Surface 
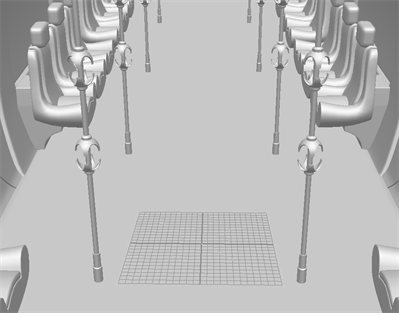
The Align Layer to Surface mode will orient the 2D plane based on the geometry of the 3D model. In this mode the red crosshair and 12-Field Grid will reposition itself everytime it translates over a surface with a different orientation.
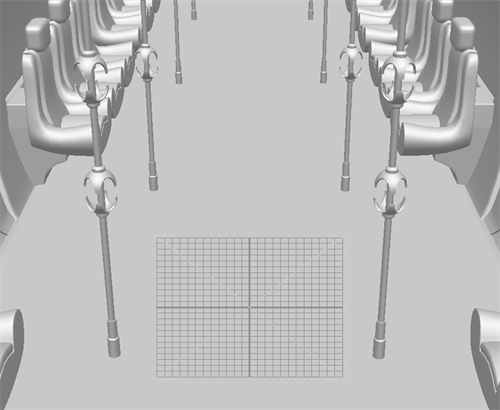
In the example below, the 12-Field Grid is aligned with the surface of the floor of the 3D model.
Align Layer to View 
The Align Layer to View mode will always orient the plane to be parallel to the Camera view. If 3D models are on an angle or not parallel to the camera, the red crosshair and 12-Field Grid will be occluded by the model. This will show where the plane will intersect with the 3D model depending on the depth of the plane relative to the model.

In the example below, the camera has a slight tilt down. The 12-Field Grid is parallel to the camera and is tilted back along the X-axis towards the camera.
Align Layer Vertically 
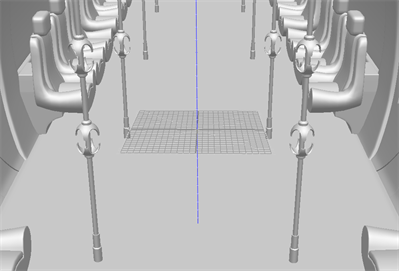
The Align Layer Vertically will create an alignment that is perpendicular to the ground. It will appear perpendicular at a 90 degree angle relative to the ground of the 3D model. When the camera is reoriented, the 12-Field Grid will distort to match the perspective of the 3D model relative to the camera, based on its placement perpendicular to the floor.
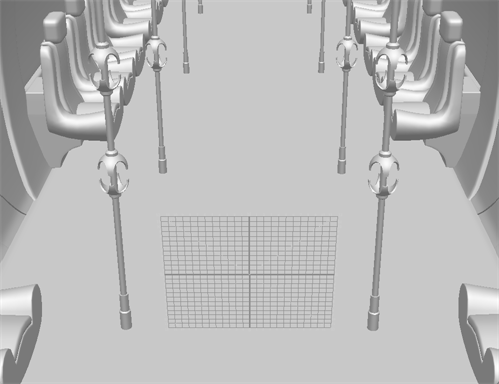
In the example below, the 12-Field Grid is perpendicular to the floor of the 3D model. The grid is aligned with the perspective in the model.
Note that the 12-Field Grid is aligned with the poles on either side adapting to the perspective of the scene.
If 3D models are on an angle or not parallel to the camera, the red crosshair and 12-Field Grid will be occluded by the model. This will show where the plane will intersect with the 3D model depending on the depth of the plane relative to the model.