T-SBADV-009-003
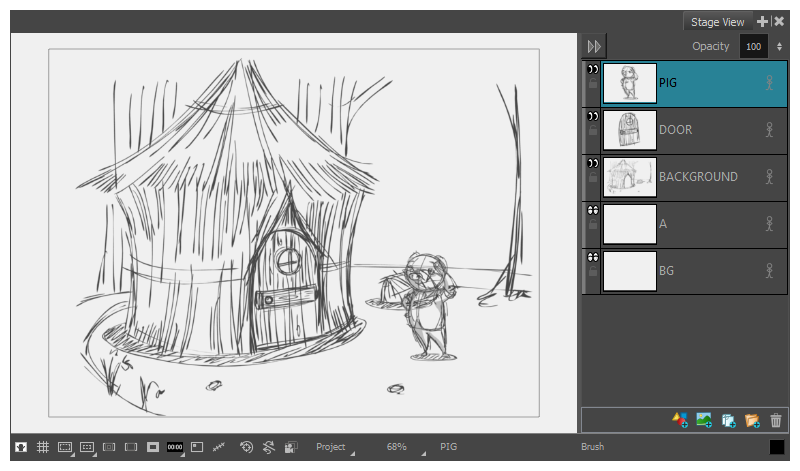
If you have bitmap images that you want to use for a panel, you can import them as layers inside the panel. You can them use them as they are in the panel, or use them as references, draw over them in a different layer, then hide or discard them. This is typically useful if you have backgrounds and overlays ready for the panel you are working on, or if you want to use a reference image to help you draw.
The following image formats can be imported in Storyboard Pro:
- Portable Network Graphics (.png)
- Photoshop Document (.psd, .psb)
- Truevision Targa Image (.tga)
- Tagged Image File Format (.tif)
- Bitmap Image (.bmp)
- Jpeg (.jpg, .jpe, .jpeg)
- Sillicon Graphics Image (.sgi)
- Toon Boom Vector Graphic (.tvg)
- Toon Boom Scan (.scan)
- Toon Boom Optimized Bitmap (.opt)
- Y'UV frame (.yuv)
- PAL frame (.pal)
- By default, images are imported as bitmap textures. It is possible to vectorize images upon import—see Vectorizing Images on Import .
- Storyboard Pro does not support import of 8-bit CMYK or 16-bit RGB or CMYK format PSD files. You can currently import only 8-bit RGBA format PSD files.
- In the Thumbnails or Timeline view, select the panel to which you want to import images.
- In the top menu, select File > Import > Images as Layers.
The Choose Image Files dialog box opens.
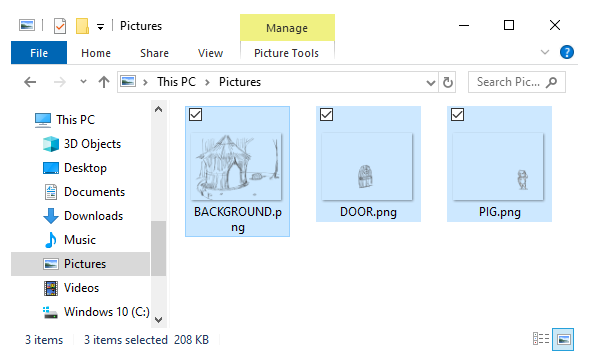
- Browse to the directory containing the images to import.
-
Select the images to import.
TIPYou can select multiple files by doing one of the following:
- While pressing Ctrl (Windows/Linux) or ⌘ (macOS), click on each file you want to select.
- While pressing Shift, click on the first file you want to select, then one the last file you want to select to select every file in-between.
-
Click Open.
-
If you selected a Photoshop Document (.psd) file with multiple layers, a message will appear giving you the option to import each layer separately.
- Click Yes to import each layer in the document as its own layer in the panel.
- Click No to import the entire document as a single layer in the panel.
A layer is created in your panel, containing the imported image. If you selected more than one image, each image will be imported into its own layer, in alphanumerical order.
- Open an Explorer (Windows) or Finder (macOS) window.
- Browse to the location of the images you want to import.
-
Select all the images you want to import.
 TIP
TIPYou can select multiple files by doing one of the following:
- While pressing Ctrl (Windows/Linux) or ⌘ (macOS), click on each file you want to select.
- While pressing Shift, click on the first file you want to select, then one the last file you want to select to select every file in-between.
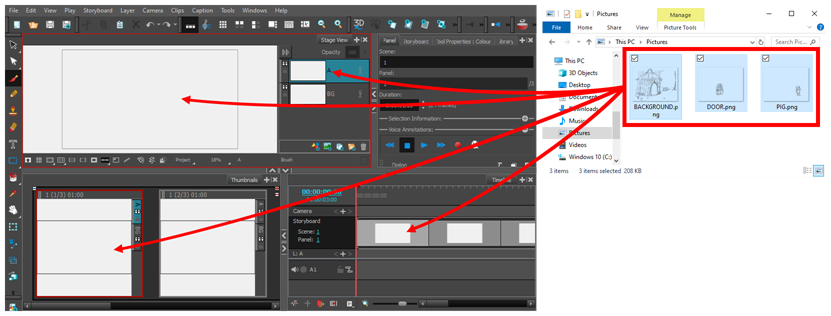
- Make sure that both the Storyboard Pro window and the Explorer or Finder window are visible.
- In the Thumbnails or Timeline view, do at least one of the following:
- Select the panel to which you want to import images.
- Scroll to the panel to which you want to import images.
- In the Explorer or Finder window, click and drag on one of the selected files, then:
- To import the images into the current panel, drop the selected files in the Stage View, the Camera View or the Layers view.
To import the images into any other panel, drop the selected files over the target panel in the Thumbnails or Timeline view.
NOTE The thumbnail for the target panel may take a few seconds to update.
The image will be imported into a layer in the target panel, on top of all the other layers in that panel.