T-SBFND-009-005
The position of the camera keyframes is set in much the same way as the Static Camera, using the Camera tool in the Stage view. You must do this for every keyframe you created, so the camera moves from one keyframe to the next when played back.
- Select the Camera tool by doing one of the following:
- From the Tools toolbar, select the
Camera tool.
- From the top menu, select Tools > Camera.
- Do one of the following:
- In the Camera track of the Timeline view, select the camera keyframe you want to modify.
- In the Stage or Camera view, zoom out to see all of the camera frames. Then, select the camera frame you want to modify by clicking on its edge or its centre point.
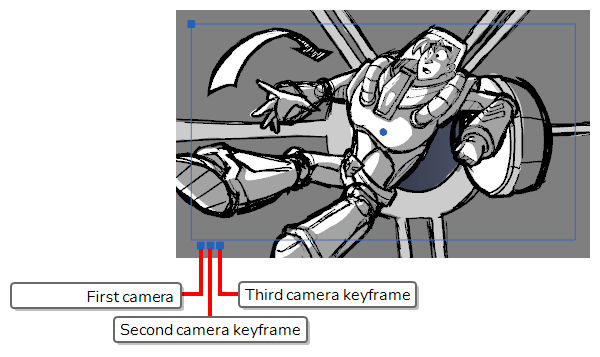
TIPEven if your camera frames are in the same position, you can still select a specific one in the Stage or Camera view. Just below the bottom-left corner of the camera frames, you will find blue square-shaped dots. Each of these dots can be clicked on to select a specific camera frame. If two or more camera keyframes are in the same position, the order of these dots will represent their relative position on the timeline. The leftmost dot can be used to select the first camera keyframe, the second leftmost dot can be used to select the second camera keyframe, etc.

- Use one of the following methods to modify the camera frame:
- Move: Move the mouse cursor over the edge or the centre point of the camera frame until the mouse cursor becomes
 , then click and drag the camera frame to move it.
 - Truck In or Truck Out: Move the mouse cursor over the point in the top-left corner of the camera frame until the mouse cursor becomes
 , then click and drag this corner to shrink or stretch the camera frame. Shrinking the camera frame will make it zoom in, and stretching it will make it zoom out.
 - Rotate: Move the mouse cursor just outside of one of the corners of the camera frame until the mouse cursor becomes
 , then click and drag the corner in either direction to rotate the camera frame clockwise or counterclockwise.


