Automatically Inserting Images as Acts, Scenes, Panels and Layers
When using the Import Images as Scenes dialog, it is possible to automatically insert each image you import into the right act, sequence, scene and panel. You can do this to generate new acts, scenes and panels from images, or to automatically inset images in the existing act, scene and panel. It is even possible to insert multiple images in the same
This can be accomplished by naming your images using the following pattern:
<ProjectName>-A#-S#-E#-P#-L<LayerName>.<extension>
Here is how the pattern works:
- <ProjectName>: This is the name of the project. This string will not be inserted into the Storyboard Pro project, but it is mandatory.
- A: Indicates the act the image will be placed in. Replace the
#with the number of the act. - S: Indicates the scene the image will be placed in. Replace the
#with the number or name of the scene the image should be inserted to. - E: This parameter is optional. If you want to insert the same image into a series of consecutive scenes, you can use this parameter to indicate the last scene in which to include the image. The image will be inserted in every scene starting with the one specified by the S parameter and ending with the one specified by the E parameter. Replace the
#with the number or name of the last scene this image should be inserted in. - P: This parameter is optional. It indicates which panel the image will be placed in. Replace the
#with the number of the panel in the scene. - L: This parameter is optional. It indicates the name of the layer the image will be placed in. Replace
<LayerName>with the number of the layer in the scene.
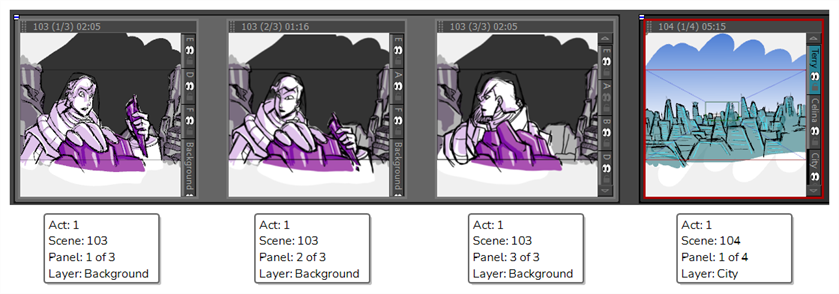
For example, if you have images named as follows:
- RocketRodeo-A1-S103-P1-LBackground.png
- RocketRodeo-A1-S103-P2-LBackground.png
- RocketRodeo-A1-S103-P3-LBackground.png
- RocketRodeo-A1-S104-P1-LCity.png
Importing them as scenes will results in the following:
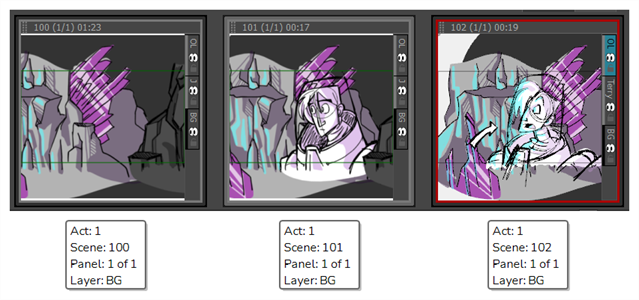
By using the E parameter, you can insert a single image into several scenes. For example, if you give an image the following name:
- RocketRodeo-A1-S100-E102-P1-LBG.png
Importing it will result in the following:
- Make sure your images are named using the naming pattern explained above.
- In the top menu, select File > Import > Images as Scenes.
- Browse to the directory where your images are stored.
- Select all the images you want to import.
- Click on Open.
-
If any of the selected images do not match the right pattern, the following dialog will appear:
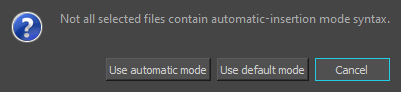
Do one of the following:
- If all of your images are supposed to match the pattern and you think this is a mistake, click on Cancel and go through the name of each of your images to make sure none of them have a typo.
- Otherwise, click Use automatic mode. Images that do not fit the naming pattern will be inserted as scenes at the end of the project.
-
If any of the selected images do not match an existing scene or an existing panel, the following message will appear:
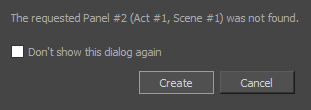
By default, this dialog will appear for each image that will generate a new scene or a new panel. Depending on the situation, do one of the following:
- If you are importing new images into a blank project, check the Don't show this dialog again checkbox, then click on Create.
- If you are importing new images into an existing project and you expect there to be a few new scenes or panels, click Create.
- If you think this is a mistake, click Cancel. Then go through the name of each of your images to make sure they do not contain a typo.
NOTE If you check the Don't show this dialog again checkbox, this will be saved to your user preferences and Storyboard Pro will always create panels or scenes for images that don't match any existing panel or scene. -
If any of the selected images match the name of an existing layer, the following message will appear:
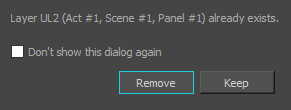
By default, this dialog will appear for each image that matches an existing layer in your project. Depending on the situation, do one of the following:
- If you don't want to see this dialog each time an image you import matches an existing layer in your project, check the Don't show this dialog again checkbox.
- If you want to add the image as a new layer and keep the one with a matching name, click on Keep. The new image will be added, but will be renamed.
- If you want the image to replace the existing layer, click on Remove. The existing layer will be removed and the image will be added as a new layer.
NOTE If you check the Don't show this dialog again checkbox, the choice you made will be saved in your user preferences and Storyboard Pro will always use this choice every time this situation occurs.The selected images will be inserted into their corresponding act, scene, panel and layers.