Each panel in your storyboard can be composed of one or several drawing layers. Those layers are composed together to make the drawing in each panel.
Layer Types
Storyboard Pro supports four types of layers: Vector drawing layers, bitmap drawing layers, 3D layers and groups.
- Vector Layers: Vector drawings are made of points and curves that compose the contours of the shapes of the artwork, along with the colour or textures these shapes are filled with. Hence, the artwork in vector layers can be scaled up and zoomed in without losing quality, unless they contain a texture.
- Bitmap Layers: Bitmap drawings are composed of a grid of pixels, which are small points that each have a single solid colour. Bitmap drawing tools allow you to lay on brush strokes onto a single flat canvas, and to tweak your artwork by the pixel if needed.
- 3D Layers: When you import a 3D model into your library, adding it to a panel will store the model into a 3D layer. You can then manipulate and animate the 3D model, just like you can with a drawing layer.
- Group: A group can contain several layers of any type. Just like you can transform and animate a layer, you can also transform and animate a group. Transformations and animations applied to a group will affect every layer inside the group simultaneously.
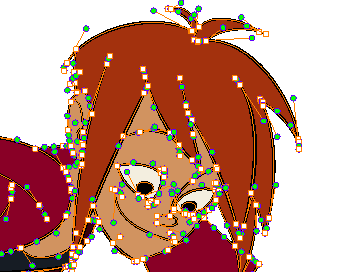
When drawing on a vector layer, each drawing stroke and pencil line is a separate object which can be manipulated individually. You can select single drawing strokes, then move them around and transform them, even if drawing strokes were applied over them. Additionally, because drawing strokes are made of points and curves, it is possible to edit their shape, making it easy to make corrections and changes to your artwork.
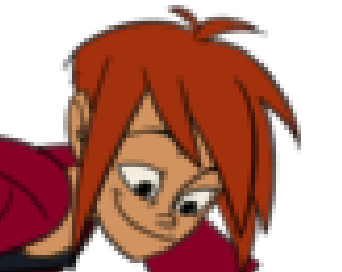
When you draw on a bitmap layer, each brush or pencil stroke is composited into the canvas, so it remains a single drawing that can only be painted or erased upon, but which does not allow you to tweak individual parts of it.
Bitmap artwork can only be scaled up or zoomed in on as much as their pixel density allows without losing picture quality. By default, bitmap artwork has a pixel density of 100%, which is only enough to display the artwork without zooming in on it or scaling it up, otherwise Storyboard Pro must generate new pixels within the artwork, which is liable to make it look blurry or pixelated.
Hence, you might want to set the required pixel density for your bitmap artwork, based on whether you'll need to zoom on it or scale it up, before you start drawing on a bitmap layer.
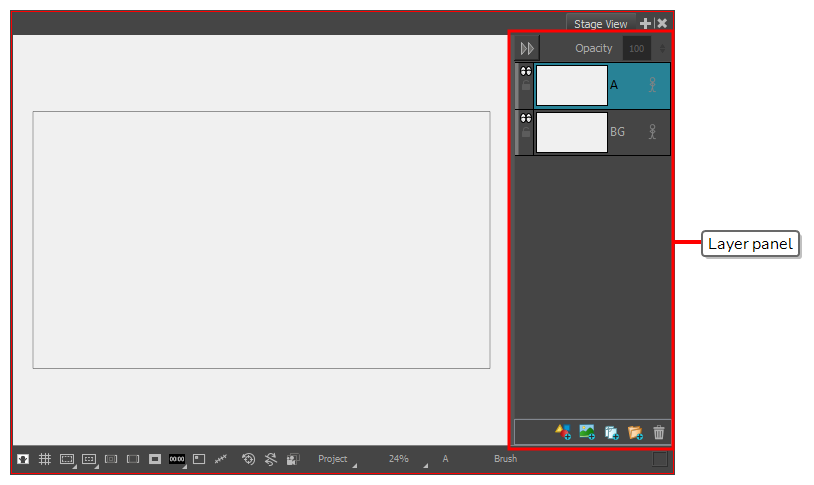
The go-to way of selecting and managing layers in a panel is to use the Layer panel, which is, by default, in the right section of the Stage and Camera views.
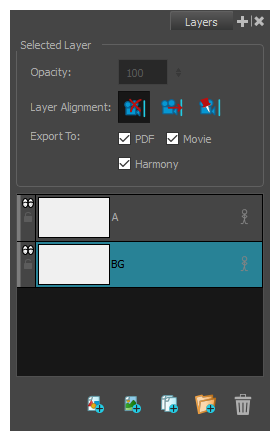
However, it is also possible to add the Layers view to your workspace, which works the same way. You can then hide the Layer panel by clicking on its ![]() Collapse button in its top-left corner, leaving more space to work in the Stage and Camera views.
Collapse button in its top-left corner, leaving more space to work in the Stage and Camera views.
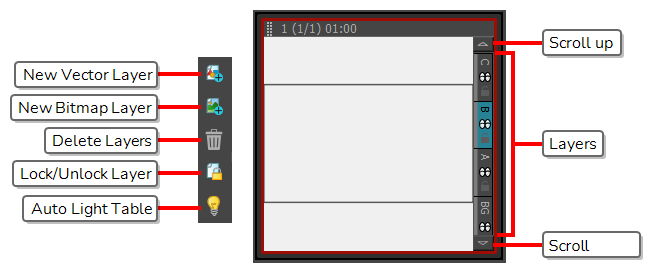
You can also manage layers using the Thumbnails view. If the size of the Thumbnails view is big enough, each panel in it will have a vertical list of layers on its right edge, which allows you to scroll through and select layers. Left of the Thumbnails view, under the Tools toolbar, is a Layer toolbar, which allows you to add and remove layers to the selected panel.
Adding Layers
By default, a panel contains a background (BG) and a drawing layer (A), but you can add as many layers as you need to each panel in your project.
- In the Thumbnails or Timeline view, select the panel to which you want to add a new layer.
- In the Layer panel of the Stage or Camera view, the Layers view or the Thumbnails view, select the layer over which you want to create a new layer.
- Do one of the following:
- Click on the
Add Vector Layer or
Add Bitmap Layer button. These buttons are located at the bottom of the Layer panel in the Stage and Camera views, at the bottom of the Layers view and in the Layer toolbar.
- In the top menu, select Layer > New > Vector Layer or New Bitmap Layer.
Deleting Layers
You can delete layers that you do not need to avoid cluttering the layer list.
- In the Layer panel of the Stage or Camera view, the Layers view or the Thumbnails view, select the layer you want to delete.
- Do one of the following:
- Click on the
Delete Selected Layers button. This button is located at the bottom of the Layer panel in the Stage and Camera views, at the bottom of the Layers view and in the Layer toolbar.
- Right-click the layer and select Delete Layers.
- In the top menu, select Layer > Delete Layers.
Grouping Layers
You can group your layers together to make them easier to manager, or if you want to transform and animate several layers together.
- In the Layer panel of the Stage or Camera view or in the Layers view, select at least two layers to group.
- Do one of the following:
- Click the
 Group Selected Layers button. This button can be found at the bottom of the Layer panel in the Stage or Camera view and at the bottom of the Layers view.
 - Right-click on the selection, then select Group Selected Layers.
- In the top menu, select Layer > Group Selected Layers.
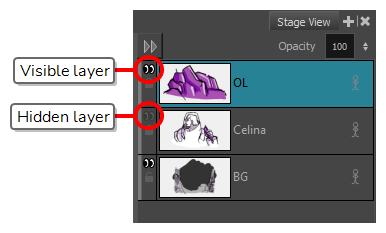
Hiding and Showing Layers
When working with many layers, you can temporarily hide certain layers to avoid cluttering the stage.
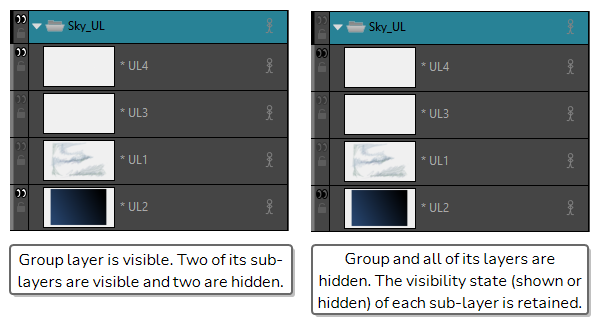
You can also hide a group. When a group is hidden, all of the layers it contains appear hidden, but their individual visibility state is preserved. Therefore, if you hide only some layers inside a group, hide the group itself, then unhide the group, the layers that were individually hidden will remain hidden and the ones that were visible will be visible again.
- Do one of the following:
- In the Layer panel or the Layers view, click the
 Show/Hide Layer icon just left of the layer.
 - In the Thumbnails view, click on the Show/Hide Layer icon just beneath the layer's name.
- In the Layer panel, the Layers view or the Thumbnails view, right-click on the layer and select Show/Hide Layers
- In the Layer panel, the Layers view or the Thumbnails view, select the layer, then select Layer > Show/Hide Layers from the top menu.
- Do one of the following:
- In the Thumbnails view, ALT+Click the eyes icon
beneath the layer's name to Show/Hide multiple layers.
- In the Layer panel, the Layers view or the Thumbnails view, right-click on the layer and select Show/Hide Layer
- ALT+Click the eyes icon
- In one of the following locations:
- Layer panel of the Camera or Stage view
- Layer view
- Thumbnail view
Alt + click the Show/Hide ![]() icon on the layer you wish to keep visible.
icon on the layer you wish to keep visible.
All other layers are hidden.
For this feature to take effect, all layers except one must be hidden.
- In one of the following locations:
- Layer panel of the Camera or Stage view
- Layer view
- Thumbnail view
Alt + click the Show/Hide ![]() icon on the only visible layer.
icon on the only visible layer.
All layers become visible.
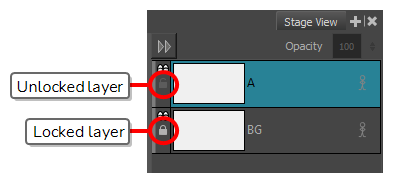
Locking and Unlocking Layers
You can lock a selected layer to protect any objects on it from being changed. Once locked, you can unlock the layer to make changes to any objects on it.
- Do one of the following:
- In the Layer panel or the Layers view, click the
 Lock/Unlock icon just left of the layer.
 - In the Thumbnails view, click on the Lock/Unlock icon just beneath the layer name.
- In the Layer panel, the Layers view or the Thumbnails view, select the layer. Then, do one of the following:
- From the top menu, select Layer > Lock/Unlock Layers.
- In the Layer toolbar, click on the
 Lock/Unlock Layers button.
 - Use the keyboard shortcut Alt + L.
- In one of the following locations:
- Layer panel of the Camera or Stage view
- Layer view
- Thumbnail view
Alt + click the ![]() Lock/Unlock icon on the layer you wish to keep unlocked.
Lock/Unlock icon on the layer you wish to keep unlocked.
All other layers become locked.
For this feature to take effect, all layers except one must be locked.
- In one of the following locations:
- Layer panel of the Camera or Stage view
- Layer view
- Thumbnail view
Alt + click the ![]() Lock/Unlock icon on the only unlocked layer.
Lock/Unlock icon on the only unlocked layer.
All layers become unlocked.