Adding Nodes to Workflows
Workflows are made up of nodes, representing processes, which will eventually turn into tasks.
When renaming nodes, DO NOT USE SPACES. USE UNDERSCORES. Spaces in process names will cause issues when pushing assets to Toon Boom Harmony.
Since nodes can be connected in a non-linear manner, the order of the tasks in the dashboard will be based on the X-axis value of the node. Leftmost nodes will be shown first, and rightmost nodes will be shown last. Even if nodes are connected in different flows, it is the X-axis value that will determine the ordering.
- In the main menu, select Settings.

The Project Settings are displayed.
- Select the Workflows option.
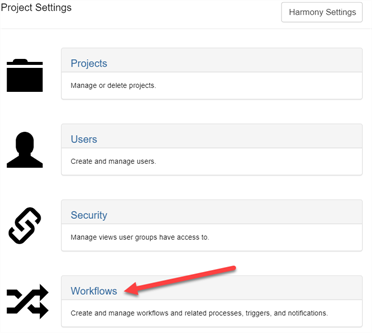
The Workflow tab opens.
- In the Workflow list, select the desired workflow.
The workflow appears in the editor.
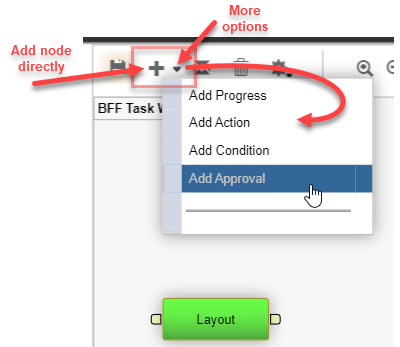
- There are 3 ways that you can add a node to your workflow:
- Click on the Add
 icon add a new Manual node to the workflow.
- Click on the Add
- Click and hold the down arrow next to the Add
The node type can be changed at any time from the node's properties panel—see About Nodes.
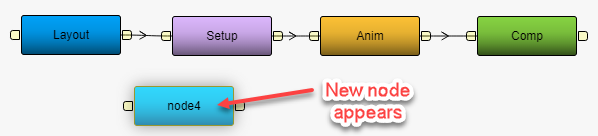
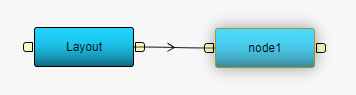
- Click and drag the outport of an existing node.
When you release the wire a newly connected Manual node appears.
- Right-click on the node and select Rename Node.
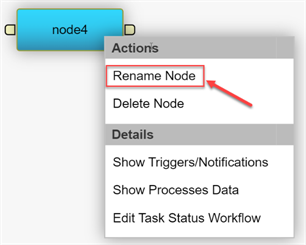
An editable field appears directly on the node.
- Type the new name. DO NOT USE SPACES. USE UNDERSCORES.
- Press Enter to validate the name.
- Click on the Save
 icon to save changes. The Save icon has an orange glow
 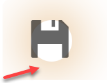 whenever a change has been made to a workflow.