About Harmony Synchronization
You can import and synchronize scenes between Producer and Harmony as long as the Environment and Job structure is the same.
To create a new environment in Producer and add it to the Harmony server you must follow these steps:
- In the main menu, select Production.
- In the Environments drop-down menu, select All Environments.
- In the Production tab toolbar, click on the Add Environment button.
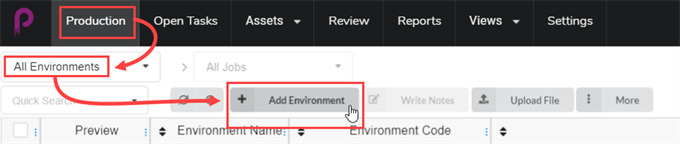
The Create Environment window opens.
- In the Name field, type in the name of the new environment.
- In the Description field, optionally add a description of the new environment.
- Check the Create in Harmony checkbox.

- Click in the Environment field. The environment name is automatically regenerated. If there are spaces in the name, they will automatically be replaced by underscores. Harmony doesn’t allow spaces in names.
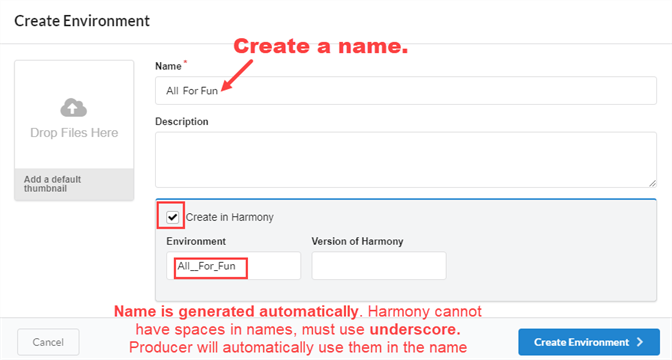
- In the Version of Harmony field, you can optionally enter the version of Harmony being used.
- In the Add a default thumbnail box, you can optionally drag and drop a file that will be used at the environment's Preview image. This can also be done at a later time.
- Click on the Create Environment button.
The new environment will be sent to the render queue.
- Go back to the Production > All Environments.
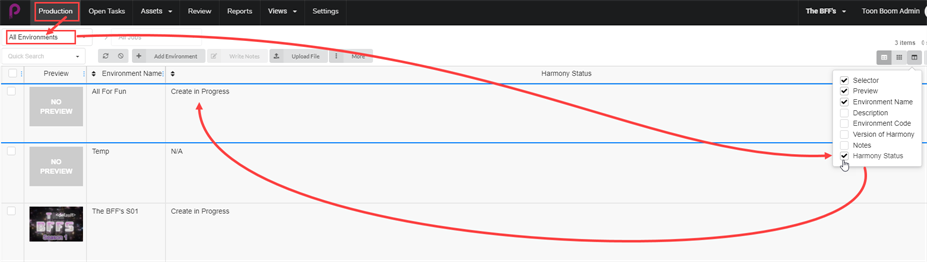
- Go to the Column Selector
 and check the Harmony Status box.
The Harmony Status indicates Create in Progress.
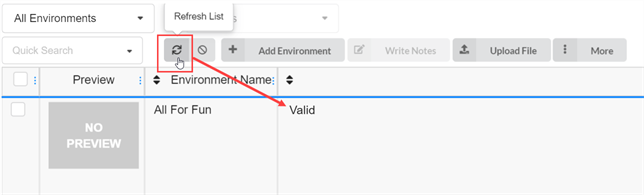
- Hit the Refresh button.
The Harmony Status is updated to Vaild. The new environment now appears in the Harmony Server or will remain in the queue until there is a proper connection to the Harmony Server.
- In the main menu, select Production.
- From the Environment drop-down menu, select the environment in which you’d like to add the jobs.
- In the Production tab toolbar, click on the Add Jobs button.

The Create Job window opens.
- In the Number of jobs field, enter the number of jobs you wish to create.
- In the Start Date field, click on the calendar icon to select a start date for the first job.
- If you entered a value greater than one for the Number of jobs, in the Days between jobs field, enter the number of days you would like in the production schedule between jobs. This will affect the production schedule Gantt chart.
- In the Name field, type in the name of the first job.
NOTEIf you create more than one job, it is important to add a number to the end of the name, as the other jobs will use the same name plus subsequent number.
- In the Description field, optionally enter a description of the job.
- In the Job Workflow and Scene Workflow drop-down menus, find the job and scene workflows that you would like to associate with the new jobs.
- Check the Create in Harmony checkbox.
- Click in the Job field. The job name is automatically generated from the one entered into the Name field. Spaces will be replaced by underscores.
- Optionally, in the Version of Harmony field, enter the version number of Harmony being used.
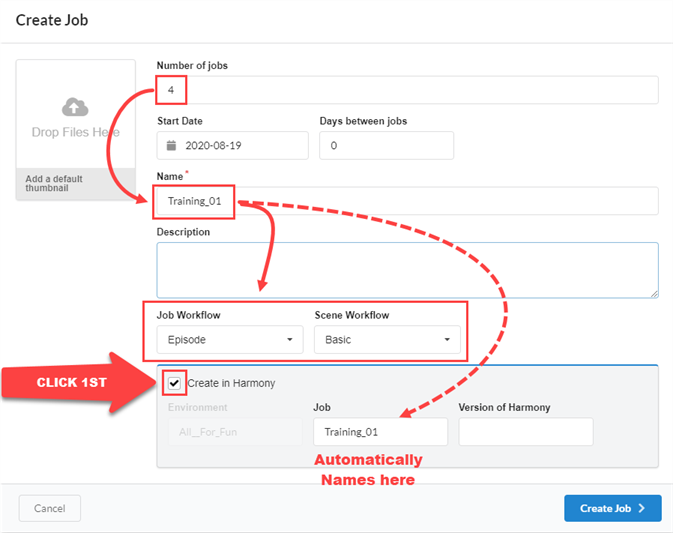
- Click Create Job.
The new Job is sent to the render queue.
- Go back to the Production page, selected environment, then to All Jobs.
- Go to the Column Selector and check the Harmony Status box.
The status indicates Create in Progress. All the jobs have a sequential numerical order.
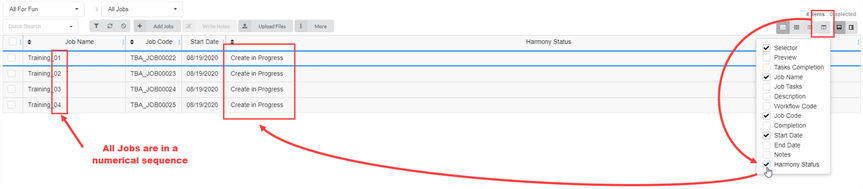
- Hit the Refresh button.
The Harmony Status is updated to Valid. The jobs appear in the Harmony Server or will remain in the queue until there is a proper connection to the Harmony Server.
- In the main menu, select Production.
- From the Environment drop-down menu, select the environment in which you’d like to add the jobs.
- From the Job drop-down menu, select the job in which you’d like to add the scenes.
- In the Production tab toolbar, click on the Add Scenes button.

The Create Scene window opens.
- In the Number of scenes field, enter the number of scenes you wish to create.
- In the Name field, type in the name of the first scene.
NOTEIf you create more than one scene, it is important to add a number to the end of the name, as the other scenes will use the same name plus subsequent number.
- In the Workflow drop-down menu, select the workflow you would like to associate with the new scenes.
- In the Number of frames field, enter a numerical value for the number of frames that you would like automatically created for each scene.
- In the Priority drop-down menu, select the priority (No priority, 1 - Critical to 5 - Low) for the new scenes.
- Check the Create in Harmony Server checkbox.
- Click in the Scene field. The scene name is automatically generated from the one entered into the Name field. Spaces will be replaced by underscores.
- Optionally, in the Version of Harmony field, enter the version number of Harmony being used.
- Optionally, in the Description field, enter a description of the scene.
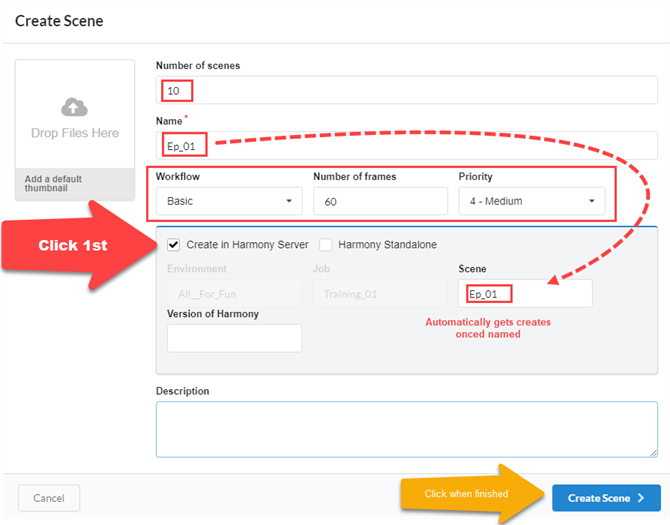
- Click Create Scene.
The new Scene is sent to the render queue.
- Go back to the Production page, selected environment and job.
- If the Harmony Status column is not displayed, go to the Column Selector and check the Harmony Status box.
The status indicates Create in Progress. All the scene names have a sequential numerical order.
- Hit the Refresh button.
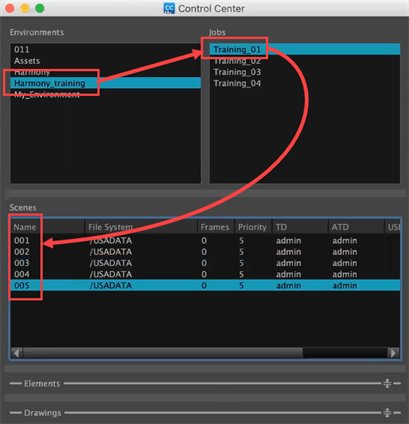
The Harmony Status is updated to Valid. The scenes appear in the Harmony Server or will remain in the queue until there is a proper connection to the Harmony Server.
Environment and job names must match in both Harmony and Producer for this process to work.
- In your Harmony Server, create your scenes.
- Once the scenes are created in Harmony, go back to Producer and in the main menu, select Production.
- In the Environment and Job drop-down menus, select the environment and job you would like to populate with scenes created in Harmony.
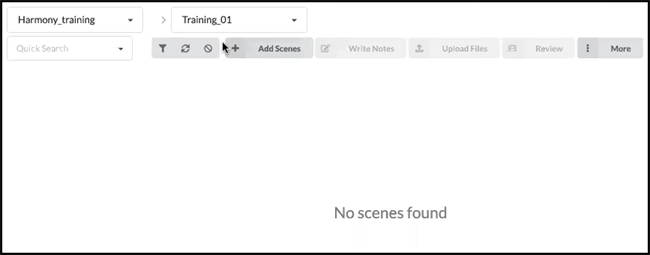
No scenes will be visible yet.
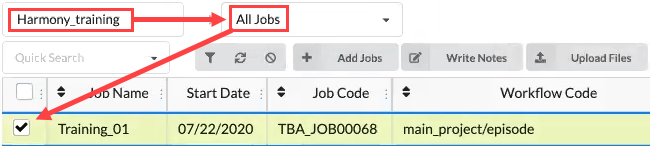
- In the Jobs drop-down menu, select All Jobs.
- From the list of jobs that appear, select the jobs for which created scenes in Harmony by checking their checkboxes.
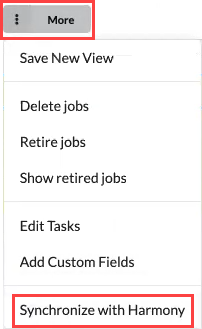
- In the Production tab toolbar, select More > Synchronize with Harmony.
The Synchronize with Harmony dialog box opens.
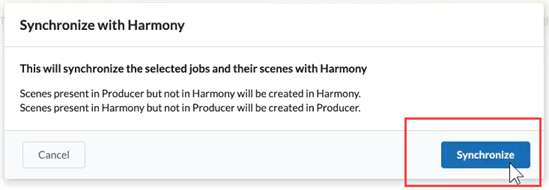
- Click on the Synchronize button.
The scenes appear in Producer.
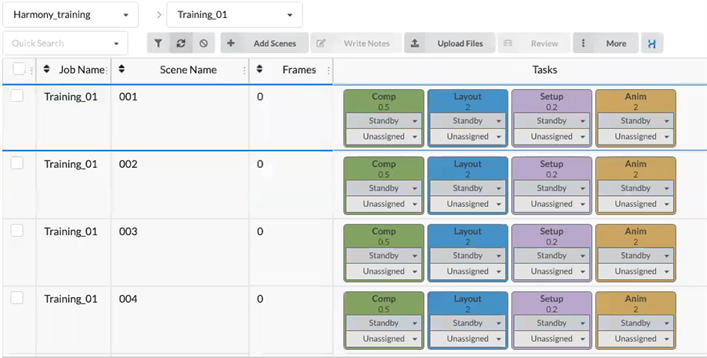
NOTESyncing with Harmony will also update the frame counts to those set in Harmony.
- In your Environment/Jobs where you would like to delete a scene(s), check the box on the left column. Then go to the More tab and select Delete Scenes.
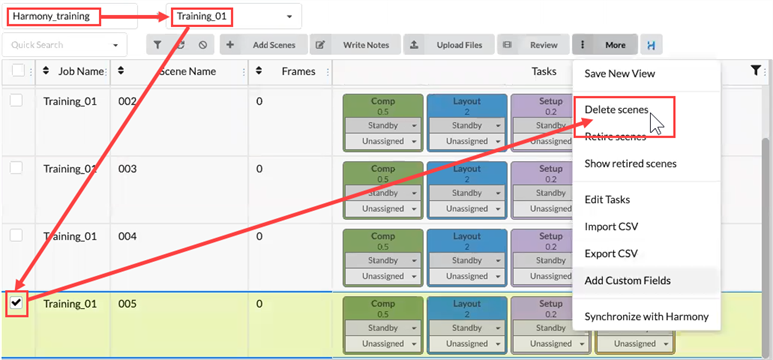
The Delete scenes dialog box opens.
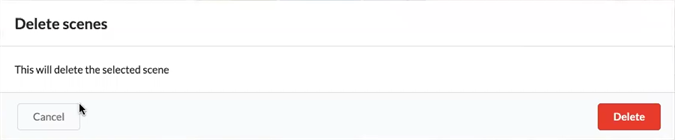
- Select Delete.
The Delete scenes WARNING window opens. It tells you that the Producer scene and the external scene in Harmony will be deleted.
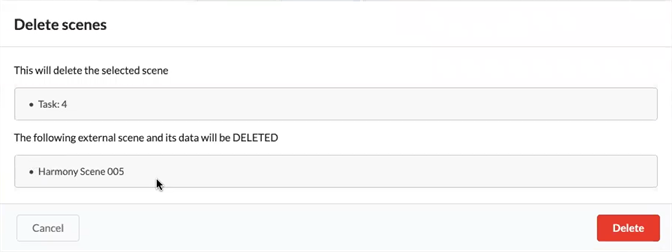
- Select Delete.
The selected scenes are deleted from both Harmony and Producer.