Mapping the Lip-Sync Detection
Harmony can automatically map drawings in an element to the mouth chart you have generated for a sound. This can save time when you are lip-synching a voice track.
In the Lip-Sync Mapping dialog box, you can identify each lip drawing of a character. Harmony then automatically labels all of the cells in the character's element with the appropriate name.
To automatically map lip-sync drawings to a mouth layer:
|
1.
|
To open the Lip-Sync Mapping dialog box, do one of the following: |
|
‣
|
In the Timeline view,right-click on any cell in the sound sample layer and select Lip-Sync > Map Lip-Sync. |
|
‣
|
From the top menu, select Animation > Lip-Sync > Map Lip-Sync.
|
|
‣
|
In the Timeline view, select your sound layer and in the Layer Properties view, click Map. |
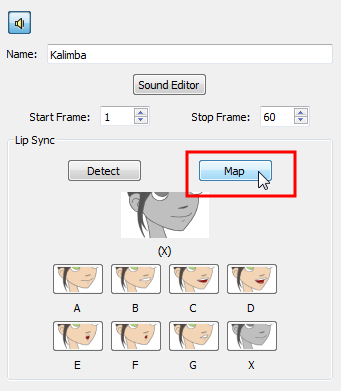
The Lip-Sync Mapping dialog box opens.
|
2.
|
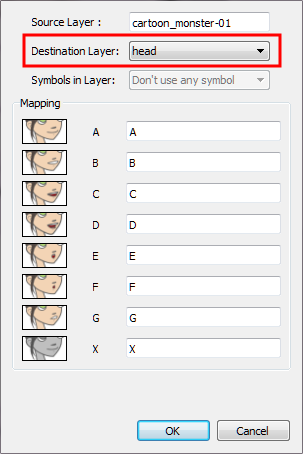
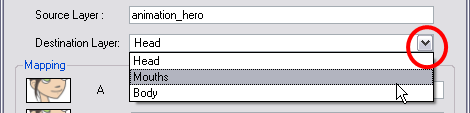
From the Destination Layer drop-down list, select the layer that contains the mouth positions for the character's voice track. |
|
3.
|
If the selected layer contains symbols, you can map the lip-sync using drawings located directly on the layer or use the symbol's frames. In the Symbol Layer field select Don't Use Any Symbol if you want to use the drawings or select the desired symbol from the drop-down menu. |
|
4.
|
In the Mapping section, type the drawing name or Symbol frames in the field to the right of the phoneme it represents. If your drawings are already named with the phoneme letters, you do not have to do anything. |
|
6.
|
Press the Play  button in the Playback toolbar to see and hear the results in the Camera view. To play back your scene with sound, enable the Sound button in the Playback toolbar to see and hear the results in the Camera view. To play back your scene with sound, enable the Sound  button in the Playback toolbar. button in the Playback toolbar. |
Related Topics