Installing a Strip of Black Tape on the ADF Paper Path
When you scan drawings with the Scan module, drawings on paper become digital images in the Harmony system. These digital images must be properly aligned during the scan process to ensure that the animation flows smoothly from frame to frame in the final output.
| • | If you want to scan many drawings using the ADF chute on your scanner, you must use the Optical Registration option in the Scan module to automate the alignment of your drawings. |
When you enable Optical Registration, the Scan module tries to identify the peg holes to align the drawings.
You can also use the Optical Registration option if you want to manually scan a drawing on the flatbed part of the scanner.
| • | If you have a peg bar attached to your scanner, you don't have to use optical registration because the drawings will be aligned by the peg bar. However, you will have to scan your drawings one at a time. |
Peg holes in your drawings must be filled with black in the final, scanned image for the optical registration to be able to locate them. Your scanner must be modified prior to scanning to ensure black peg holes appear in the scanned image.
For ADF Scanning
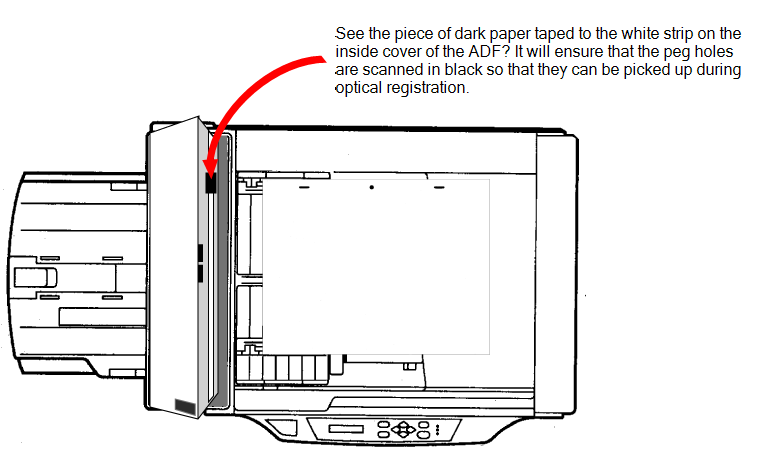
Tape a piece of dark paper to the ADF feeder in the position where the peg holes will pass as they are scanned.
If you don't place the black tape on the ADF paper path, the peg holes in the drawing pass in front of a white background. This does not provide enough contrast for the Scan module to distinguish where the peg holes are and it will not be able to register and align the autofeed drawings.
For Manual Scanning
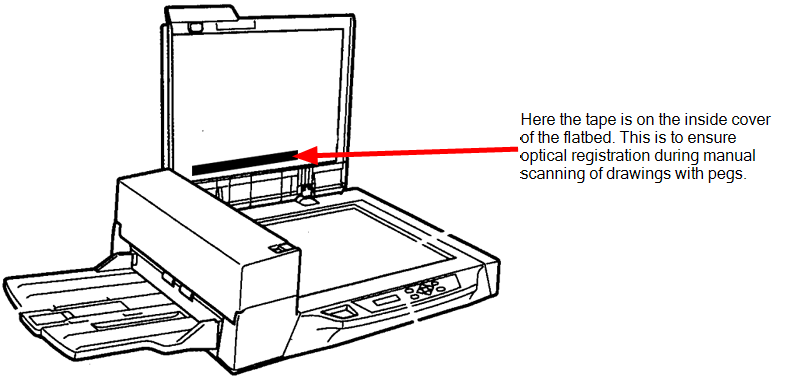
Tape a piece of dark paper to the scanner cover above the position of the peg holes.
RICOH Scanner
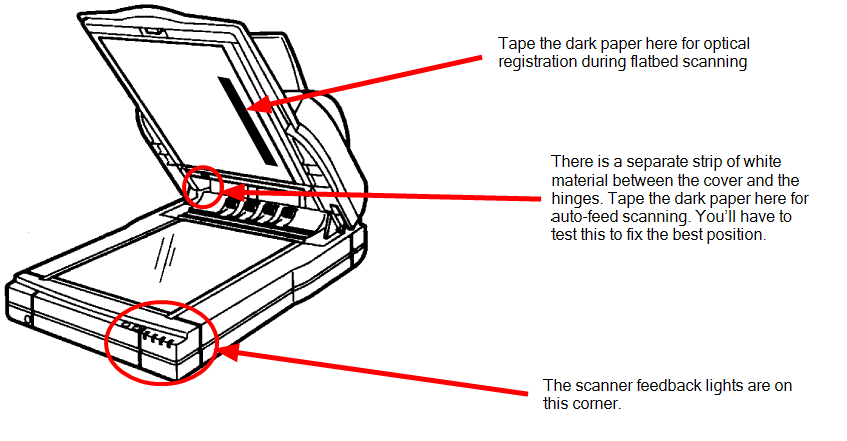
Fujitsu Scanner - ADF
Fujitsu Scanner - Cover
Before you perform this procedure, you need the following materials:
| • | A strip of black adhesive tape approximately 1.25 inches (3.5 cm) by 0.75 inches (2 cm). Black plastic electrician's tape is fine. |
| • | A sheet of drawing paper with field size and peg hole locations identical to the type that you intend to scan with the autofeeder. |
To install the tape on the ADF paper path:
| 1. | Turn off the scanner's power and open the ADF cover. |
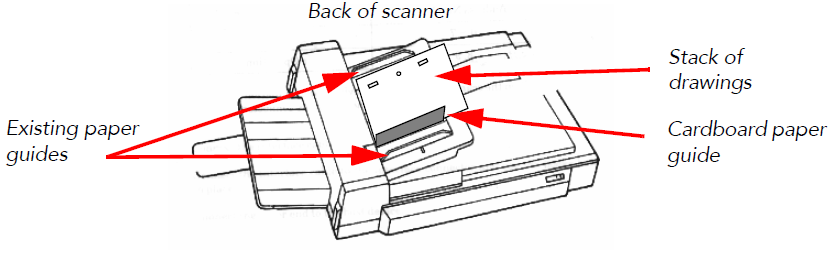
| 2. | Place the paper guides in their scanning position. This will depend on your scanner and any modifications you made to it. |
| 3. | Place the drawing paper in the paper chute with the peg holes toward the back of the scanner. |
The top edge of the paper should touch the paper guide closest to the back of the scanner.
| 4. | Slide the paper into ADF chute. |
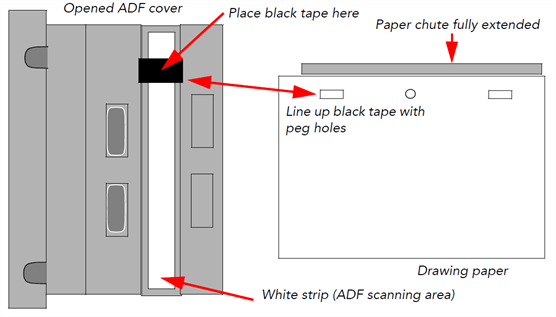
| 5. | Place the strip of black tape across the width of the white strip on the inside of the ADF cover. Use the peg holes in the drawing paper as a visual guide. |
| 6. | Close the ADF cover and scan a few test drawings to see that the Scan module can identify the peg holes. |