You can change a scene's rendering and vectorization queue priority to place it ahead of or behind other scenes. For example, if scene B comes before scene A in the queue, change the scene's priority so scene A is processed first.
If a scene was already sent to the queue, changing the priority will not affect its priority in the queue. Changes will only be applied the next time it is sent to the queue.
NOTE If you want to change a scene's priority after it has been sent to the queue, you can do so using the Change Priority button in the Queue window in the Control Center applicationModifying Render Queue Entries.
- Select a scene from the Scenes list.
- Do one of the following:
- Select Scene > Change Priority.
- Right-click and select Change Priority.
The Change Priority window opens.
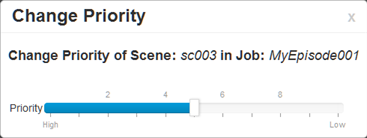
- Drag the slider to adjust the priority. 0 = the highest priority for processing through the Vectorize or Render queue and 10 = a priority of 10 is the least important. Items with higher priorities pass in front of other projects with lower priorities in the Vectorize and Render queues even if there is already a queue processing.
- Close the window.
The new scene priority appears in the Priority column of the Scenes list.