Use the Import 3D Models dialog box to import 3D models into Harmony.
- From the top menu, select File > Import > 3D Models.
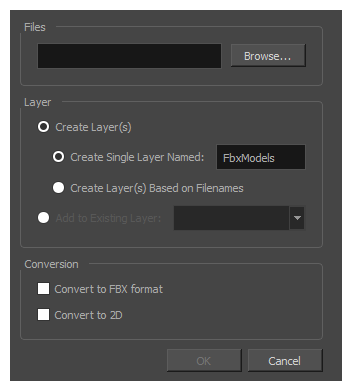
The Import 3D Models dialog box opens.
| Parameter | Description |
|
Files |
|
|
Browse |
Lets you locate and select 3D model file formats from a location on your computer or a location accessible from your computer (network, server, etc.). |
|
Layer |
|
|
Create Layers(s) |
This option is selected by default. A new layer will be created for the selected 3D model files for the import. You have two choices: |
|
Create Single Layer Named |
Creates a new layer for your 3D model that you can name. Name the new layer immediately by entering a name into the provided field. |
|
Create Layer(s) Based on Filenames |
Creates a layer based on each unique filename prefix. For example, the filenames a-1.obj, a-2.obj and b-1.obj will create layers named "a" and "b", where "a" has two 3D models and "b" has one. When creating a single layer from these three filenames, all three models will be imported to the new layer. |
|
Add to Existing Layer |
Imports the selected files to an existing layer in the scene. Once this option is selected the adjacent drop-down list becomes active. Select an existing layer name from the drop-down list. Note that if you select a vector layer, it will encapsulate the 3D model inside a symbol. |
|
Conversion |
|
|
Convert to FBX format |
|
|
Convert to 2D |
Check this option if you want to render the 3D model into a 2D image and import it into a bitmap layer instead of as a 3D object. You will be prompted to select the position and angle from which to render the 3D model, as well as to apply geometrical transformations to it before rendering it—see Render 3D Model Dialog Box. |