Peg nodes are often use in great amounts in digital animation. To make rigging and staging easier, there are methods for quickly adding pegs to a node system.
- Do one of the following:
- Right-click in the Node View and select Insert > Move > Peg.
- In the top-left corner of the Node View, open the View Menu and select Insert > Peg.
- Press Ctrl + P
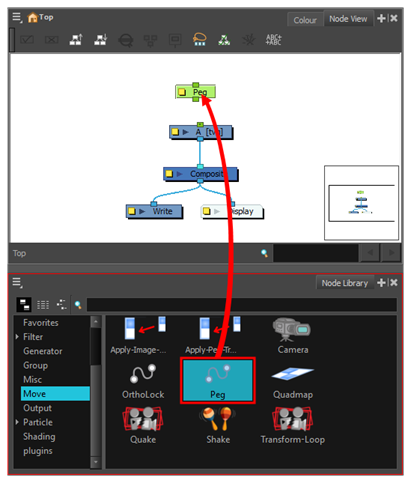
In the Node Library view, select the Move category. Then, drag and drop the Peg node into the Node View.
-
Connect the bottom port of the Peg node to the top port of the Drawing node you want it to affect by doing one of the following:
-
Click and drag on the bottom port of the peg to create a cable, and drag it to the top port of the Drawing node.
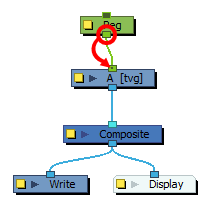
- Click on the bottom port of the peg and, while holding Ctrl (Windows/Linux) or ⌘ (macOS), click on the top port of the drawing node to instantly create a connection.
-
-
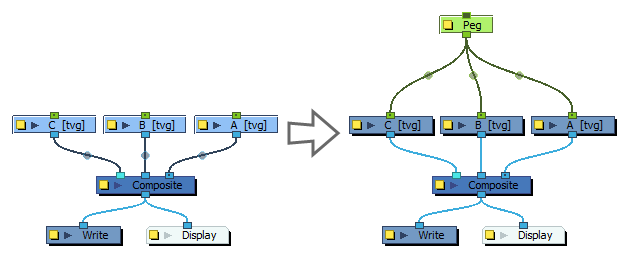
In the Node view, select all the nodes to which you want to add a parent peg.
TIPS-
You can draw a rectangle around a cluster of nodes to select to select all of them simultaneously.
- You can hold the Ctrl key and click on each node you want to select to add them to the selection.
-
- Do one of the following:
- In the top-left corner of the Node View, open the
 View Menu and select Insert Parent Peg
 - Press Ctrl + Shift + P (Windows/Linux) or ⌘ + Shift + P (macOS).
A peg is created for each selected node, each rigged as the parent of their respective node.
- In the top-left corner of the Node View, open the
-
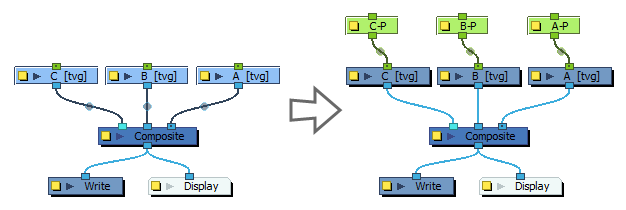
In the Node view, select all the nodes to which you want to add a parent peg.
TIPS-
You can draw a rectangle around a cluster of nodes to select to select all of them simultaneously.
- You can hold the Ctrl key and click on each node you want to select to add them to the selection.
-
-
Press Ctrl + P (Windows/Linux) or ⌘ + P (macOS).
A single peg is created and is rigged as a parent of all the selected nodes.