Function Wizard Example 4: Controlling Attributes with the Slider Widget
The Function Wizard allows you to create a Slider widget that can control any specific numerical (scalar) attribute for one or several nodes.
-
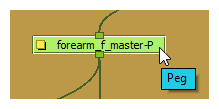
In the Node View or Timeline view, select the node or nodes that the Slider widget will control.
 NOTE
NOTEIf you select several nodes of different types, the Function Wizard will only allow you to select a parameter to control that is common to all of the selected nodes.
For example, the Function Wizard will not allow you to manipulate the position of a drawing element and the position of a peg using the same widget, as the position parameter of a drawing element is named OFFSET, whereas the position parameter of a peg is named POSITION. If you are familiar with Harmony‘s scripting interface, you can work around this limitation by customizing the function of your Master Controller—see Function Wizard Example 6: Customizing the Function Code.
-
Do one of the following to add the Master Controller toolbar to your workspace:
- Right-click on an existing toolbar and select Master Controller.
- In the top menu, select Windows > Toolbars > Master Controller.
The Master Controller toolbar appears.
-
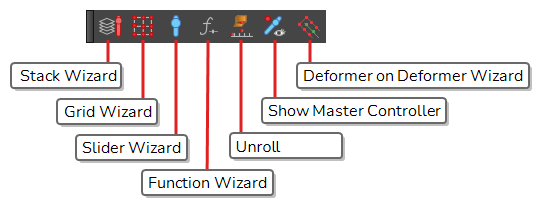
In the Master Controller toolbar, click on the
 Function Wizard button.
The Function Wizard dialog appears.
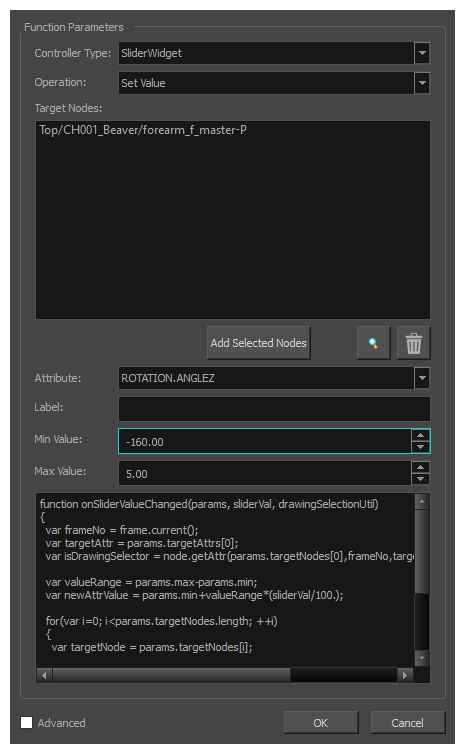
- In the Controller Type drop-down, select SliderWidget.
- In the Operation drop-down, select Set Value.
-
In the Target Nodes list, verify that all the nodes you want your Master Controller widget to control are listed. If not:
- To add nodes to the Target Nodes list, select them in the Node View, the Timeline view or the Camera view, then click on Add Selected Nodes in the Function Wizard dialog box.
- To remove nodes from the Target Nodes list, select them in the Target Nodes list, then click on
 Remove selected nodes.
-
In the Attribute drop-down, select the node attribute that you want the slider to control.
NOTE Some node attributes are hidden by default to avoid cluttering the Attribute drop-down list. To display all attributes available for the target nodes, check the Advanced checkbox at the bottom of the dialog box. - In the Label field, type in the display name for your Master Controller widget.
-
In the Min Value field, type in the value to which you want the parameter to be set when the slider is moved to its lowest position. Likewise, in the Max Value field, type in the value to which you want the parameter to be set when the slider is moved to its highest position.
-
Click OK.
-
A dialog box will appear prompting you to select a composite to attach the Master Controller to. In the Composite drop-down, select the main composite for your character rig. Then, click OK.
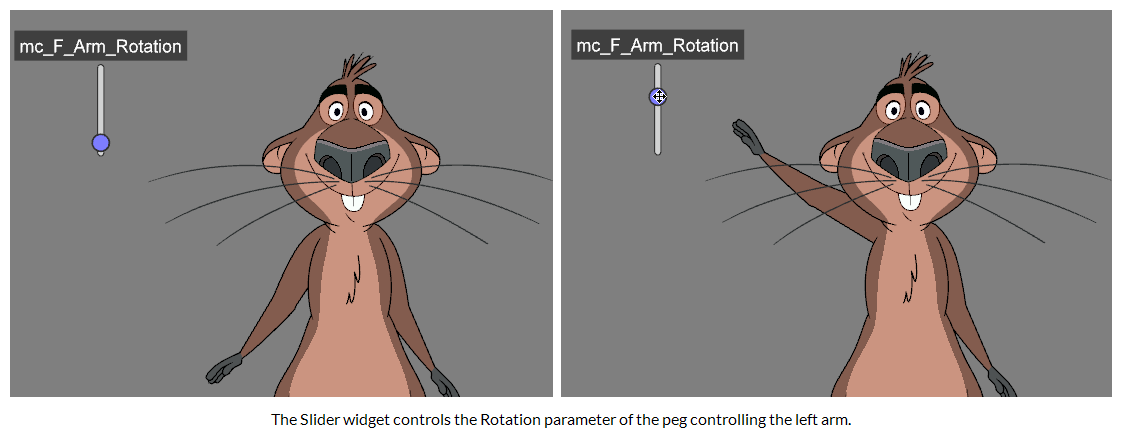
A Slider widget will be created and will appear in the Camera view. Manipulating it will update the attribute you selected for all of the nodes that were in the Target Nodes list.
NOTE The position of the Slider widget will be synchronize with the value of the selected parameter for the first node in the Target Nodes list. This means that if you manipulate the first node in the Target Nodes list, the slider’s position will automatically update to keep up with the value of this node’s parameter, but if you manipulate any other node in the Target Nodes list, the slider’s position will not be updated accordingly.