You can use the advanced Add Column dialog box to make more file format and field size options available when you insert a column.
- From the top menu, select Edit > Preferences (Windows/Linux) or Harmony Premium > Preferences (macOS) and select the Advanced tab.
- In the Advanced Options section, select the Advanced Element Mode option to access the advanced Add Column dialog box.
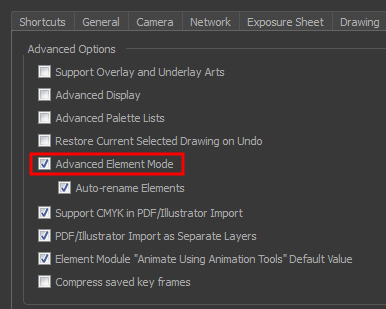
- Click OK.
- In the Xsheet menu, select Columns > Add Column or press Shift + C.
The Add Column dialog box opens.
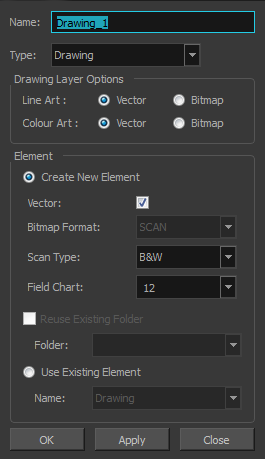
- In the Name field, type the new column’s name.
- In the Type menu, select the Drawing type.
- In the Element section, select one of the following:
- Create New Element: Creates an independent column with its own drawing folder.
- Reuse Existing Folder: Links your column to an existing folder within the Element folder of your scene. If you select this option, in the Folder menu, select the folder to which you want to link your new column.
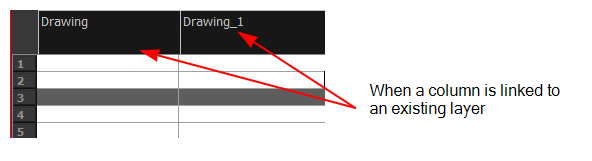
- Use Existing Element: Uses drawings from an existing column in the new column. Both columns will be attached to the same set of drawings, but their timing will remain independent from one another. If you modify one of the drawings, it will be modified in both columns. This is the same principle as the Clone column.
In the Name menu, select the column to which you want to link your new column.
- If you selected the Create New Element option:
- Deselect the Vector option if you want your layer to contain bitmap images or enable it if you want the layer to contain vector drawings. Most of the time, the Vector option will be enabled.
- If you deselected the Vector option, from the Bitmap Format list, select which type of bitmap image you want to insert in the column. Select the SCAN type if you are planning to scan drawings using the Toon Boom Harmony Premium Scan module.
- If you deselected the Vector option and you chose the SCAN type, from the Scan Type menu, select what kind of scanning you want to achieve.
- In the Field Chart field, when importing traditional animation, indicate the size of paper on which the animation or background was drawn. If you are not using perforated animation paper, leave the 12 field default value as is.
- Do one of the following:
- Click OK to create the new column and close the dialog box.
- Click Apply to create the new column but keep the dialog box opened to create other new columns.