Once your Write nodes are connected, if you want one of your renders to be smaller than your scene's resolution, but have the same aspect ratio and contain the same camera frame, you can use the Scale-Output node to shrink the image output by your scene's composite before it reaches the Write node.
You can use a Scale-Ouput node in conjunction with a Crop node to produce a render that is in a different resolution and aspect ratio than your scene's. For example, if you want a scene in HD 1080p to render in NTSC, you can use the Scale-Output node to scale down the image to 960 x 540 pixels, which matches the NTSC resolution height, but has a greater resolution width to preserve the aspect ratio of HD 1080p. Then, you can use a Crop node to crop the image to 720 x 540 pixels, cropping out the image in the left and right edges to make it fit an NTSC screen.
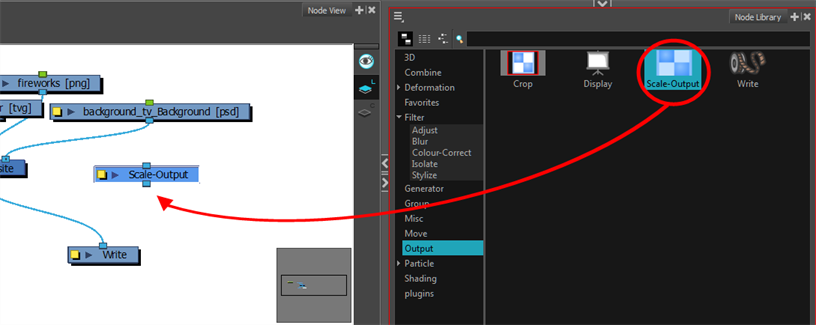
- In the Node Library view, select Scale-Output from the list of categories.
- Select the Scale-Output node and drag it to the Node view.
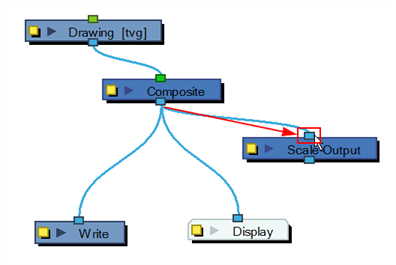
- In the Node view, connect the Composite node to the Input port of the Scale-Output node.
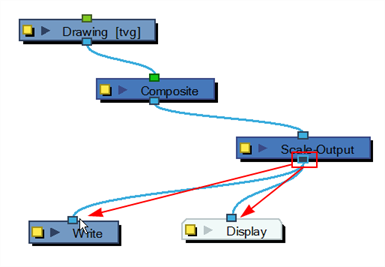
- In the Node view, connect the Scale-Output node to the input ports of both the Display node and the Write node.
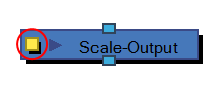
- In the Node view, open the Scale-Output node’s editor by clicking its yellow square properties button.
- In the Layer Properties dialog box, do one of the following:
- Under Customer Resolution, type in the Width and Height of the resolution you want to scale to, in pixels.

- Uncheck the Custom Resolution option, then choose one of the available resolution presets in the Resolution Name drop down list.

- Click Close.