The first step in setting up your light shading effect is to identify which volumes you want the light to interact with.
To learn more about each node's parameters, see Shading Nodes.
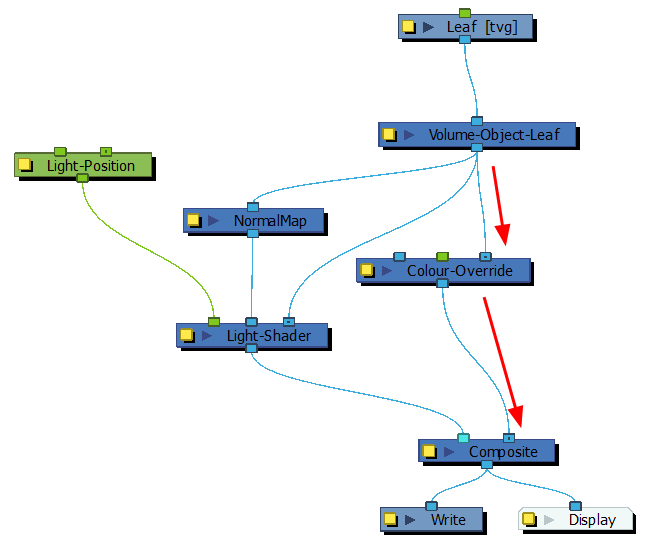
Here's what a basic light shading effect node structure looks like:
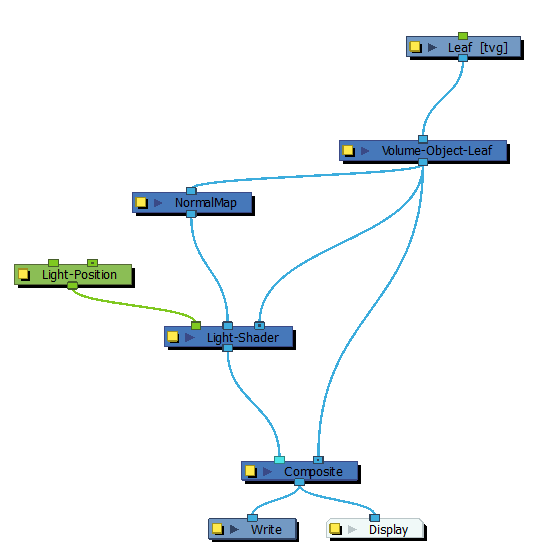
- In the Node Library view, select a Volume Object node from the Shading category and drag it to the Node view.
- In the Node view, connect the Volume Object node between the drawing node and the Composite node. Click on the node's properties button (yellow square) and rename it with the volume it represents. This will make it much easier to edit the beveling in the Normal Map node later on.
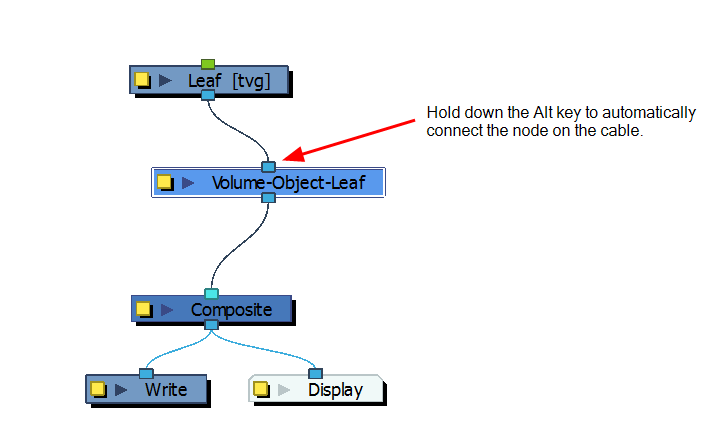
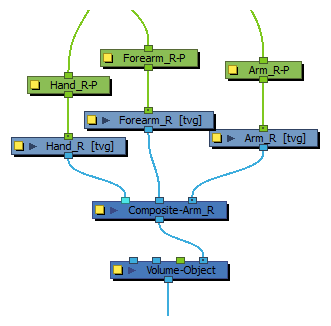
If you need to combine several elements into one volume, you can connect the elements into a Composite node set to Pass-Through and connect that Composite node to the Volume Object node.
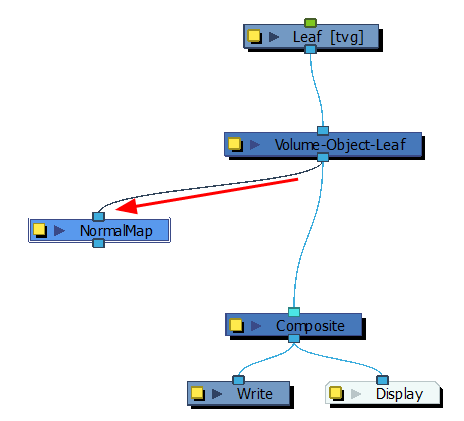
- In the Node Library view, in the Shading category, select a Normal Map node and drag it to the Node view.
- In the Node view, connect a second connection from the Volume Object node to the Normal Map node. Don't connect the Normal Map's output port yet.
- In the Node Library view, in the Shading category, select a Light Shader or Tone Shader node and drag it to the Node view.
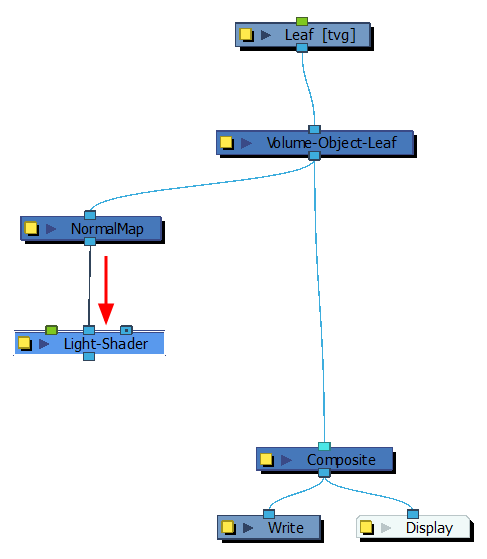
- In the Node view, connect the Normal Map output node to the shader node's middle input port.
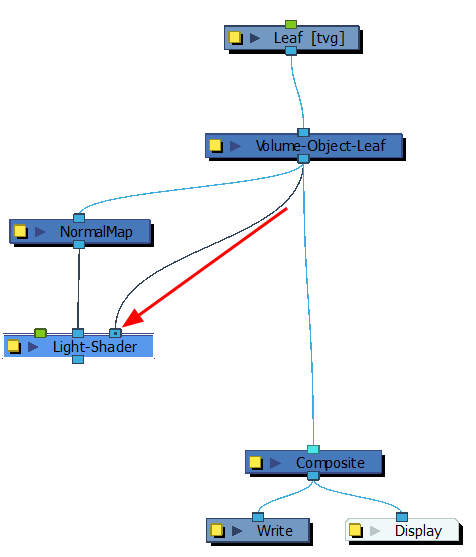
- From the Volume Object node, pull out a third connection and connect it to the shader node's right input port.
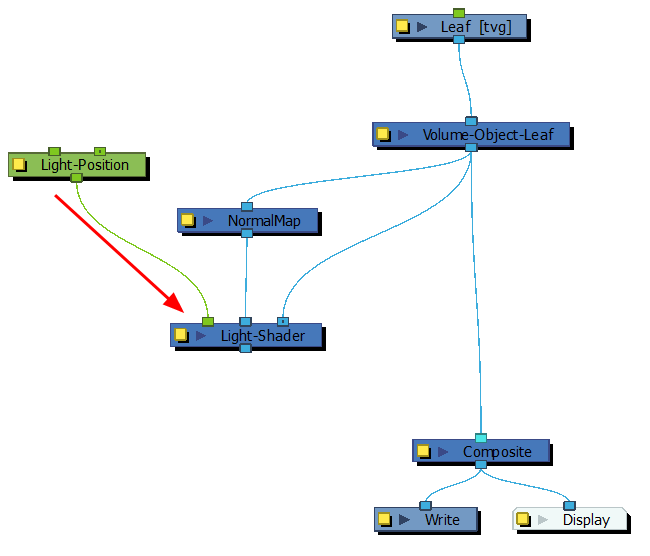
- In the Node Library view, in the Shading category, select a Light Position node and drag it to the Node view.
- In the Node view, connect the Light Position output node to the shader node's left input port (green).
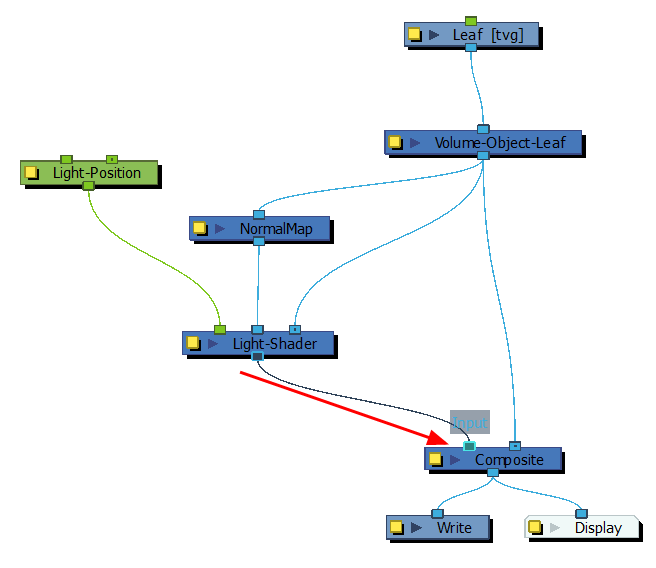
- Connect the shader's output port to the Composite node to the left (in front) of the Volume Object's Composite connection. This will display the light shading effect on top of the original drawing. Connecting it to the right would result to nothing as the effect would be hidden behind the drawing.
- If you added colours to your drzwing to carve in some areas, in the Node Library view, select a Colour-Override node and drag it to the Node view.
- In the Node view, connect the Colour-Override node between the Volume Object and the Composite nodes. Make sure the Volume Object node is connected to the Colour-Override's right input port.
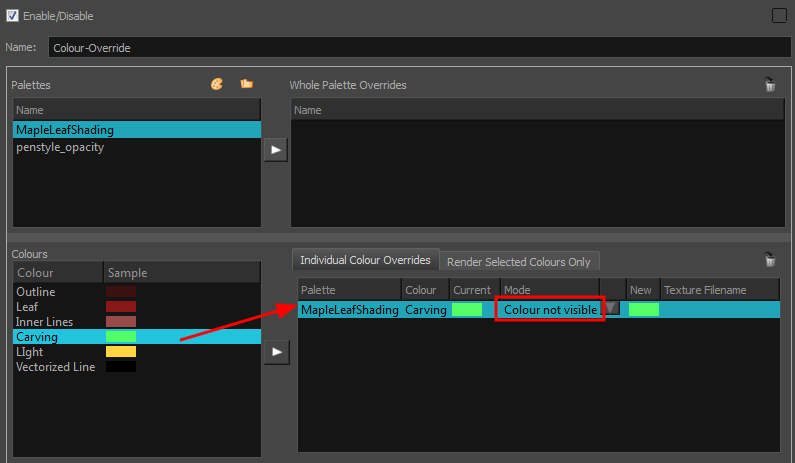
- Click the Colour-Override node's properties button (yellow square) to open the Layer Parameters dialog. From the Colours section, drag your carving colours to the Individual Colour Overrides section. In the Mode column, set all your colours to Colour not visible.
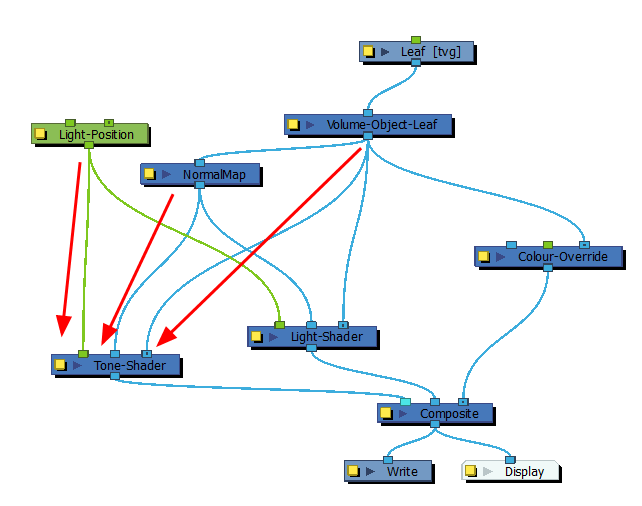
- To combine both the Tone Shader and the Light Shader, from the Node Library bring the other shader node and drag it to the Node view.
- In the Node view, connect the same Light Position, Normal Map and Volume Object nodes to the new shader node.
- Click the Normal Map node's properties button (yellow square) to open the Layer Parameters dialog.
- In the Volume Creation section, from the Object List , select all the Volume Object nodes you want to use in this map.
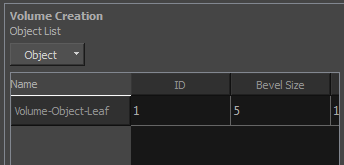
| ‣ | It's possible to add all Volume Object nodes at the same time by selecting the Add all Defined Objects option or it's possible to add each Volume Object node one by one. |
- In the Camera view, enable the Render mode to view the final effect.
- See Shading Nodes to adjust the light shading parameters.