If you have separated the matte points of the outer and inner contours of an Animate Matte Generator, you can lock them back together so that they behave as single matte points again.
- In the Node or Timeline view, select the Animated Matte Generator node.
- In the Tools toolbar, select the Transform
 tool.
tool.
- Display the controls of the Animated Matte Generator node by doing one of the following:
- In the Camera view toolbar, click on Show Control
 .
. - From the top menu, select View > Show > Control.
- Press Shift + F11.
The control points for the Animated Matte Generator display in the Camera view.
- In the Editing Mode panel of the Animated Matte Generator view, click on Define Matte Point
 .
.
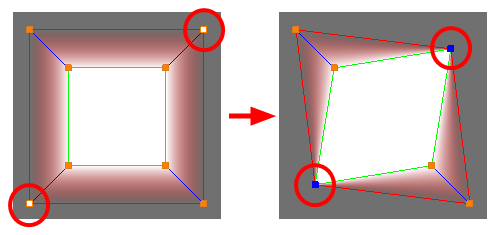
- In the Camera view, select the contour point you want to merge with its corresponding point in the other contour. If you want to merge several contour points with their corresponding contour points, hold shift and click on each point to select them together.
- In the Animated Matte Generator toolbar, click on Merge Inner and Outer Matte Contours
 .
.
The selected matte points and their corresponding matte points are moved to the same position, halfway between their respective positions, and are locked together again.
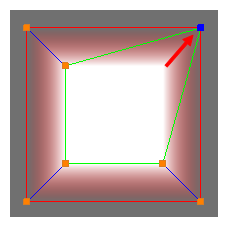
You can also lock a contour point back to its corresponding point by clicking and dragging it very close to its corresponding point. When close enough, it will snap to that point and appear blue. Releasing it in this state will lock the corresponding contour points together.