By default, when you use the ![]() Transform tool or the
Transform tool or the ![]()
![]()
![]()
![]()
![]() Advanced Animation tool to reposition an element, its coordinates are changed in the current frame only. However, it is possible to move, rotate, scale and skew an element on several keyframes simultaneously. This is done by changing the Animate mode.
Advanced Animation tool to reposition an element, its coordinates are changed in the current frame only. However, it is possible to move, rotate, scale and skew an element on several keyframes simultaneously. This is done by changing the Animate mode.
There are three different Animate modes:
-
 Animate Current Frame: When you transform an element, its position, angle, scale and skew are stored in a keyframe at the current frame. This means that a keyframe is created at the current frame, if there is not one already.
 -
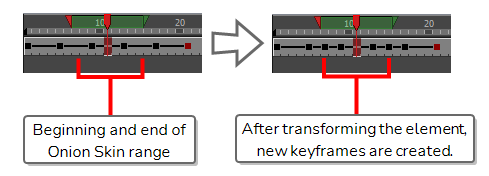
 Animate Onion Skin Range: When you transform an element, the transformation is applied to every frame in the Onion Skin. This means that it is applied to every keyframe inside the Onion Skin range, and, if needed, keyframes are created at the beginning and the end of the Onion Skin to preserve the transformations you make.
 -
 Animate Off: When you transform an element, the transformation is applied throughout the entire scene. If the element has keyframes, the transformation is applied to all of these keyframes. No keyframe is automatically created when using this mode.
-
In the Tools toolbar, select the
 Transform tool.TIP You can also make transformations over several keyframes using the
 Translate,
  Rotate,
  Scale,
  Skew or
  Maintain Size tools, which can be selected in the Advanced Animation toolbar.
-
In the Timeline or Camera view, select the element you want to transform.
-
In the Tools toolbar, click on the Animate mode button which, depending on the currently selected mode, will either have the
Animate Current Frame, Animate Onion Skin Range or Animate Off icon, and select Animate Onion Skin Range in the pop-up menu.Animate Onion Skin Range is now enabled. At the same time, Onion Skin becomes enabled, and the Onion Skin handles appear left and right of the red playhead in the Timeline view.
![]()
-
In the Timeline view, move the timeline playhead to a frame somewhere in the middle of the span of frames you want to transform.
![]()
-
Adjust the range of the Onion Skin so that it covers every frame you want to apply the transformation to by doing one of the following:
- In the Timeline view, click and drag on the red onion skin marker to make it include the previous drawings you want to display in the onion skin, then click and drag on the green onion skin marker to make it include the next drawings you want to display in the onion skin.
-
Use the buttons in the toolbar above the drawing space to adjust how many previous and next drawings are included in the Onion Skin:
- To increase the amount of previous drawings to display, click on the
 Add Previous Drawing button in the Camera/Drawing view toolbar.
 - To decrease the amount of previous drawings to display, click on the
 Remove Previous Drawing button in the Camera/Drawing view toolbar.
 - To increase the amount of next drawings to display, click on the
 Add Next Drawing button in the Camera/Drawing view toolbar.
 - To decrease the amount of next drawings to display, click on the
 Remove Next Drawing button in the Camera/Drawing view toolbar.
- To increase the amount of previous drawings to display, click on the
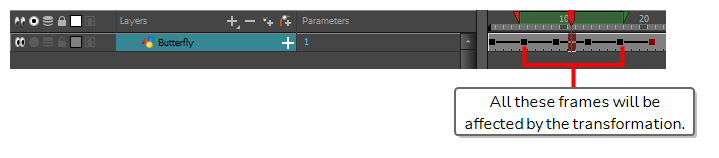
NOTEIf there are no keyframes at the beginning and at the end of the Onion Skin range, keyframes will be automatically created at those frames to store the transformation you will make. If you want to avoid this, make sure the Onion Skin range begins and ends on a keyframe.
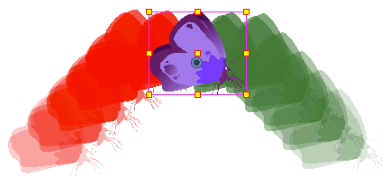
The position of the layer in every frame in the Onion Skin range will appear in the Camera view, as Onion Skin.
-
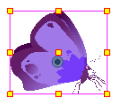
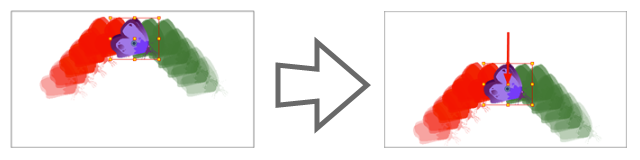
In the Camera view, use the Transform tool to move, scale, rotate or skew the selected element.
NOTES- For information on how to use the Transform tool to move, rotate, scale or skew an element, see About the Transform Tool .
- You can also use the Advanced Animation tools to move, rotate, scale and skew elements—see About Advanced Animation Tools.
The transformation is applied on every keyframe within the Onion Skin range on the selected layer.
-
In the Tools toolbar, select the
Transform tool.TIP You can also make transformations throughout the entire scene using the Translate, Rotate, Scale, Skew or Maintain Size tools, which can be selected in the Advanced Animation toolbar.
-
In the Timeline or Camera view, select the element you want to transform.
-
In the Tools toolbar, click on the Animate mode button which, depending on the currently selected mode, will either have the
Animate Current Frame, Animate Onion Skin Range or Animate Off icon, and select Animate Off in the pop-up menu.
-
In the Camera view, use the Transform tool to move, scale, rotate or skew the selected element.
NOTES- For information on how to use the Transform tool to move, rotate, scale or skew an element, see About the Transform Tool .
- You can also use the Advanced Animation tools to move, rotate, scale and skew elements—see About Advanced Animation Tools.
The transformation is applied to the element throughout the entire scene. If the element has animation keyframes, the transformation is applied to every keyframe as well.