As you work on your scenes, their nature and contents may change and the name you gave the scene when you began the project may no longer reflect its contents. In this case, you can rename the scene to more accurately reflect its contents.
Before you rename a scene:
- Make sure no one else is currently using the scene.
Failure to do this may result in file corruption and loss of your work.
- Wait until everyone is offline. This ensures no one can open the scene while you rename it.
- In the Scenes section, select the scene to rename.
- Do one of the following:
- From the top menu, select Scene > Rename.
- Right-click anywhere in the Scenes list and select Rename.
The Rename Scene dialog box appears.
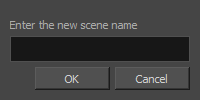
- In the Enter New Scene Name field, type the new name for the scene and click OK. Try to keep scene names brief. It is recommended that you use no more than 23 characters.
NOTE Use lower case letters if these scenes may be used with a Windows workstation.
NOTE By default, when creating a new scene or renaming a scene, the scene's name cannot exceed 23 characters. If Unicode is enabled, the scene's name can not exceed 119 characters.