Remapping Palettes, Textures and Images in a Scene on Demand
Harmony will only prompt you to remap assets in a scene when opening the scene in Harmony Stand Alone or when importing it in Control Center. You can however use this feature at any time, for example if you need to remap assets while working on a scene because you forgot to do it when prompted to, or if you have a scene with broken links and have made a remapping rule that can fix it.
The remapping dialog is a script package with Harmony. Hence, you can invoke it by adding a button for it in the Scripting toolbar.
- Add the Scripting toolbar to your workspace by doing one of the following:
- In the top menu, select Windows > Toolbars > Scripting.
- Right-click on any existing toolbar and select Scripting.

-
In the Scripting toolbar, click on the Manage Script
 button.
The Script Manager dialog appears.
- In the Files list, select TB_RelinkPaths.js.
- In the Functions list, select TB_RelinkPathsInteractive.
-
Click on the Add script to toolbar
 button.
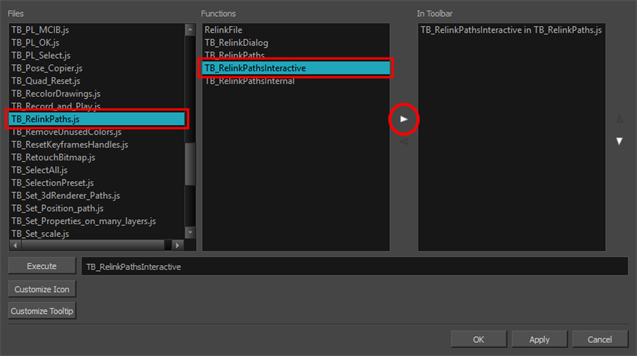
- Click on the OK button.
-
A button
 for the Remap dialog is added to the Scripting toolbar.
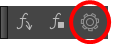
-
Click on the Remap dialog
button. The Choose the Remapping Group dialog appears.
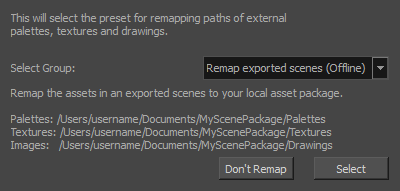
- In the Select Group drop-down, select the remapping rules group that you want to apply to your scene.
-
Click on Select.
The paths to the assets in your scene are remapped according to the selected rule set.