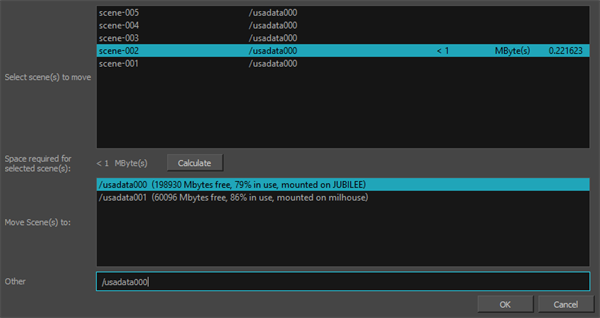
When you create a scene, it and its associated files are stored on one drive. If you find you are running out of space, you can move a scene to another drive. However, you can consolidate all the scenes for a particular job in a single directory allowing you to find related information quickly. You may also want to file your scenes in specific directories, creating a customized directory system. The Move command lets you move scene data from one file system to another.
Before you move a scene's data:
- Make sure no one else is currently using the scene's data. Failure to do this may result in file corruption and loss of your work.
- Wait until everyone is offline. This ensures no one can open the data files while you move them.
- In the Scenes section, select the scenes you want to move.
- Do one of the following:
- From the top menu, select Scene > Move.
- Right-click anywhere in the Scenes list and select Move.
The Move Scene dialog box appears.

- In the Select Scene(s) to Move field, select the scenes you want to move from their current directory.
- Click Calculate to know how much hard disk space your selection requires.
- In the Move Scenes To list, select the directory where you want to move the scene. If it does not appear in the list, enter the directory path in the Other field.
The Control Center node automatically checks the amount of free space for each directory and compares it to the size of the scene you want to move.
If there is not enough disk space on a particular drive/mount point to store the scene, the directory displays a not "enough space message". Choose another disk from the list.
- Click OK.