You can modify the colour of a scene marker or edit the note attached to it.
-
In the timeline ruler, click on the scene marker to select it.
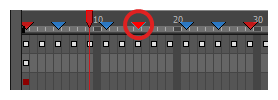 NOTE When a scene marker is selected, its outline will turn cyan, and other scene markers will become slightly darker.
- Do one of the following:
- Double-click on the scene marker.
- Right-click on the timeline ruler and, in the context menu, select Scene Markers > Edit Scene Marker.
The Marker dialog box appears.
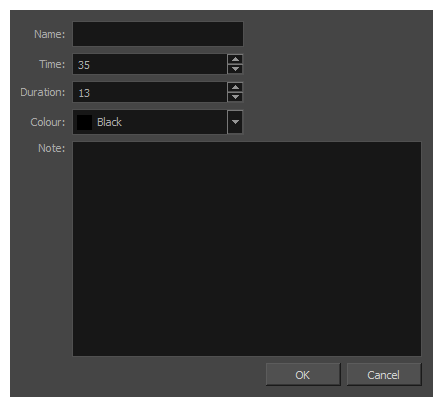
- To edit the scene marker’s name, type it in the Name field.
- To change the starting frame of the scene marker, edit the value in the Time field.
-
To change the length in frames for this scene marker, edit the value in the Duration field.
- To change the colour of the scene marker, open the Colour drop-down and select a new colour.
- To edit the note for the scene marker, type it in the Note field.
- Click OK.
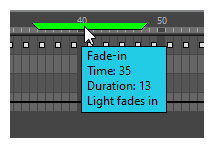
Move the mouse cursor over the scene marker and wait 1 second to display the scene marker’s name, time, duration and note in a tool tip box.
- Select a frame or range of frames.
- In Xsheet view, click View Menu
 in the upper-left corner of the view. A drop-down menu will appear.
 - In the drop-down menu, select Frames. A drop-down menu appears displaying the following options:
- Add Frames at Start... - Adds frames at the start of the timeline
- Add Frames at End... -Adds frames at the end of the timeline
- Add Frames Before Selection...- Adds frames before the selected frame
- Add Frames After Selection... -Adds frames before the selected frame
- Remove Selected Frames - Removes the selected frame
- Check Ripple Scene Markers.
- Click OK.
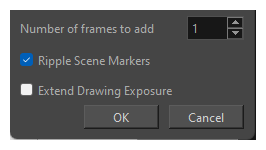
When frames shift after inserting or deleting a frame, the marker will extend with it.