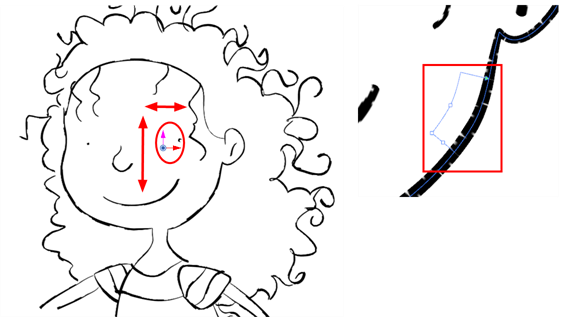
A pencil line can be drawn with a texture but also painted with a texture swatch. With the Colour-Override node, you can override the pencil line's texture or texture fill and replace it by another one, or you can animate the texture's position.
With the Edit Gradient and Texture tool, you can modify the size and position for both types of textures on a pencil line; the drawing texture and the filling texture. By doing that, you are actually modifying the texture's matrix.

When you paint a pencil line with a bitmap colour swatch, you can override the position of the texture fill using the Colour-Override node and a Peg.
You can modify and animate a pencil texture's position using the Colour-Override node and a Peg node. This lets you create a shaky line style which is a very popular design style. The main issue with this style is that it works well in traditional and tradigital animation, when the artist draws the line differently on each drawing, but it does not work in cut-out animation where the same drawing is used for the entire animation. The same issue happens when the same drawing is held for more than a few frames. The line moves during the animation, but stops moving during the drawing hold, which looks bad.

With the Colour-Override node, you can animate the position of the pencil line texture independently from the drawing exposure. Even if a drawing's exposure is held over several frames, the line will move.
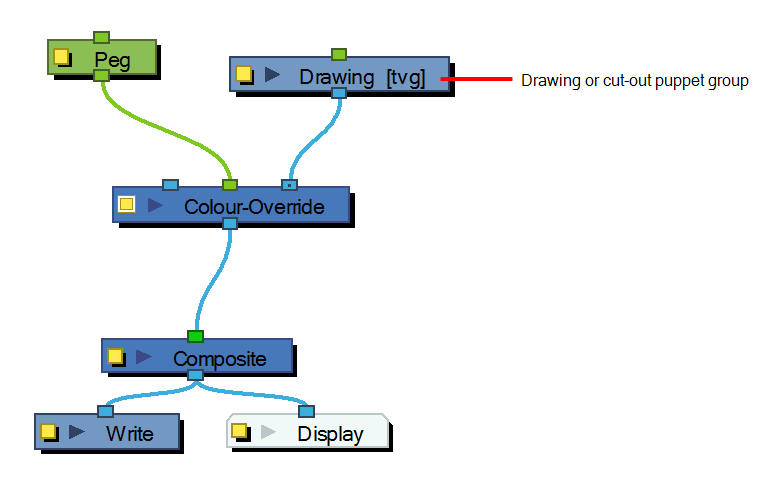
- From the Node Library view, drag a Colour-Override node and a Peg node to the Node view.
- In the Node view, connect the Colour-Override node under the Drawing node you want to animate the line for. Note that for a cut-out puppet, you would connect the Colour-Override under the final Composite, set as Pass-Through.
- Connect the Peg node in the Colour Override's middle port. The green port will take the transformation of the Peg to modify the texture's position.
- Click the Colour-Override's square yellow properties button to open its property editor.
- In the Palettes section, select the palette containing the colour to override.
- In the Colours section, select the bitmap texture swatch you used to paint your lines and drag it to the Individual Colour Overrides section.
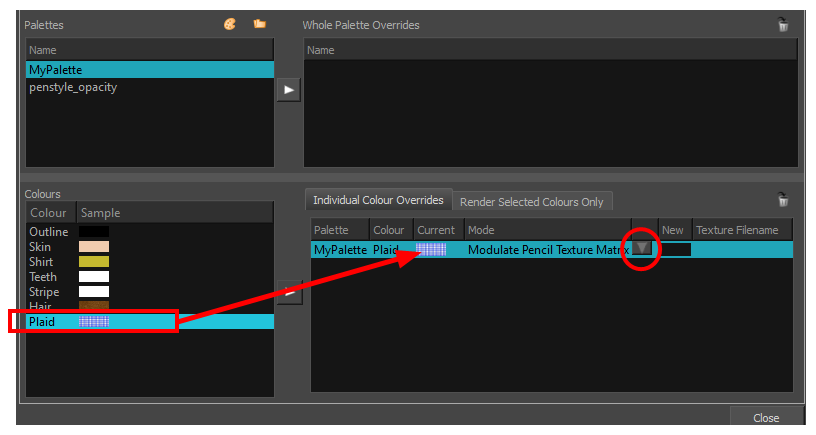
- Once the swatch appears, select it and then click on the Override Mode button. Select one of the following options from the drop-down menu:
- Modulate Pencil Texture Colour (replace transformation): Overrides the initial texture fill's transformation (matrix) established when you painted the line or modified it with the Edit Gradient and Texture
tool. This transformation override will be done by modifying the Peg's position.
- Modulate Pencil Texture Colour (combine transformation): Combines the initial texture fill's transformation (matrix) established when you drew the line or modified it with the Edit Gradient and Texture
tool with the new position transformation you will create when modifying the Peg's position.
- In the Node view, select the Peg node.
- In the Advanced Animation toolbar, select the Translate
, Rotate
or Scale
tool.
- In the Camera view bottom toolbar, enable the Render
mode.
- In the Camera view, move the Peg's position. As you move it, you will see the texture fills being modified. You can animate the position by adding position keyframes in the Timeline view.
- From the Node Library view, drag a Colour-Override node and a Peg node to the Node view.

- In the Node view, connect the Colour-Override node under the Drawing node you want to animate the line for. Note that for a cut-out puppet, you would connect the Colour-Override under the final Composite, set as Pass-Through.
- Connect the Peg node in the Colour Override's middle port. The green port will take the transformation of the Peg to modify the texture's position.
- Click the Colour-Override's square yellow properties button to open its property editor.
- In the Palettes section, select the pencil texture palette containing the texture you want to use. By default, every scene has a pencil texture palette named after the name of the scene followed by _pencil_texture.
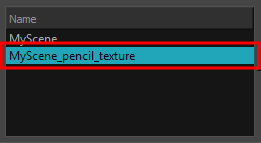
- In the Colours section, select the pencil texture used to draw your lines and drag it to the Individual Colour Overrides section.
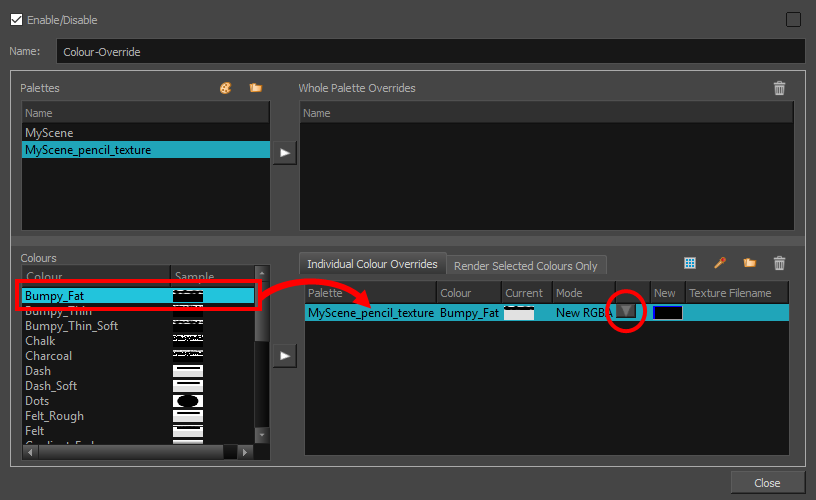
- When the swatch appears in the Individual Colour Overrides section, select it and click the
Override Mode button. Select one of the following:- Change Pencil Texture Transformation: Overrides the initial pencil texture's transformation (matrix) established when you drew the line or modified with the Edit Gradient and Texture
tool. This transformation override will be done by modifying the Peg's position.
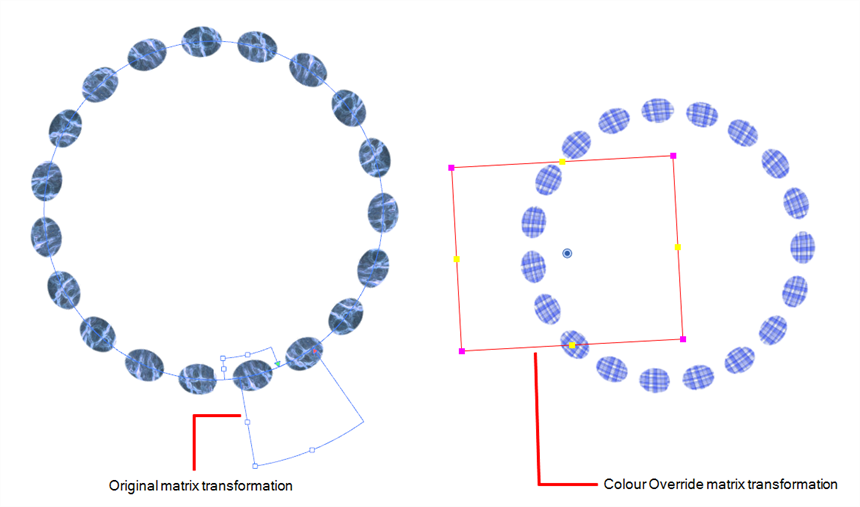
- Modulate Pencil Texture Matrix: Combines the initial pencil texture's transformation (matrix) that was established when you drew the line or modified with the Edit Gradient and Texture
tool with the new position transformation you will create when modifying the Peg's position.
- Change Pencil Texture Transformation: Overrides the initial pencil texture's transformation (matrix) established when you drew the line or modified with the Edit Gradient and Texture
- In the Node view, select the Peg node.
- In the Advanced Animation toolbar, select the Translate
, Rotate
or Scale
tool.
- In the Camera view bottom toolbar, enable the Render
mode.
- In the Camera view, move the Peg's position. As you move it, you will see the pencil texture being modified. You can animate the position by adding position keyframes in the Timeline view. You can use the Random Fill function to quickly create a random shake.
