With the Colour Override node, you can apply a texture over a selected colour. Any zone painted with the selected colour swatch will be overridden by the selected texture.
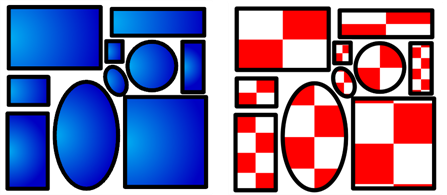
There are different ways to apply the texture over your colour:
The matrix position can be modified using the Edit Gradient and Texture tool. To do so, your drawing zone must be painted with a gradient swatch or texture swatch.

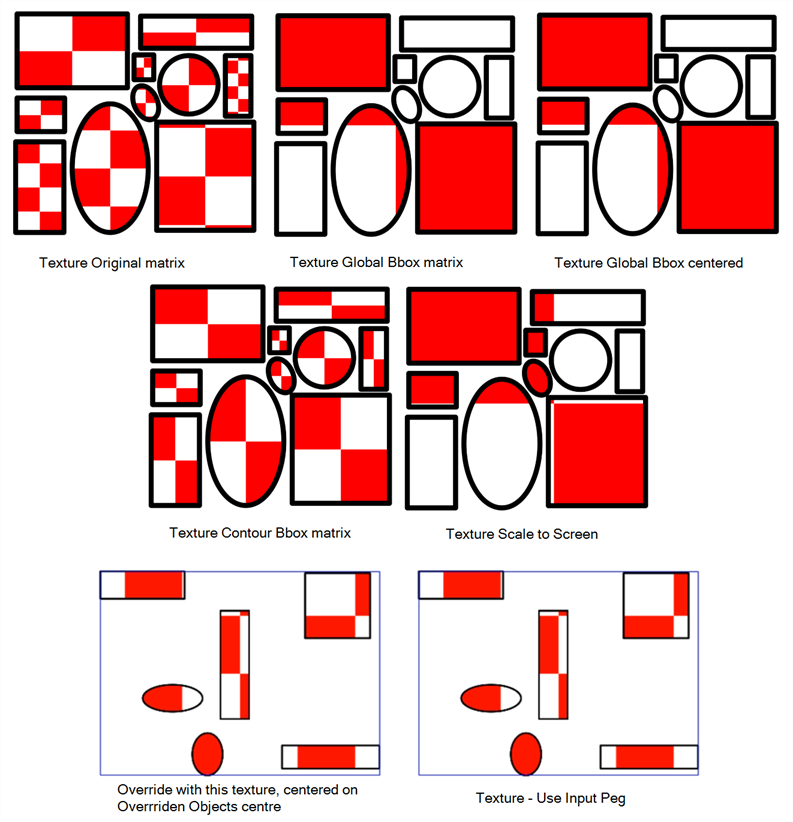
Texture - Original Matrix
Overrides the swatch's colour with a pattern or texture. You must right-click under the Texture header to bring up the Browser window to search for your texture. The texture's default matrix (fixed proportion and orientation) is mapped to the full size of the bounding box of each colour area to be overridden.
Texture - Global Bbox Matrix
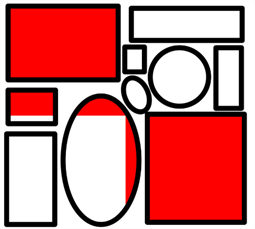
Overrides the colour with a texture that is scaled non-proportionally to the size of the bounding box encompassing the colour areas to be overridden. With multiple objects, it will look as though their fills were all traced and cut from the same piece of stretched or squashed fabric.
Texture - Global Bbox Centered
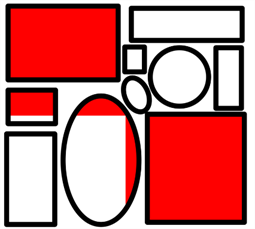
Overrides the colour with a texture that is scaled proportionally to the size of the bounding box encompassing all colour areas to be overridden. With multiple objects, it will look as though their fills were all traced and cut from the same piece of fabric.
Texture - Contour Bbox Matrix

Overrides the colour with a disproportionately scaled texture for each individual colour area. In other words, each fill area will not only have the texture scaled to its individual proportions, but also stretched or squashed to fit within its contours.
Texture - Scale to Screen

Disproportionately scales the texture to the output resolution before applying it as an override.
Modulate Pencil Texture Colour (Replace Transformation)
Overrides the initial texture fill's transformation (matrix) established when you painted the line or modified it with the Edit Gradient and Texture tool. This transformation override will be done by modifying the Peg's position.
Modulate Pencil Texture Colour (Combine Transformation)
Combines the initial texture fill's transformation (matrix) established when you drew the line or modified it with the Edit Gradient and Texture tool with the new position transformation you will create when modifying the Peg's position.
Override with This Texture Centered on Overridden Objects' Centre
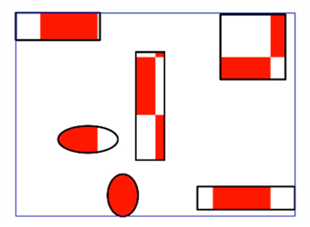
Overrides the colour with a texture that is centered in the bounding box encompassing all colour areas to be overridden. With multiple objects, it will look as though their fills were all traced and cut from the same piece of fabric. The texture will not be stretched or distorted. It will be tiled in proportion. The centre of the texture zone will be centered in the middle of the bounding box's centre.
With this option, you can connect a Peg in the middle port to apply a transformation on the texture's position. The advantage of being able to animate the texture is that it can be adjusted, scaled, rotated and translated to follow the general motion of a character if you want the texture to follow instead of having the character moving across the fixed texture—see How to animate a texture override with a peg.
Texture - Use Input Peg

Overrides the colour with a texture that is scaled non-proportionally to the size of the bounding box encompassing the colour areas to be overridden. With multiple objects, it will look as though their fills were all traced and cut from the same piece of stretched or squashed fabric.
With this option, you can connect a Peg in the middle port to apply a transformation on the texture's position.
Textures - Use Input Image
- From the Colours section, select the colour swatch to override and drag it to the Individual Colour Overrides section.
- Once the swatch appears in the Individual Colour Overrides section, select it and then click on the Mode drop-down button and select one of the following options:
- Texture - Original Matrix
- Texture - Global Bbox Matrix
- Texture - Global Bbox Centered
- Texture - Contour Bbox Matrix
- Texture - Scale to Screen
- Override With This Texture Centered on Overridden Objects Centre
- Texture - Use Input Peg
- Texture - Use Image Image
The Browse icon appears in the New column.
- In the Colour-Override section, in the New column, click the Browse
icon to select your custom texture.

- Browse for your texture file.

- Click Open.
- If you want to select a new texture to replace the existing one, click the Browse
button again and select a new one to replace the existing one.
- From the Node Library view, drag a Peg node to the Node view.
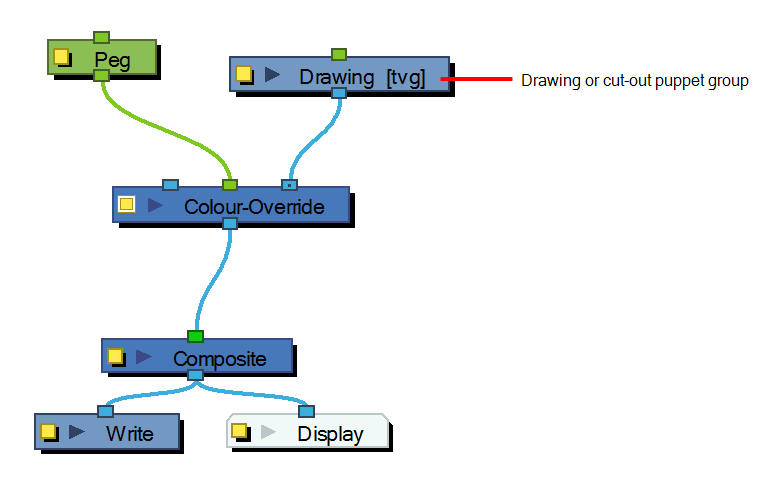
- Connect the Peg node in the Colour Override's middle port. The green port will take the transformation of the Peg to modify the texture's position.
- In the Node view, select the Peg node.
- In the Advanced Animation toolbar, select the Translate
, Rotate
or Scale
tool.
- In the Camera view bottom toolbar, enable the Render
mode.
- In the Camera view, move the Peg's position. As you move it, you can see the texture being modified. You can animate the position by adding position keyframes in the Timeline view. You can use the Random Fill function to quickly create a random shake.