The Standard Video Compression Settings dialog box allows you to configure the video compression settings when exporting a QuickTime Movie (.mov) file.

- For tasks related to this dialog box, see Exporting a Movie File, Exporting Movie Files from the Node View and Exporting OpenGL Frames.
-
This dialog can only be accessed on Windows and requires Apple QuickTime to be installed.
-
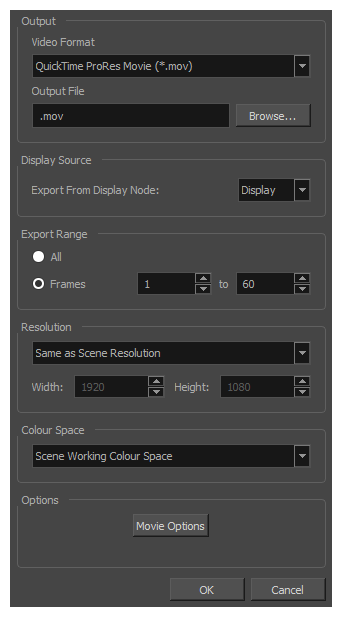
From the top menu, select File > Export > Movie.
The Export Movie dialog box appears.

- In the Movie Format drop-down, select QuickTime ProRes Movie (*.mov).
-
Click on the Movie Options button.
The QuickTime Movie Options dialog box appears.

- In the Codec drop-down, select any of the movie options.
-
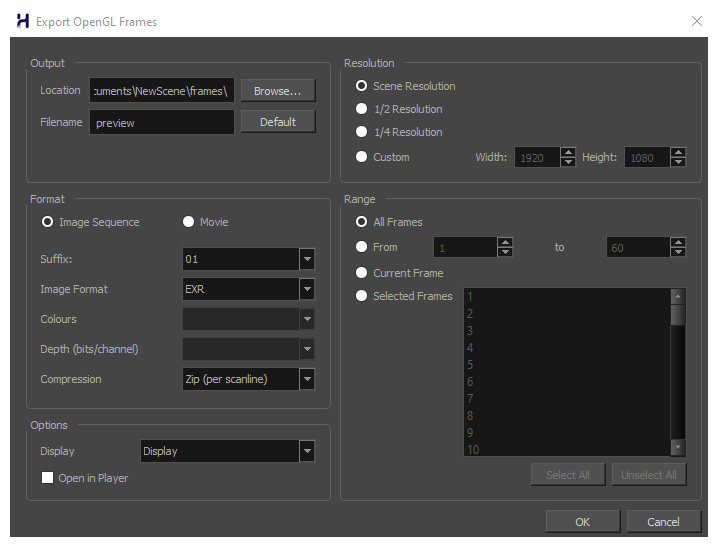
In the top menu, select File > Export > OpenGL Frames.
The Export OpenGL Frames dialog box appears.

- In the Format section, select Movie.
- In the Movie Format drop-down, select QuickTime Movie (*.mov).
-
Click on the Movie Options button.
The QuickTime Movie Settings dialog box appears.

-
In the Video section, click Settings.
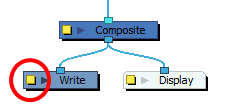
- In the Node view, locate your scene's Write node.
-
Open the Write node's Layer Properties by doing one of the following:
- Click on the yellow square
 at the left end of the Write node.
 - Right-click on the Write node, then select Layer Properties.

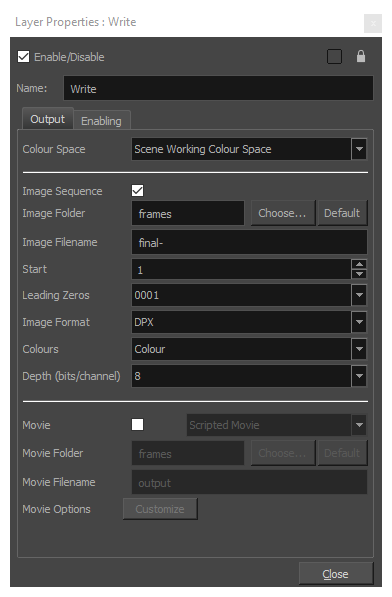
The Write node's Layer Properties dialog appears.

- Click on the yellow square
- In the Write node's Layer Properties, enable the Movie option.
- To the right of the Movie check box, open the drop-down menu and select QuickTime Movie (*.mov).
-
To the right of Movie Options, click Customize.
The QuickTime Movie Settings dialog box appears.

-
In the Video section, click Settings.
| Parameter | Description |
|---|---|
|
Compression Type |
Allows you to select the codec to use to compress the video stream of your movie. It is recommended to use one of the following codecs, depending on your usage scenario:
TIPS
|
|
Motion |
|
|
Frame Rate |
The amount of frames per second for the video stream. Leave this setting to Current to use your project's frame rate. |
|
Key Frames |
Some codecs compress the video by recording a limited amount of keyframes, which are frames in which the entire picture is encoded, pixel by pixel and, in-between, recording deltas, which are frames that are only defined by their difference with the previous frame. This significantly reduces the size of the movie file. However, the less keyframes a movie has, the more it is likely to encounter decoding errors, and the harder it is for players to scrub or jump to a specific time in the video. This option allows you to decide when keyframes are inserted in the video stream. Automatic: Lets the encoder decide when keyframes should be inserted. Every ... frames: Allows you to set the exact interval, in frames, at which keyframes should be inserted. All: Encodes every frame as a keyframe. This option will significantly impact file size, but will make it easier to scrub through the video without causing any rendering error. NOTE If you are using the H.264 codec, you must set the Key Frames option to All, or you will get an error message when you confirm the compression settings.
|
|
Frame Reordering |
Encodes frames in a different order than the one at which they are meant to be displayed. This allows for more efficient compression, but may not be compatible with some players. |
|
Compressor |
|
|
Depth |
Allows you to set the colour depth for your video. A lower colour depth will reduce the size of the video stream but will have significant impacts on picture quality. TIP Set this to Millions of Colors+ if you want to export a video with transparency.
|
|
Quality |
Lets you choose a quality setting for the video compression. A higher quality setting will increase the size of the movie file, but will look better. A lower quality setting will reduce the size of the movie file, but will cause blurriness and compression artifacts to appear in the picture. |
|
Scan Mode / Interlaced |
Allows you to choose between the following scan modes:
NOTE Some codecs will display a drop-down allowing you to select Interlaced or Progressive, while others will simply have an Interlaced checkbox.
|
|
Aspect Ratio |
Allows you to select one of the following aspect ratios:
|
|
Filter |
When exporting with the PNG compression type, this determines the algorithm with which each pixel is encoded relative to other pixels. Leaving this option to Best will export in the most space-efficient filter, without compromising picture quality. Picking a filter may increase rendering speed a bit, at the expense of some disk space. |
|
Data Rate |
|
|
Automatic |
Lets the encoder use the optimal bit rate for your compression settings. |
|
Restrict To |
Allows you to specify the encoding bit rate. NOTE This setting will override other compression settings, so that the specified bit rate is respected.
|
|
Optimized For |
Optimize the encoding to be responsive depending on the intended viewing method:
|