Toon Boom Harmony 21 Release Notes
Here is the list of changes in Harmony 21, build 21.0.0.17367 (2020-09-01):
- Drawing Tools
- Timeline
- Animation
- Camera and Compositing
- Performance
- Game Pipeline
- Library
- WebCC
- Scripting
- Fixes
Drawing Tools
| Feature | Description |
|---|---|
| New Brush Tool Parameters |
To give you more control over the look and feel of the brush tool, new options are available to dynamically control the size, flow, opacity and brush tip angle when using a drawing tablet. Size, Flow and Opacity
Brush Tip Orientation
|
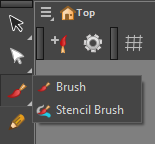
| Stencil Brush Tool |
A new Stencil Brush tool is now available in Harmony. Located in a drop-down menu under the Brush tool in the Tools toolbar.
The Stencil Brush Tool has a Repaint Brush Mode and an Overlay Brush Mode. The two modes are available from the Stencil Brush Tool Properties, in a drop-down menu under the brush presets.
In Repaint Brush Mode, the existing artwork is replaced and repainted, ignoring empty zones. In Overlay Brush Mode, the existing artwork is used as a mask to generate new brush strokes which are added on top, leaving the existing artwork untouched. A selection of multiple layers can be used when Overlay Brush Mode is active. With multiple layers selected, the union of the artwork in all of the selected layers is used as the mask while the topmost layer, the active layer, will be where the new strokes are created.
|
| Single Line and Multiple Lines Cutting Modes |
The Cutter tool now has two gesture cutting modes available in the Tool Properties view.
|
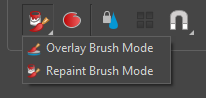
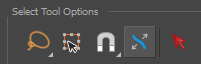
| Select by Colour Tool |
The Select by Colour tool, which was only available as a mode in the Select tool’s properties in previous versions, is now directly accessible from the Tools toolbar and the Drawing Tools menu for faster workflow.
The ability to create a keyboard shortcut for this tool has also been added under the Drawing Mode category. |
| Deselecting Multiple Strokes | It is now possible to deselect multiple strokes from the selection when using the Select tool by holding down the SHIFT+ALT keys (SHIFT+OPTION on macOS). This allows you to quickly remove multiple strokes from a selection without having to click each of them individually. |
| Scale Pencil Line Thickness |
A new option named Scale Pencil Line Thickness has been added to the Select Tool Properties.
When enabled, the thickness of lines created with the Pencil tool or any of the shape tools will scale when using the Select tool to transform them. |
Timeline
| Feature | Description |
|---|---|
| Extend Exposure for Scene Duration | A new option named Extend Exposure for Scene Duration has been added to the Add Drawing Layer dialog. This new option allows you to quickly create and extend a new drawing exposure in a single step when adding a new drawing layer. |
| Reorder Sound Layers | It’s now possible to reorder sound layers by dragging and dropping them within the sound layer section of the Timeline. |
| Locking Sound Layers | A lock button is now available on sound layers in the Timeline to prevent accidental timing modifications to audio tracks. |
| Renaming Sound Layers | Sound layers can now be renamed directly from the Timeline, by double-clicking on the name. |
Animation
| Feature | Description |
|---|---|
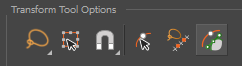
| Mixed Manipulation Mode |
The new Mixed Manipulation Mode button available in the Transform tool properties, allows the manipulation of multiple selections and combinations of Curve Deformers, Free Form Deformers, Drawings and Pegs together using the Transform Tool.
When the Mixed Manipulation Mode button is enabled in the Transform Tool Properties, the bounding box manipulator allows to perform scale, move, rotate and skew operations on all the selected elements together. |
| Rigid Point Deform Node |
The new Rigid Point Deform node is a type of weighted deformer that uses the position of pegs to apply transformations. It prioritizes rigid transformations over deformations to preserve drawing integrity. Used in conjunction with the Weighted Deform node, it is particularly useful for tracking and deforming textures on characters and animated surfaces.
|
Capture Motion Tool  |
A new tool called the Capture Motion tool can be used to record the position and motion of the mouse and apply it as an animated path to Drawing and Peg layers. This provides an easy way of creating animated paths for drawing and peg layers. The tool is available in the Advanced Animation toolbar as well as in the Animation Tools menu. |
| Deformer Manipulator Improvements |
The deformer manipulator that can be enabled using the Show Manipulator button in the Deformation toolbar has the following improvements:
|
| Show Deformation Mesh |
It is now possible to display the deformation mesh of a deformer using the new Show Deformer Mesh option.
The Show Deformation Mesh button can be added to the Deformation toolbar using the Toolbar Manager by right-clicking on the Deformation toolbar and selecting Customize from the menu. |
| Nudging Deformer Points using the rigging tool | The Rigging Tool now allows nudging deformer points using the arrow keys. This allows for precise positioning of points while creating deformers. |


Camera and Compositing
| Feature | Description |
|---|---|
| Shine Effect Node |
The new Shine effect node in Harmony 21 can be used to create effects such as shining light from behind an object or rays shining through the clouds. Without having to build a complex node network, the Shine node replicates the placement of a light source behind an object and projects light rays around the given object. This new node is available in the Blur category of the Node Library.
|
| New Timing Nodes |
New effects nodes that allow retiming and changing the order of frames are now available in Harmony. The following nodes are available in the Timing category of the Node Library. The Hold Timing and Hold Transformation Timing nodes are used to define held frames and are useful for putting content on twos. The Loop and Loop Transformation nodes can be used to define a range of frames to repeat in loop or ping pong mode. The Retime and Retime Transformation nodes are used to offset image or transformations by a given amount of frames and can be used to shuffle frames in any order.
|
| Proportion Grid Overlay |
A Proportion Grid can now be displayed in Harmony’s Camera view, to help with balance and proportions of scenes.
The Proportion Grid can be enabled from the Camera view’s status bar and follows the camera frame as it moves. The grid is divided by three on each axis by default to create a rule of thirds grid. The number of divisions can be changed from the Camera tab of the Preferences. |
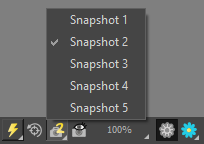
| Camera View Snapshots |
The Take Snapshot button in the Camera View status bar now has a drop-down menu with five available slots to store snapshots.
Custom keyboard shortcuts can be set for each slot from the Camera category of the shortcuts. |
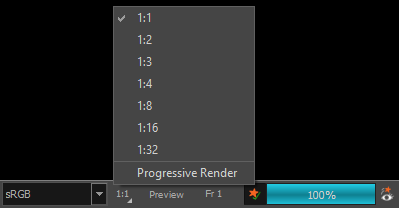
| Preview Resolution Ratio |
The preview resolution can now be changed from a drop-down menu in the Camera view’s status bar, providing a quick way of changing the resolution used for software render previews.
|
| Progressive Render Preview | The new Progressive Render option, available in the Preview Resolution menu, allows generating fast low resolution previews before displaying renders using the selected preview resolution. |


Rendering and Pipeline Integration
| Feature | Description |
|---|---|
| Apple ProRes exports on Windows and Linux |
Apple ProRes 4444 and 422 codecs are now available on Windows, Linux and macOS as export formats. The new QuickTime ProRes formats are available in the Write node, as well as in the Export to Video and Export OpenGL Frames dialog. On macOS, the Apple ProRes options from previous versions are still available for compatibility with scenes created in those versions. These export formats are labelled with “Legacy” in parentheses. |
| Writing 16-bit TIFF |
Harmony now allows writing TIFF files in 16-bit per channel and also provides the option to use LZW compression for this format. |
| Export Format Selection |
The list of available image formats when rendering is now easier to use. Format, colours and bit depth are now listed as separate options rather than in a single list. |
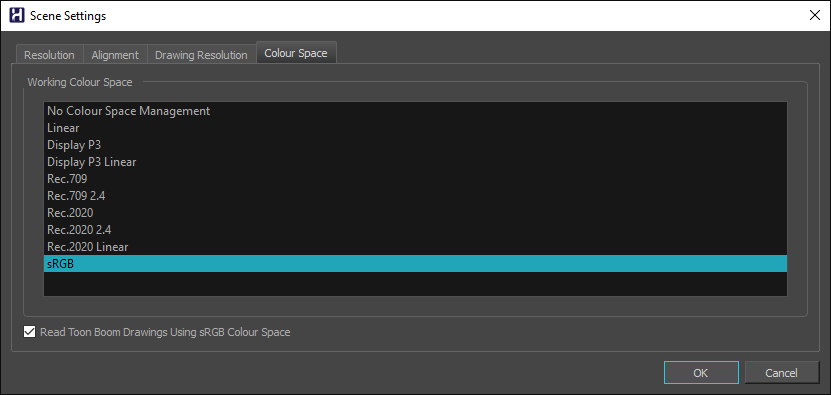
| Colour Management for OpenGL Rendering |
In order to provide consistent colours between OpenGL previews and software renders, a new option named Read Toon Boom Drawings using sRGB Colour Space has been added to the Colour Space tab of the Scene Settings dialog. When this option is selected, colours from Toon Boom drawings are converted from sRGB to the project working colour space before being composited.
This allows Harmony’s Camera view to use the same colour space, which can be selected from the list at the bottom of the Camera view, when displaying drawings in OpenGL and Render modes. The Display Colour Space option that was available on the Camera tab of the preference is not required anymore and has been removed. This also allows using a different colour space for each camera view in the workspace, which is useful when using monitors with different colour spaces. The Read Toon Boom Drawings using sRGB Colour Space option is selected by default for any new scene created in Harmony 21. When a scene created in a previous version is opened, this option remains unchecked, to ensure colours in the scene render as they did in previous versions of Harmony. |
| Assign Image Colour Space on Import |
An option has been added to the Import Images dialog to assign a colour space when importing an image using the Keep as Original Bitmap option. The colour space selected in the New Layer Colour Space list will define the colour space set for new layers. |
| Convert Image Colour Space on Import | An option has been added to the Import Images dialog to convert an image’s colour space when importing an image using the Import as Toon Boom Bitmap option. The image will be converted from the selected colour space in the Source Colour Space list, to sRGB. |
Performance
| Feature | Description |
|---|---|
| OpenGL Rendering Optimizations |
The performance of the Camera view has been improved by making OpenGL rendering in this view multithreaded. This allows Harmony to use multiple CPU cores to simultaneously perform render operations of multiple drawings and effects. Scenes with high numbers of drawing layers benefit the most from the multithreaded OpenGL rendering. Performance improvements are noticeable when manipulating artwork using the Transform tool or when panning and zooming the camera view in those types of scenes.
|
| Transform Tool Optimizations |
Transform Tool overall responsiveness and performance when selecting, editing and interacting in the scene has been improved, specifically with heavier scenes that have many nodes (common to rig-based projects). |
| Interactive Camera View Cache |
The new Interactive Camera View Cache preference, available in the OpenGL tab of the Preferences, is now enabled by default. This improves the performance of tools in the Camera view by reducing the number of refresh required when using those tools. |
| Weighted Deformers Optimizations |
The weighted deformer now renders faster and manipulates faster in heavy scenes that contain detailed drawings and textures. |
Game Pipeline
| Feature | Description |
|---|---|
| Skinning View |
The new Skinning View in Harmony allows you to manage and edit the skins you create for your assets used in your game. It is especially useful when you want to switch to different costumes or props on a character while continuing to use the same animation. This Skinning view replaces the Game Skinning toolbar and shortcuts in the Gaming category that were available in previous versions of Harmony. |
| Scene Markers View |
Scene markers are an essential part of the gaming pipeline. The new Scene Markers view allows you to create, manage and edit all your scene markers from a single place. |
| Export to Sprite Sheet |
The option Export Sprites Individually has been added to the Export to Sprite Sheet window. When enabled, each drawing is exported separately instead of on one sprite sheet, allowing the game engine to create the sprite sheets or sprite atlases during import. |
Library
| Feature | Description |
|---|---|
| Library View Thumbnails |
The Library view Thumbnail display mode has been improved with the addition of a slider, placed on the bottom right of the view, that can be used to change the thumbnail sizes. Filenames are now written below the thumbnails to allow them to align in a grid fashion. |
| Higher Resolution Thumbnails |
Higher resolution thumbnails are now used to display the drawing substitutions in the Library and the Drawing Substitution view as well as thumbnails of drawing when opening a template as a folder. |
WebCC
| Feature | Description |
|---|---|
| Customizable Export Options for WebCC |
New parameters are now available to customize the options available when using the Export Offline dialog, simplifying the export process and preventing errors. Use the following parameters when launching the WebCC service to disable export options in the Export Offline dialog: -noEnvLibraryExport: disables the Environment Library export option during. -noJobLibraryExport: disables the Job Library export option. -noEnvPaletteExport: disables the Environment Palette export option. -noJobPaletteExport: disables the Job Palette export option. |
Scripting
| Feature | Description |
|---|---|
| New Scripts |
The following scripts are now packaged and available in Harmony:
|
| Center Timeline on a Specific Frame | Timeline.centerOnFrame(frameNum) has been added to the Timeline scripting api. This function will get the position of a frame and centre the Timeline view on that frame. |
| SessionChangeNotifier | New SessionChangeNotifier JavaScript class that can be used to connect a function to any available signal from this class. Once a function is connected to a signal, the code will be executed when the specific event is triggered, until the parent object is destroyed. |
| Added Signals to SceneChangeNotifier | nodeMetadataChanged() and sceneMarkersChanged() signals have been added to the SceneChangeNotifier class. |
Search Filter Improvements
Improvements have been made to the search filters in the Node View and Node Library.
The Node View Find and Insert search results are now ordered to quickly find the nodes you want to insert by showing best matches at the top rather than alphabetically. For example, typing “Peg” now lists results in the following order:
- Peg
- Apply-Peg-Transformation
The Node Library search filter has been improved to show nodes that match all the words that are typed, even when the match is partial. In addition, the option Search Node Description, that can be used to search through the description of nodes, has been.

The improved search filters now have an X button that appears in the search field when a filter is applied. Clicking this button or pressing the Esc key can be used to quickly clear the search filter.
Fixes
The following issues have been fixed in this release of Harmony:
Drawing Tools
- The Pencil tool loses its texture when creating a new drawing layer. HAR-7060
- Brush texture is lost when changing the colour of drawings using Permanent Selection and Apply to all Frames. HAR-7072
- Small parts may disappear when using the Perspective tool in Lattice mode. HAR-7159
Animation Tools
- The Transform tool doesn’t work correctly when the parent peg is selected if there is a deformation switch beneath. HAR-6927
- Master Controllers should honour the "Set Keyframes on all Functions with the Transform Tool" preference. HAR-6552
- Using the transform tool or moving up the hierarchy using B does not select the peg connected to the target port of the Transform Gate. HAR-7101
- Auto Muscle does not work properly when the angle is more than 90 degrees. HAR-7259
- Harmony may crash when manipulating the Fold node in the Camera view. HAR-7395
- Cannot manipulate Light Position connect to a Cast Shadow node from the Top and Side views. HAR-6423
Timeline
- Crash when copying keyframes using the mouse on Windows 10 systems with NVIDIA Quadro video cards. HAR-7491
- Crash when dropping a selection of layers containing a Free Form Deformer over a Drawing layer. HAR-7550
- Colour Cards are added as a parent when a Drawing layer is selected. HAR-7273
- Map Lip-Sync applies the timing to the wrong layer. HAR-7330
Node view and Compositing
- Selecting only the backdrop in the Node view with ALT+Click does not work. HAR-6790
- Harmony freezes when rendering certain scenes containing Weighted Deform nodes. HAR-6646
- White areas of bitmaps turn grey when lowering the opacity from the Layer Properties. HAR-6694
- Rendered image in Camera view appears blurry when zoom level is at 200%. HAR-7056
Master Controllers
- Slider and Point2D widgets are not updated immediately when modifying their attributes from the layer properties view. HAR-6880, HAR-6883
Library
- Double-clicking a template in the Library regenerates its thumbnails. HAR-4332
- Folders in the Library view collapse when creating a new folder. HAR-6959
3D
- TB_MayaToXml.py only exports the first 25 frames. HAR-6577
- Framing is wrong when importing camera information from Maya. HAR-6578
- FBX files with shared embedded textures take a long time to load. HAR-6945
- Scenes with Alembic files that use RGB colour sets may crash. HAR-7503
- Crash when importing a Collada file that does not have normals. HAR-7042
Control Center
- The Control Center -import_scene command line argument does not work anymore. HAR-7225
- Palettes at the job and environment levels are not imported when importing an offline scene. HAR-7565
Scripting
- exportPenstyleToString function in the PenstyleManager class does not work. HAR-6695
- TB_EditLineThicknessOvertime.js script creates too many entries in the undo list. HAR-7168
- scene.setDefaultResolution overrides the scene’s projection value. HAR-7157
Others
- The Lock in Time button in the function editor does not work correctly with 3D Paths. HAR-6697
- Remove Unused Files does always delete palette files from disk. HAR-7090
- Keyboard shortcuts may stop working after clicking Cancel in the Shortcuts window. HAR-5632
- Cannot type characters that require the right Alt key in some views on Windows. HAR-6854
- Restore All Defaults in the Colours preferences restores all the preferences when clicking OK. HAR-7235
- The Create Empty Drawing shortcut only works from the Timeline and Xsheet. HAR-6558
- Cannot import Apple ProRes movies on Windows. HAR-7133
- Keyboard Shortcuts are imported to the wrong preset if the same name is used. HAR-7569
- The selected Alignment Rule is ignored when importing a PSD as Individual Layers. HAR-7616