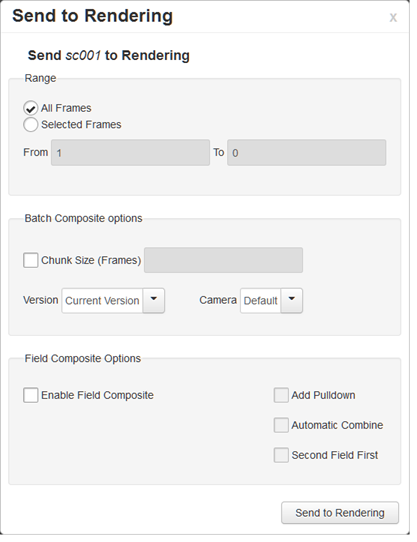
When one or more scenes are complete, you can send them to the batch processing machine for rendering. You can also use Harmony Advanced or Harmony Premium to render scenes, but since you must open each scene individually in Harmony, you can only send one scene to render at a time.
- Select the environment, job and scenes to send to the Render queue.
- Do one of the following:
- Select Scene > Send to Rendering.
- Right-click and select Send to Rendering.
The Send to Rendering window opens.

- In the Range section, select the frames to render:
- All Frames: Sends all the frames in the scene to be rendered.
- Selected Frames: Sends a range of frames to be rendered. You can only do this if you selected one scene. Enter the frame range.
- Select the Chunk Size (Frames) option if you want to split the frames into chunks. This lets you process frames among many stations instead of just one. Enter the number of frames in each chunk.
- From the Version list, select the version of the scene to render.
- From the Camera list, select the camera to render the scene's images. These are the cameras you created in Harmony.
- If you want to create a sequence of images in fields, such as in NTSC or PAL, select Enable Field Composite option and any of the following:
- Add Pulldown: Uses the 3:2 pulldown technique.
- Automatic Combine: Combines even and odd fields on a scene's image.
- Second Field First: Always starts with the second field before combining with the first field.
- Click Send to Rendering.